Getting Started
Introduction
Want to make your videos into the DVD or Blu-ray disc as the gift for your lovers? Wish to burn your favorite movies into the DVD disc for a long playback and preservation? Aiseesoft Burnova is the exact tool to help you realize your dreams.
Aiseesoft Burnova works functionally to burn videos to DVD or Blu-ray disc/folder/ISO file. Follow the guide to make your own BD/DVD file now in five parts:
Part 1. How to Burn Videos to DVD or Blu-ray Disc/Folder/ISO File
Step 1 Insert a blank DVD or Blu-ray disc to the DVD drive if you want to burn videos into DVD disc.
Step 2 Click Add Media File(s) to add one or more video files to this software.
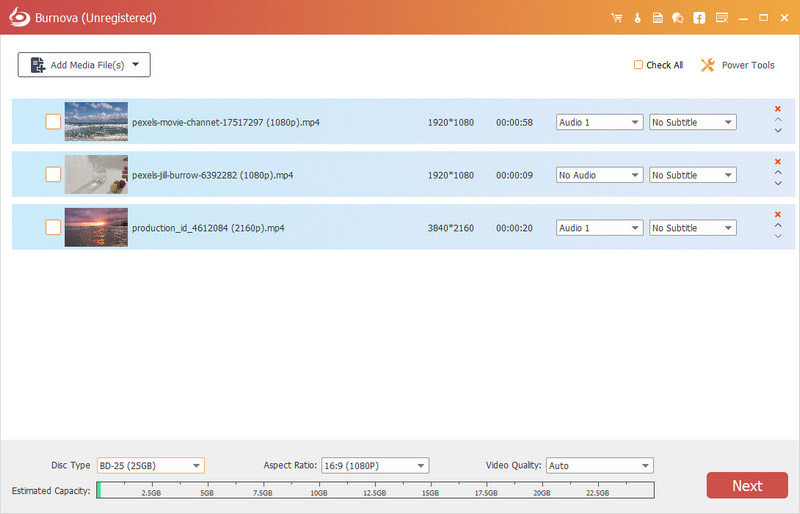
Step 3 Click the Edit button in the main interface to edit videos.
Step 4 Choose Disc Type in the bottom-left corner to make sure what type of DVD or Blu-ray disc you want to burn video into. Click Next to edit DVD menu.
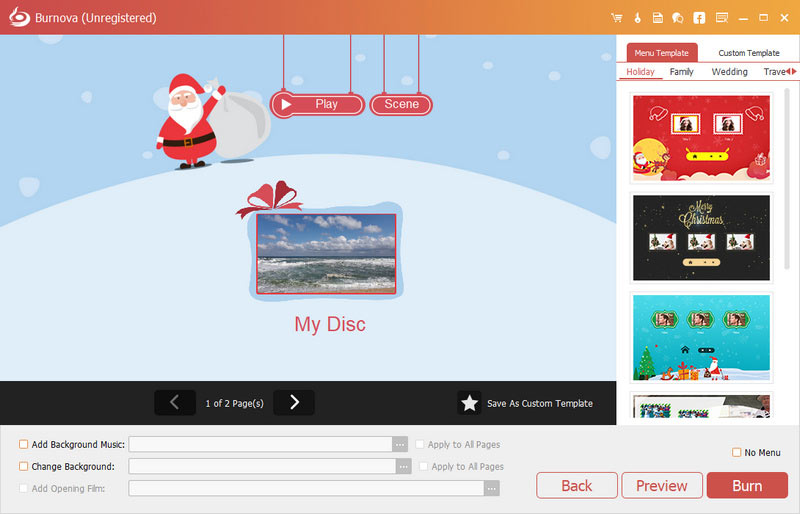
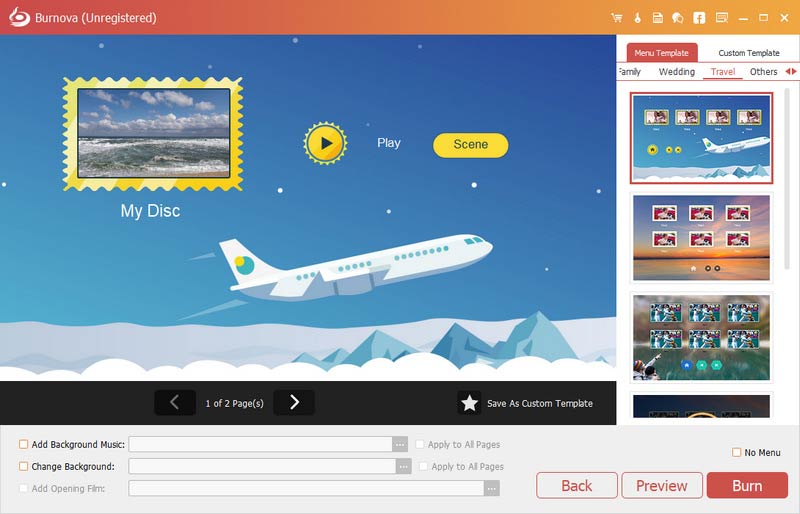
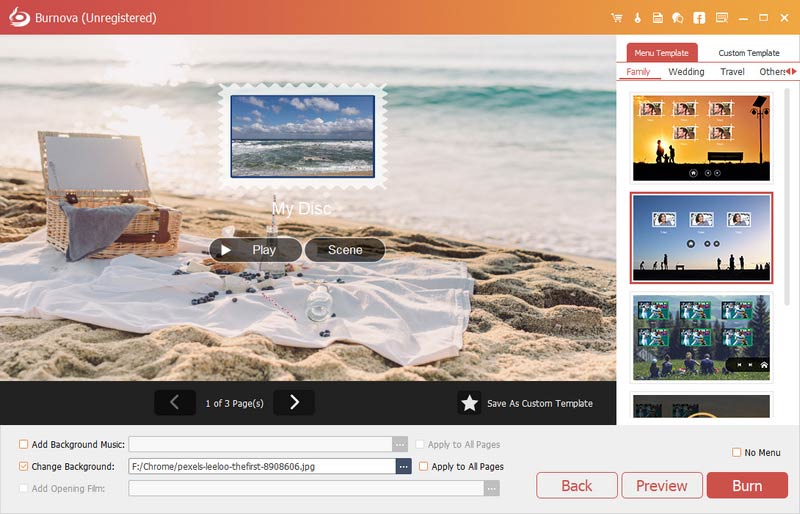
Step 5 When you enter in the menu editing interface, choose a menu template for your DVD. You can click the Preview button to preview your DVD.
In the Preview interface, click the Play button to make all videos play in order.
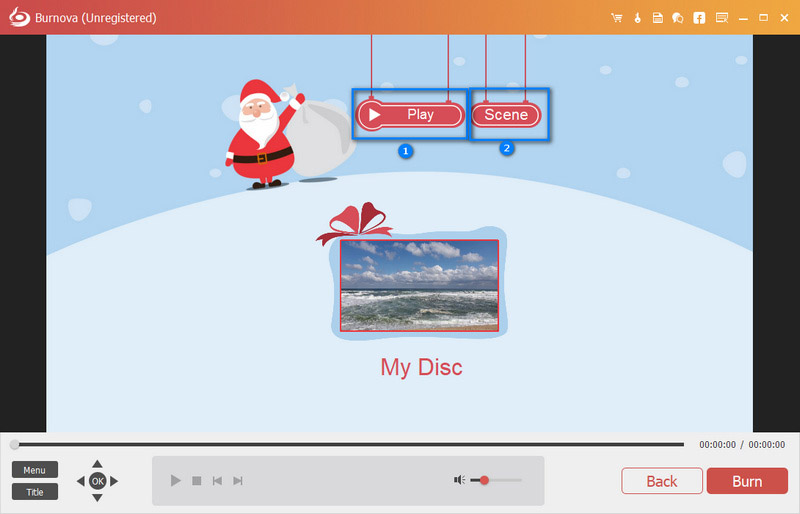
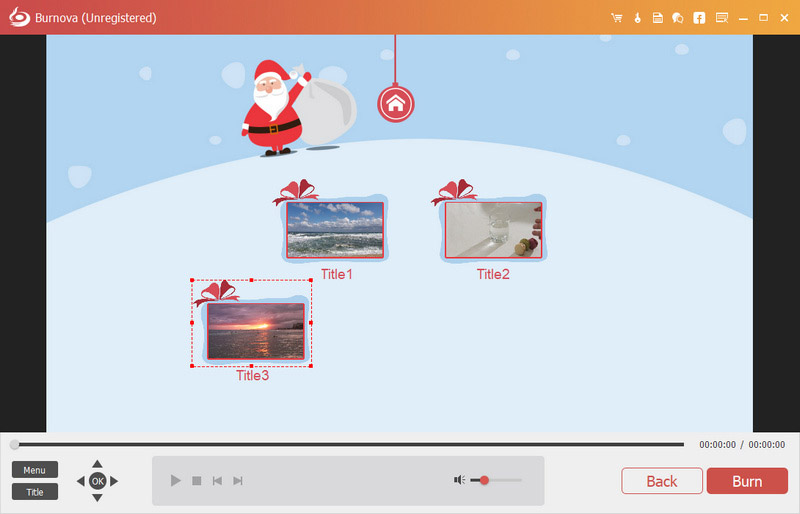
If you want to play videos at random, click the Scene button to view your videos. Then, choose and click the one you want to play.
Step 6 Click Burn to get the DVD/Blu-ray burning settings
Here you can make the DVD settings as the following:
• Select create video to DVD disc or DVD folder/ISO file.
• Choose the TV standard as NTSC or PAL.
• Play the DVD file from the first title or menu.
• Loop all titles or not.
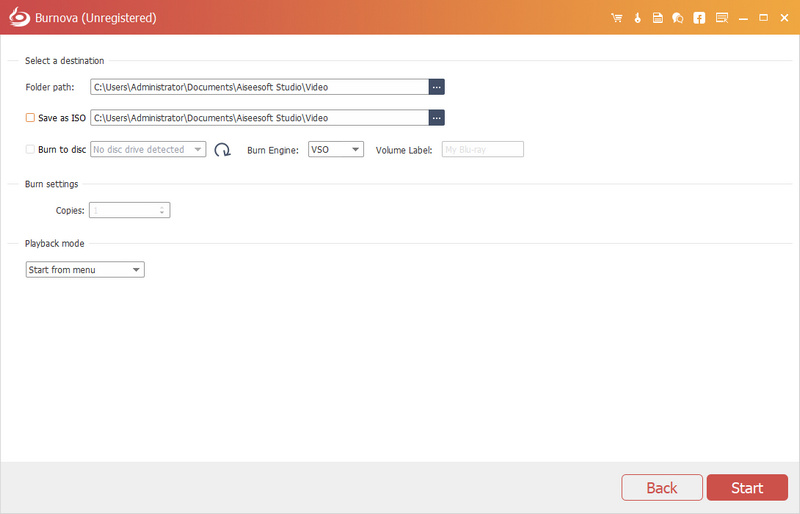
Step 7 After making all settings, click Start to burn your videos to DVD/Blu-ray.
Part 2. How to Edit Video Effects Before Burning
Before you make the movies or videos to DVD, you are allowed to edit your video effects freely to animate your videos.
Step 1 Click the Edit button to enter the editing interface.
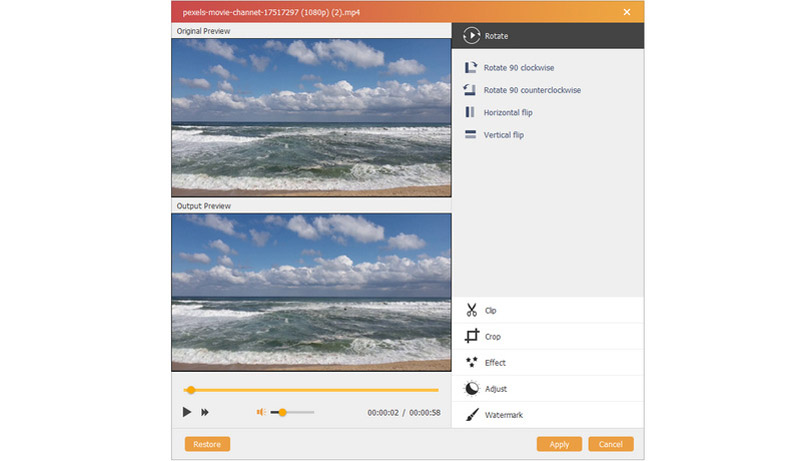
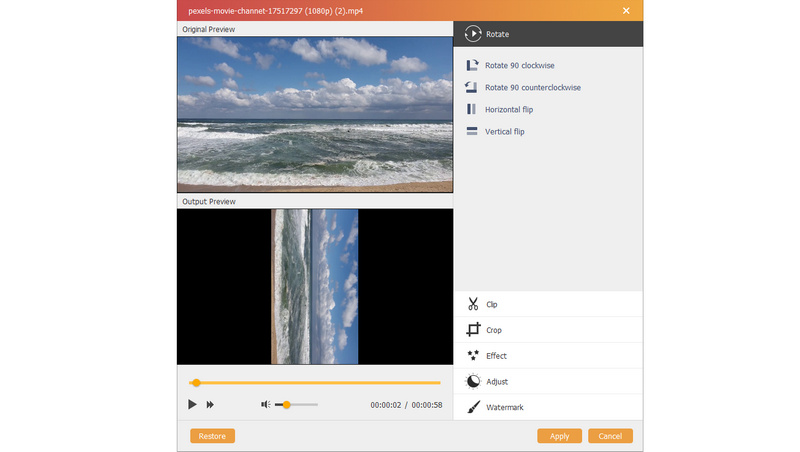
Step 2 Rotate or flip video
Click Rotate to rotate video in 90 clockwise or 90 counterclockwise or flip horizontally or vertically.
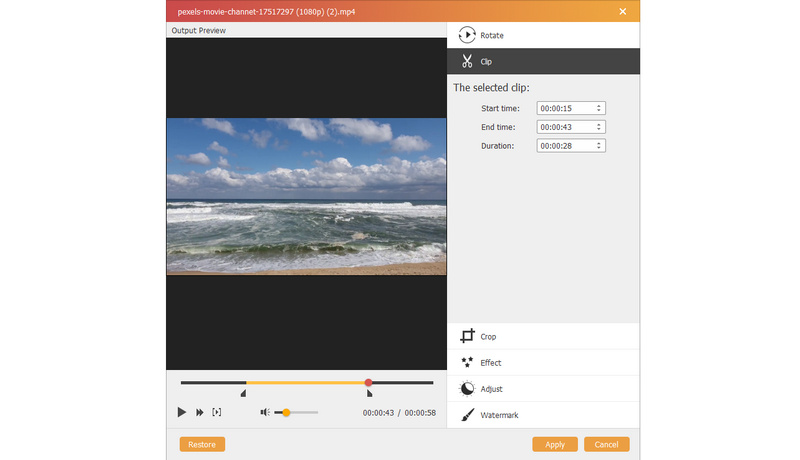
Step 3 Clip video
Click Clip to drag the bar automatically or set the start time and end time to cut the unwanted video parts.
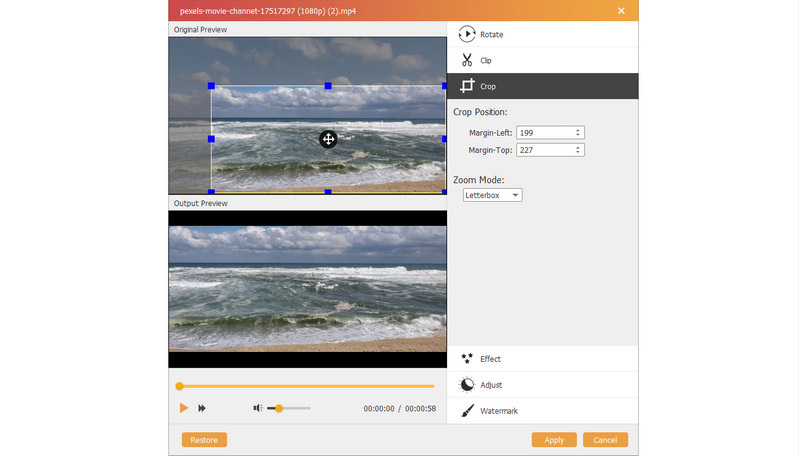
Step 4 Crop video
Click Crop to select the zoom mode as Letterbox, Center, Pan & Scan or Full to get rid of the unwanted edges or capture the wanted parts.
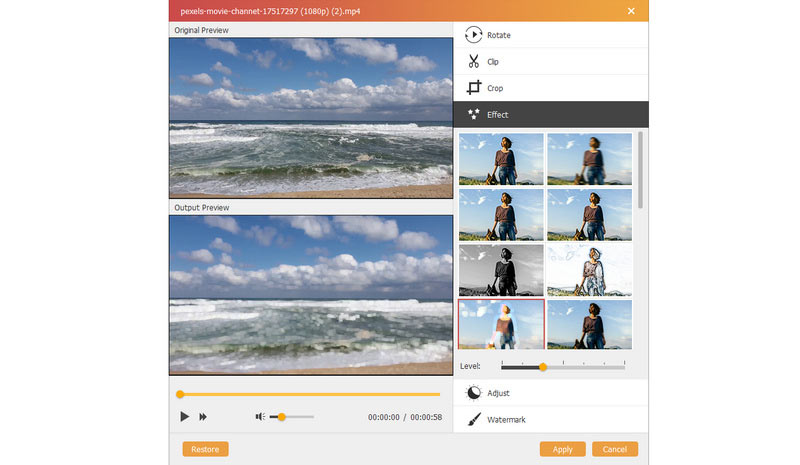
Step 5 Change effects
Click Effect to color for your videos. Here you can edit video effects like photos as Blur, Sharpen, Frame, Gray, Sketch, Color Pencil, Erode, Pixelate, Noise, Sculpture, Emboss, Smooth, Canvas, Mirror, Material, Wave, etc. Check this page to know more about special video effects.
Step 6 Adjust video
If you do not like the brightness or contrast, you can click Adjust to manually adjust the brightness, contrast, saturation, hue and volume.

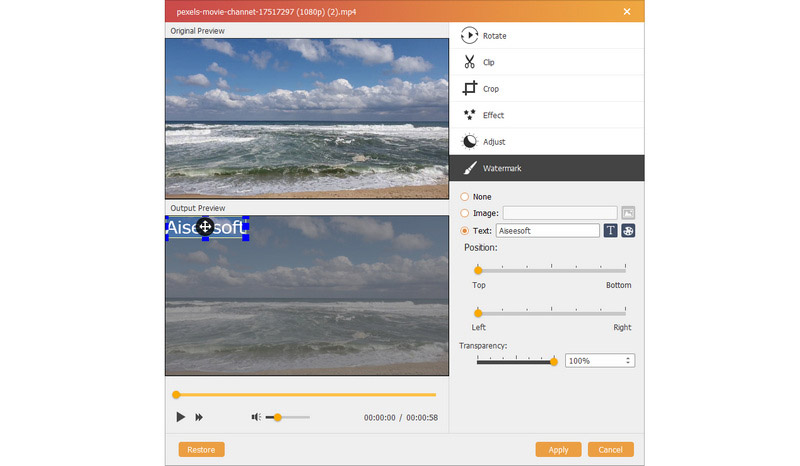
Step 7 Watermark
If you want to add your own mark to the video, you can click Watermark to add text or images as the watermark on your video files.
Part 3. How to Edit Menu Before Burning
After editing your videos, you could edit the menu for burning.
Step 1 Click Next to enter the menu editing features.
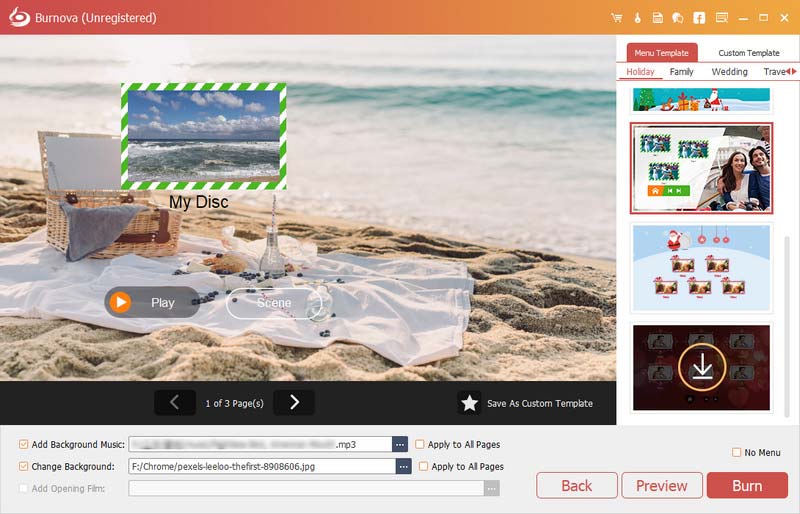
Step 2 Menu templates
Here you can use the default templates of this software, or download from online sites to make the menu background. Moreover, if you do not like those, just click Change Background to import your own images or photos as the menu background.
Step 3 Add background music
Checkmark Add Background Music to import the audio file. Here you can set the music as loop or single playing.
Step 4 Add opening file
Want to make your video more enjoyable? Then add opening film. You can use downloaded or local opening film to make your video more professional.
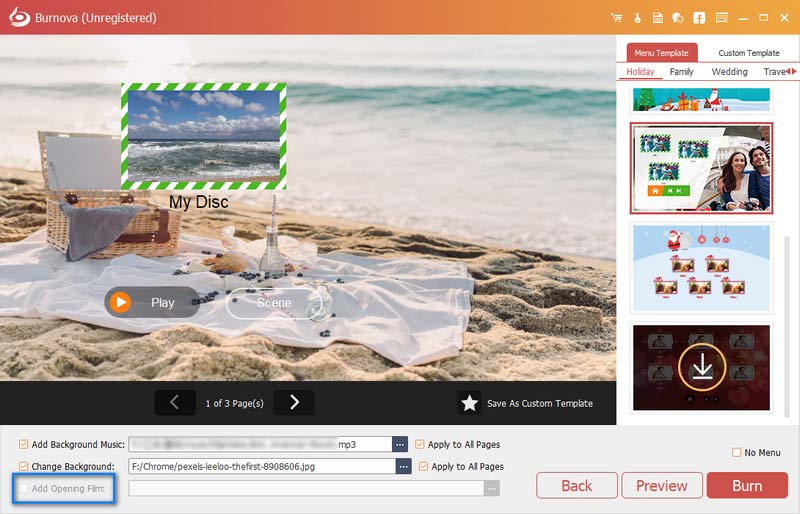
After you make menu settings successfully, click "Next" to proceed the subsequent steps.
Part 4. More Preference Settings
The above step guides show you how to use Burnova to burn videos to DVD/Blu-ray. For this software, still some features you cannot miss in this part.
Update
For checking the new feature of this software, you need to make settings to get the update reminder. Click Menu > Preferences > Tick Check Updates Automatically.
Comparison between free and register version
Burnova has its free version and register version. You can check the functions between them from the table as below:
| Main Features | Trail Version | Register Version |
| Free trial | 30 days | Unlimited |
| Free DVD/BD creating | 3 times | Unlimited |
| Add watermark to the created video | Forced | NEVER |
| Download online menu templates | ||
| Free technical supported and upgrade |
-
How to Burn iMovie to DVD with iMovie 10/11
It is no longer available to export iMovie to DVD with iMovie 10/11. The article shows an easy way to burn iMovie to DVD without iDVD.
 Posted by Amanda Brown | 17.04.2015
 -
Best MP3 to DVD Burner of 2024 - Burn MP3 to DVD/CD
Aiseesoft MP3 to DVD Burner lets you easily convert and burn your MP3 music files to DVD/CD with excellent quality.
 Posted by Jenny Ryan | 24.08.2017
 -
HD to DVD Converter - Easily Create DVD Disc with HD Videos
How to convert HD video to DVD? Learn how to convert HD video (MKV, TS, MTS, M2TS, TRP, TP, TOD) to DVD with HD to DVD Converter in this article.
Posted by Jenny Ryan | 11.12.2017 -
Easiest Tutorial to Burn MP4 to DVD (with Video Demo)
Want a MP4 to DVD burner no watermark? Burnova will let you burn MP4 to DVD to make your own masterpiece with your favorite video files and enjoy it with any DVD player.
Posted by Amanda Brown | 19.06.2014 -
How to Burn HD video to Blu-ray disc with Blu-ray Creator
Aiseesoft Blu-ray Creator can create Blu-ray disc with high-definition videos. Burn TS, MTS, HD MP4, MPG,/MOV, MXF, MKV video to Blu-ray disc without quality loss.
 Posted by Louisa White | 19.06.2014
 -
[Solved] How can I Create a Blu-ray Movie with My Own Videos
If you want to create a Blu-ray disc or ISO image file with your own videos, then you need a powerful Blu-ray creator. In this post, we will show you how to burn Blu-ray with detailed steps.
 Posted by Ashley Mae | 16.12.2020
 -
2024 Reviews of Best Blu-ray Burner (Software and Hardware)
This article shows the best 8 Blu-ray burners (hardware from internal and external and software) to help you burn Blu-ray disc easily on Windows and Mac.
Posted by Jenny Ryan | 27.06.2017
