Deleting photos from an iPad is relatively easy, as you can do it from the Photos app, even after you have captured a picture or footage. But in another situation, you want to get rid of multiple files at once. In some cases, the deleted photos keep returning to the gallery, making you furious. Fortunately, you can find the best ways for photo deletion here and the professional alternative to eliminate files from both cloud and local storage simultaneously.
This part shows the default ways to remove photos from your iPad. See how to permanently get rid of the files from the Photos app and iCloud.
The Photos app is where all the captured and downloaded images are kept. You can start with this easy step:


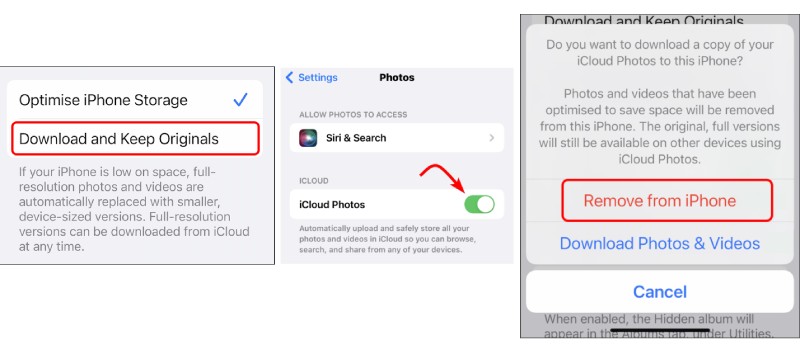
You can remove unwanted pictures from the iCloud Photos. This method is a great alternative to permanently deleting pictures. Here’s how to do it:
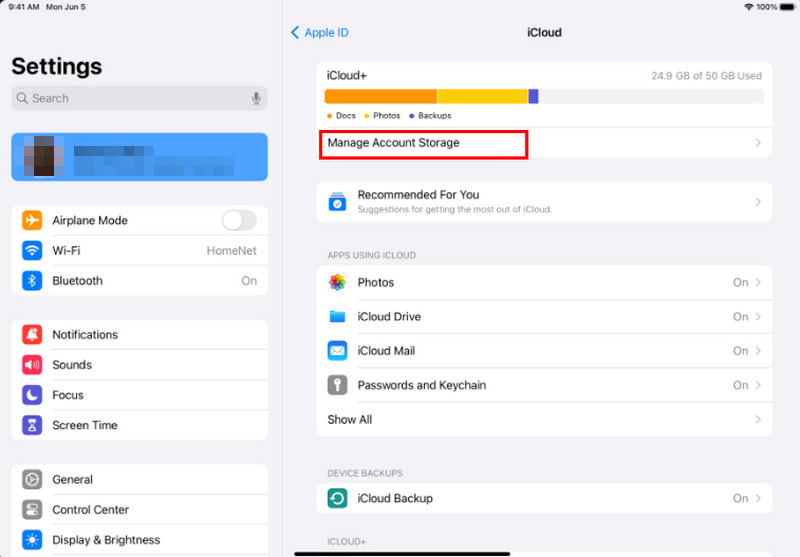
Your cloud service enables photo syncing between devices. This also means the file deletion will reflect on iPhones or iPads with the same iCloud account. Is it possible to delete photos from one device only? Absolutely, yes. You can follow the demonstration below to access iCloud photos sync option and disable it:
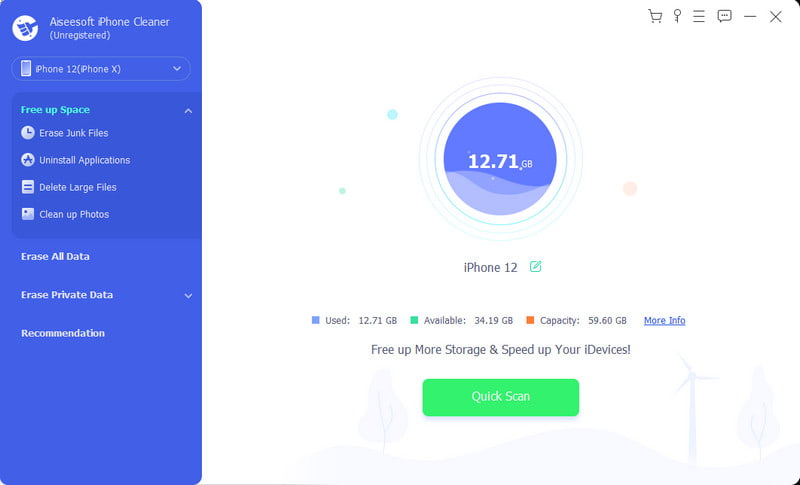
Your device is running out of storage space, and you want to free it up. You can save time from manual deletion by using Aiseesoft iPhone Cleaner. It is a desktop program that can detect unwanted files from your iPad. It frees up more space by scanning and deleting large files, photos, videos, documents, and more, with an immediate boost in device speed. For your device's well-being, choosing the iPhone Cleaner will help clean junk files easily.
Downloads
Aiseesoft iPhone Cleaner – Delete Photos from iPhone
![]() 100% Secure. No Ads.
100% Secure. No Ads.
![]() 100% Secure. No Ads.
100% Secure. No Ads.
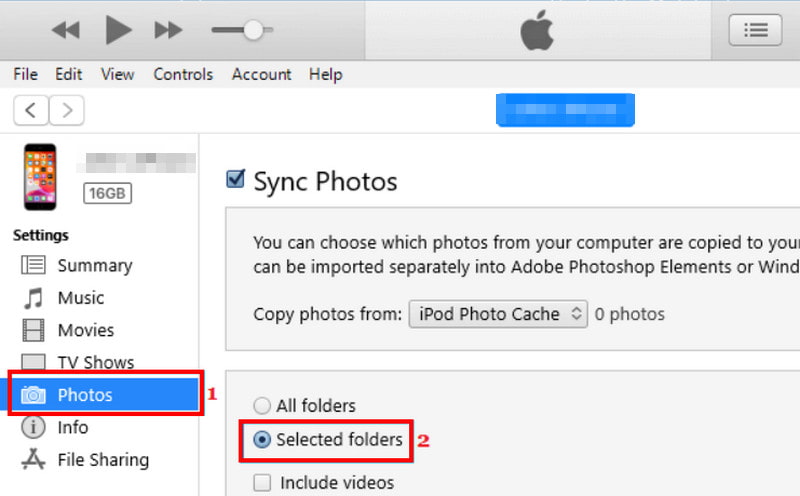
The next solution you should try when the deleted images are still on your iPad is through iTunes. This method requires a Mac or computer, where you can choose files to delete. Once you meet the requirements, proceed with these steps:
Why can't I delete iPad photos?
The major cause of undeleted photos is they are synced with iTunes or other third-party apps. In addition to this, your device’s storage space is full. Thus, deleting files is impossible. You can resolve this by turning off iCloud Photos or transferring data to a computer.
How do I stop my photos from syncing to my iPad?
Open the Settings app on your iPad and tap your name. From the iCloud menu, choose the Photos option. Toggle off the Sync this iPad option to turn off iCloud Photos.
How do I stop sharing photos between iPhone and iPad?
Aside from turning off the iCloud Photos, you can also log out of the iCloud account to stop sharing pictures between devices. Just go to the Settings and tap your name. Tap the SignOut button and confirm the action by entering your passcode.
How long do deleted photos stay in the Recently Deleted album?
The deleted images and videos will stay in the Recently Deleted folder for 30 days. After the given time, they will be deleted permanently from your device unless you recover them.
Conclusion
You can quickly delete photos from your iPad, but considering the deleted files keep coming back to your device, you can use other solutions mentioned here. For quicker file deletion and data cleaning, download Aiseesoft iPhone Cleaner and try its free trial version.
 Tips & Tricks on How to Recover Deleted Photos from iPhone [Updated]
How to recover deleted photos from iPhone? Varieties of approaches you can take to recover deleted photos. Read this as we explain and teach you how to do it.
 How to Access iCloud Photos on iPhone, Mac, PC or Online
How do you access iCloud photos on iPhone, Mac, PC or Online? Read on this post and you will find feasible solutions.
 Free Software to Wipe iPad You Should Try for Quick File Deletion
An iPad Cleaner app helps to manage files and delete unusable ones. If you don’t know which app to get, see the best pick in this post!
Erase iPhone Data
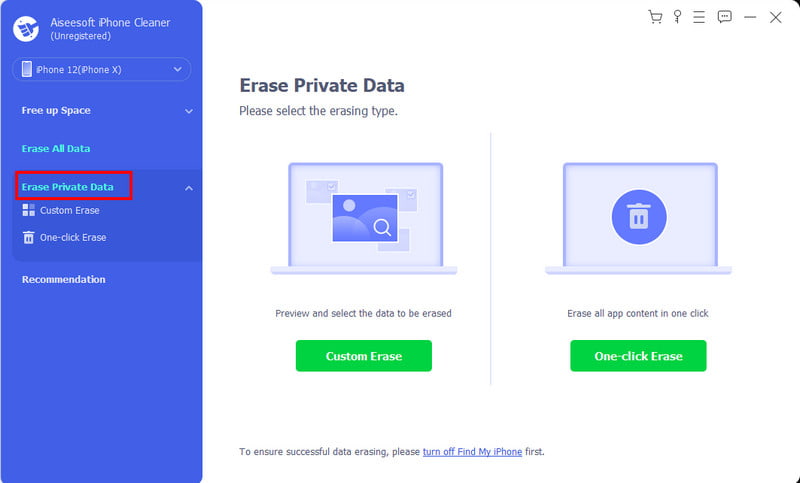
iPhone Cleaner can clean up useless data on your device selectively. You can also use it to wipe your private data and keep your iPhone/iPad/iPod Touch fast and safe.
![]() 100% Secure. No Ads.
100% Secure. No Ads.
![]() 100% Secure. No Ads.
100% Secure. No Ads.
