 For Windows

 For Mac
 PDF Solutions
 Data Manager
 Other Tools
 Free Online Solutions
 Free Image Tools
 Desktop Freeware

Hot Solutions You May Need
- iOS
- Android
- Windows/Mac
- Video/Audio
- Image
- More Tips
 Two Tricks to Find Deleted Messages on iPhone 15/14/13/12/11/XS/XR/X/8/7
By Louisa White
 2 Ways to Recover Contacts from Facebook Messenger on Your iPhone
By Nicole Jones
 SMS Backup and Restore on Android Phone and iPhone
By Iris Walker
 Step-by-step Tutorial to Clear Battery Usage on iPhone and iPad
By Ashley Mae
 How to Clear App Data on iPhone With or Without Deleting App
By Ashley Mae
 iPhone Calendar Events Disappeared? 6 Easy Fixes to Get Back
By Louisa White
 How to Unjailbreak All the iPhones in 2024 (3 Methods)
By Louisa White
 Forgot Voicemail Password? Reset or Change It on iPhone and Android
By Louisa White
 Forgot Parental Controls Password on iPhone or iPad? Here Is The Fix [2022]
By Nicole Jones
 [6 Fixes] Cannot Get Mail – The Connection to The Server Failed
By Louisa White
 Free & Quick Ways to Bypass iCloud Activation Permanently/Remove iCloud Lock
By Louisa White
 iMovie iCloud - How to Share iMovie to iCloud [2024 Updated]
By Jenny Ryan
 [Ultimate Guide] Top 5 Methods to Recover Facebook Messages on Android
By Iris Walker
 How to Send Large Audio Files from iPhone to iPhone, Android or PC
By Nicole Jones
 Top 5 Solutions to Fix WhatsApp Backup Stuck on Android
By Nicole Jones
 How to Delete WhatsApp Photos [iPhone & Android]
By Ashley Mae
 4 Best Free Cell Phone Unlock Code Generators
By Iris Walker
 How to Jailbreak Android Phone/Tablet within Simple Clicks
By Iris Walker
 [Solved] Free SIM Network Unlock Pin for Samsung Galaxy
By Iris Walker
 [New Updated] Top 3 Simple Methods to Unlock Samsung Galaxy S4/S5/S6 for Free
By Iris Walker
 Top 6 Message Lock App to Protect Your Text Messages on Android
By Louisa White
 How to Screen Mirror Phone to Tablet/Phone (Android/iOS) Easily
By Iris Walker
 The Simplest Way to Use AllShare Cast to Mirror Samsung Screen
By Iris Walker
 6 Efficient Ways to Recover Unsaved/Deleted PowerPoint File in 2024
By Amanda Brown
 How to Restore Deleted Downloads Folder on Windows 7/8/10
 Recover Previous Version of Word Document in Office 2019/2016/2010/2007/2011
By Amanda Brown
 5 Ways to Recover Excel File (Unsaved/Overwritten/Corrupted/Deleted)
By Amanda Brown
 How to Fix Windows Didn't Load Correctly and Recover Lost Data
By Nicole Jones
 How to Repair Corrupted Files on Mac OS X and Windows 10/8/7
By Amanda Brown
 Mac Error Code 8072 - What Is and How to Fix Error Code-8072 on Mac [Fixed]
By Nicole Jones
 QuickTime Not Working on Mac - How to Fix [2024]
By Amanda Brown
 How to Fix Mac Sound Not Working? Get Full Tips and Solutions Here
By Nicole Jones
 [Solved] How to Remove App (Icons) from Launchpad Completely on Mac
 Top 5 Memory Cleaners for Mac with the Step-by-step Guide
By Nicole Jones
 Complete Tutorial to Delete Shortcuts on Mac Computer/Laptop
By Ashley Mae
 The Simplest Way to Convert Videos to HD with 4K/1080p/720p Resolution
By Jenny Ryan
 M3U8 to MP4 - How to Convert M3U8 to MP4 (Online Converter/VLC)
 Verified Ways to Mute Sound or Original Audio on TikTok Quickly
By Ashley Mae
 5 Best AMV Editor Apps to Edit AMVs [2024 Updated]
 TikTok: How to Do Split Screen and Duet with Yourself on TikTok
By Jenny Ryan
 How to Fix PowerPoint Screen Recording Not Working [Solved]
By Amanda Brown
 6 Best Video Players with Speed Control for Windows 10/8/7 and Mac
By Ashley Mae
 Best SWF Player for Windows/Mac/Android/iPhone
By Jenny Ryan
 [2022] 3 Fast Solutions to Convert M3U8 Playlist File to M3U File Format
 2024 Top 6 M4A Audio Editor for Windows and Mac
By Jenny Ryan
 [Top 5] Music Voice Recorder to Record Audio While Playing Music
 Best WAV Player to Play WAV Files Freely
By Jenny Ryan
 Concrete Answer on Can Google Drive Download and Convert HEIC to JPG
By Ashley Mae
 HEIF VS. JPEG - What's the Difference and Which one is better
 3 Easiest Ways to Increase Image Size from KB to MB
By Ashley Mae
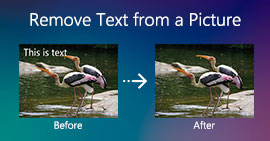 How to Remove Text from a Picture on Desktop and Mobile Devices
By Ashley Mae
 How to Convert Low-resolution Image to High-resolution Online
By Ashley Mae
 3 Efficient Ways to Remove Getty Images Watermark
By Ashley Mae
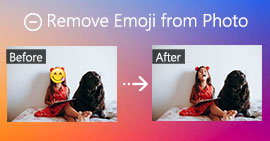 3 Efficient Methods to Remove Emoji from a Photo
By Ashley Mae
 Top 3 GIF Background Removers to Transparent GIF Background
By Ashley Mae
 3 Ways to Combine Pictures on Android and iPhone
By Jenny Ryan
 Top 3 Easy Ways to Improve JPEG Image Quality
By Ashley Mae
 2024 Snagit Scrolling Capture: Full Guide & Troubleshooting
By Ashley Mae
 Image Capture Not Working - Image Capture Not Showing Photos
By Ashley Mae
 HD to DVD Converter - Easily Create DVD Disc with HD Videos
By Jenny Ryan
 Top 6 MPEG to DVD Converter Programs for Windows and Mac
By Ashley Mae
 Top 7 Best Free CD Burner Software to Burn CD [2024]
By Jenny Ryan
 Free Download MXF Player to Watch MXF Files on PC and Mac
By Jenny Ryan
 Does Wii U Play Blu-ray Disc? Yes! Get the Solution Here
By Jenny Ryan
 15 Best 3D Blu-ray Movies Worth to Watch at Home
By Jenny Ryan
 [Solved] Does PS4 Play Blu-ray Movies (4K Included)
By Jenny Ryan
 PDF to HTML Converter - Save PDF as a HTML Webpage (Online&Desktop)
By Amanda Brown
 PDF to JPEG Converter - Convert PDF to JPEG Image
By Jenny Ryan
 Remove Watermark from PDF Free, Online and Professional
By Ashley Mae
 How to Quickly Insert a Multi-Page PDF File into a Word Document
By Amanda Brown
 Best 3 Ways to Create a Slideshow in PDF Format for Presentation


