Before you clean up your iPhone, you need to check whether you have backed up important iOS data already. For people who love to record daily tasks or other memorable things through photos, it will be better to backup iPhone photos to Mac computer. Even though you do not have too many photos stored in iPhone, why not backup those photos and then release more available space? Your iPhone photos will be saved in original resolution without data loss.
Keep reading to back up iPhone messages with the following guide.
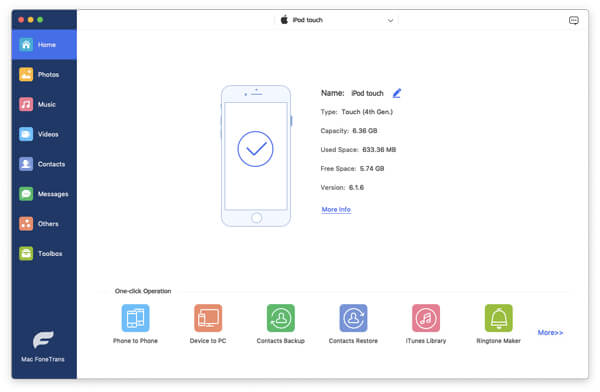
To start with, there is one most comprehensive iOS transfer app you should know, it names Mac FoneTrans. You can transfer photos, contacts, videos, music and other iOS files between iOS devices and Mac flexibly and safely. And all iOS devices are supported including iPhone X, iPhone 8, iPhone 8 Plus, iPhone 7 and etc.
Step 1 Connect your iPhone to Mac
Download and install Mac FoneTrans on your MacBook. Launch it and connect iPhone to your system. Choose the name of your iOS deviceon the left pane.
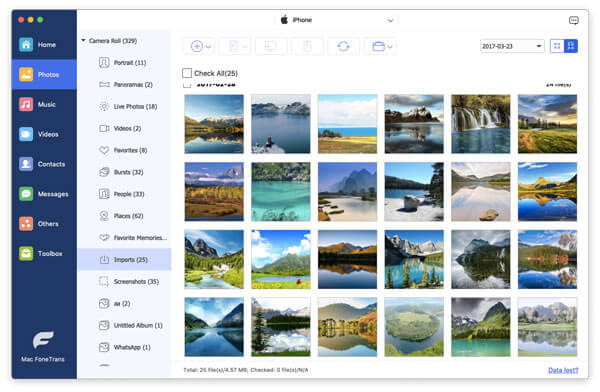
Step 2 Backup iPhone Photos to Mac
Tap "Photos" to see all your iPhone photos display. Tick before the item you wanna backup. Select "Export to Mac" from the "Export to" drop-down menu. Choose the destination and then start backing up iPhone photos to computer including iMac, MacBook, Mac Mini and Mac Pro.
You can also import photos, videos and other files from Mac to iPhone with Mac FoneTrans easily.
iPhoto enables users to backup Camera Roll photos to Mac computer only. So if you still want to backup photos in Photo Stream, Photo Library and other albums, you can choose Mac FoneTransto backup iPhone photos to Mac computer selectively and professionally.
Step 1 Connect iPhone to Mac, and launch iPhoto
Step 2 Choose your device and click "Import" button
Step 3 Select iPhone photos and tap "Import Selected"

Now you can transfer iPhone photos to Mac with iPhoto successfully.
Well, Preview enables users to backup Camera Roll photos from iPhone to Mac only. And you can choose whether to transfer selected iPhone photos or import all to Mac computer.
Step 1 Connect iPhone to Mac, and launch Preview
Step 2 Select "File" and then click "Import"
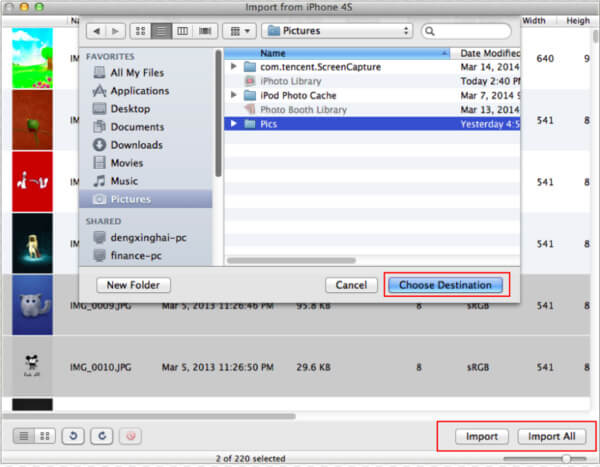
Step 3 Choose iPhone photos and then hit "Import" or "Import All"
Step 4 Set the output folder to save backed up iPhone photos to Mac with Preview
You are able to use Preview to delete selected iPhone photos after backing up. And there is "View" mode you can switch.
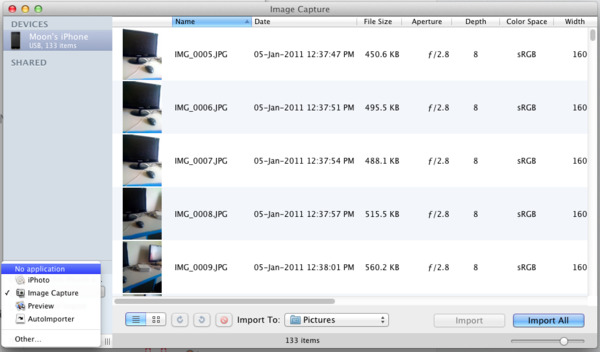
Image Capture cannot transfer all iPhone photos to Mac computer just like iPhoto and Preview do. It means you are able to backup iPhone photos to Macfrom Camera Roll albums only.
Step 1 Connect iPhone to Mac, and then open Image Capture
Step 2 Select your iPhone under "Devices"
Step 3 Choose the destination folder
Step 4 Select iPhone photos, and then tap "Import" or "Import All"
You can transfer photos from digital cameras and other devices to Mac computer with Image Capture for free.
Make sure your Wi-Fi condition and do not send too many iPhone photos to Mac per time. Backing up iPhone photos to Mac with Email is the method especially for people who just need to transfer few photos.
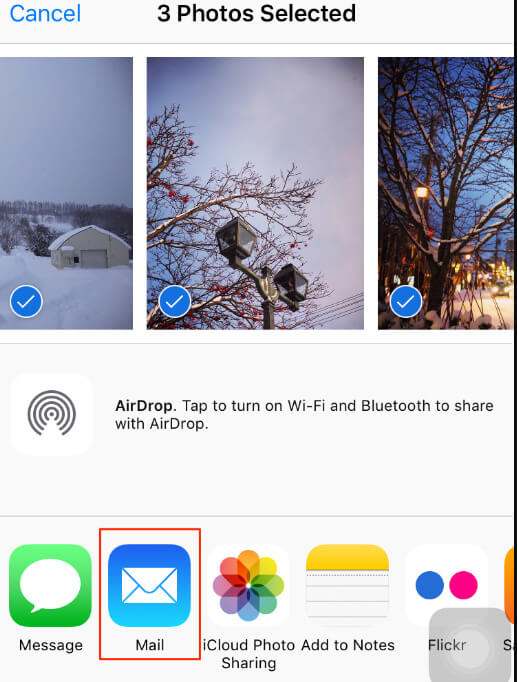
Step 1 Select iPhone photos
Open Photo app on iPhone. Tap "Albums" to access all your albums. Choose the certain album and click "Edit" button. Now pick up which iPhone photos you wanna backup.
Step 2 Transfer iPhone photos to computer
Choose "Share" button and then select "Email" icon. You can type your email address and other information to complete the mail. Hit "Send" button to send iPhone photos.
Step 3 Download and manage iPhone photos on Mac
Open Email on your Mac computer. Set the specific folder to save those downloaded photos.
When you choose email to send photos from iPhone, you can see many other choices. Actually, Dropbox and other photo-sharing applications are also supported.
For people who runs Mac OS X Yosemite or EI Capitan, the iPhoto app has been replace by Photo app already. Similar with iPhoto, you can backup Camera Roll photos to Mac only. No iCloud sharing photos and iTunes synced photos supported.
Step 1 Launch Photos app on your Mac, and then connect iPhone to Mac
Step 2 Tap "Import" to pick up iPhone photos displayed
Step 3 Click "Import Selected" or "Import All New Items" to back up iPhone photos

You are able to backup iPhone photos to Mac with Photos app in smart way. In another word, Photos will backup new taken photos to MacBook only or items you selected.
Though above iPhone photos to Mac backup processes, there are some similarities and differences between those iOS data backup apps. iPhoto, Preview, Image capture and Photos apps are all designed to backup Camera Roll photos to Mac computer selectively. If you need to transfer Photo album photos, Photo Stream photos and other types of iPhone photos, you need to choose Mac FoneTrans or Email. But you are not able to transfer too much iPhone photos to Mac once a time. In addition, you can enjoy one-click data backup service from Mac FoneTrans only. All in all, if you need to customize and backup iPhone Photos to Mac computer of all photo types, you should try the first method mentioned.

June 05, 2018 12:26 / Updated by Louisa White to Back up iOS Data
 Simple Methods to Restore from iCloud Backup
How to restore iPhone from iCloud backup? Read this post and learn two simple methods to restore from iCloud backup, without reset included.
 Why Wont My iPhone Backup (to iCloud)
iPhone won't backup to iCloud, how to fix it? Learn why won't my iPhone backup to iCloud and how to backup iPhone in this post.
 How to Backup iPhone to iTunes/Computer
How to back up iPhone with iTunes? You can learn detailed info about how to backup iPhone to iTunes/Computer in this article.
