Some people search for how to fix iPhone charger online. It makes sense that Apple's iPhone chargers quite often break or stop working. Though iPhone is the most popular smart device and helpful in work and daily life, all the features are based on power. So, no matter where to go, we will take iPhone charger. After using over the years, iPhone chargers sometimes break, due to travel damage or constant plugging and unplugging. What should you do if you have got a broken Apple charger or iPhone stop charging? Well, you could just go to the nearest Apple Store and buy a new charger, but it costs money and more than you expected. So, we're going to show how to fix iPhone charger without wasting a lot of money in this post.
When you discover iPhone stops charging, you should check whether your charger is working. An iPhone charger has two parts: the power adapter and the Lightning to USB cable. When charging the smartphone, you need to plug the adapter into the wall and use the Lightning cable to connect the adapter and your iPhone.
If everything is connected very well and nothing happens, you have to check and test a few things.
1. Wall socket. You should keep everything the same and try to use another wall plug to test whether the wall socket is damaged.
2. The iPhone device. If you have two or more iOS devices, try charging up another one with the same cable, adapter and wall socket. If the device is the problem, you can follow our guides of how to fix iPhone charger below.
Step 1 Reconnect your iPhone to the wall socket with the original charger and wait for 30 minutes.
Step 2 If your iPhone still does not charge, force restart it by holding both the Sleep and Home buttons for ten seconds while connecting to power. And then go to Settings app and install the latest iOS 17.
Step 3 If your device still won't charge, you have to contact Apple Support.
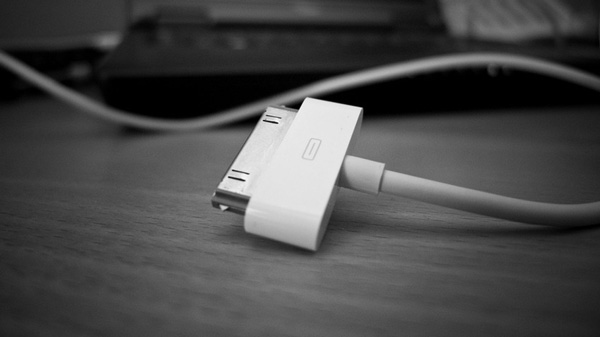
3. USB cable. Try using another cable if you have got multiple USB cables. If not, you can use the same cable to connect another device to test it.
4. The power adapter. If the wall socket, your iPhone and cable are working well, it is pretty much the problem of the power adapter. If you have a spare one, you can confirm this by using a different power adapter.
Following these steps, you can establish which elements is at fault and learn more about how to fix iPhone charger.
AppleCare+ is Apple's extended warranty and technical support plans for iPhones, iPads and other devices. iPhone normally has a one-year limited warranty and 90 days of technical support by telephone calls for free. But you can gain extended warranty coverage and technical support by purchasing an AppleCare+ plan. It includes repairing iPhone charger or exchanging new iPhone charger. The steps below show you how to fix iPhone charger through AppleCare+.
Step 1 Check you AppleCare+ plan
Go to Apple official website and sign in to "My Support" with your Apple ID and password. Then you can check your iPhone's current coverage and AppleCare plans in product details page.
Step 2 Print the proof of coverage
Click "View Proof of Coverage", you can decide to get the proof of coverage via email or view it online. To email it, you have to press "Email me". Or view it online through two-factor authentication. Then you can print the proof of coverage in email or webpage.
Step 3 Choose a way to repair your iPhone
AppleCare+ offers six methods to initiate repair service to fix iPhone charger issues:
You may need: How to fix battery percentage not showing up on iPhone.
Similar to other USB cables, Apple's lightning cables tend to fray and weaken at the place where the port meets the cable. And if you have not purchased the AppleCare+ plans, you can learn about how to fix iPhone charger by your own in this part.
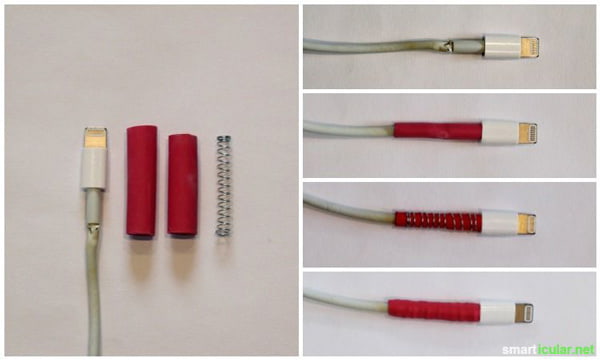
Over time the plastic coating wears out or becomes weaken, you can twist gaffer tape around the top to reinforce or repair it. Firstly, clean the cable as gently as possible. Then attach the gaffer tape or electronic tape on the broken part of the cable. Finally, test whether the Lightning to USB cable works as normal when charging.
If the cable still stops working, you will need more drastic measures, like repair the wiring of Lightning to USB cable using a soldering iron. But it is not an easy process, we suggest you to purchase a new cable directly.
In this tutorial, we have talked about how to fix iPhone charger. Several people complaint that the Lightning to USB cables fell apart or iPhones stop charging on Apple forum and Facebook. The only explanation was that these cables are consumptive material.
When you discover you iPhone stop charging, you should follow our guides to check whether it is because of iPhone device or the charger accessory. If your iPhone device is in faulty, you can try to fix it by force restart or iOS update. To grasp how to fix iPhone charger, you can contact Apple technical support under AppleCare+ plans or learn about how to DIY fix iPhone charger with our instructions.
Don't miss: Wireless Charger Not Working on iPhone


December 15, 2020 06:36 / Updated by Louisa White to Fix iOS Problems
 How to Fix iPhone/iPad Not Charging
iPhone/iPad not charging when plugged into wall or connected to PC/Mac? You can learn to fix iPhone/iPad not charging.
 iPhone Does Not Ring? Here's The Fix
There are 7 easiest methods to help you fix iPhone does not ring problem with detail explanations, and all iOS versions are supported.
 iPod/iPod Touch Frozen: How to Fix
What to do when iPod is frozen? This article gives you the simple tutorials to fix a frozen iPod.
 How to Recover Deleted Files on iPhone
How to recover deleted files from iPhone? The post introduces you with one best way to help you get back the deleted files from iPhone.
 How Do You Backup iPhone? Best Ways Here
How to backup iPhone 15/14/13/12/11/XS/XR/X/8/7/6/5/4 securely? This article introduces three methods for you to backup iPhone.
 Top 32 Major iOS Update Problems and Solutions
Potential solutions are provided here to the most common iOS Update problems on iPhone, iPad and iPod touch.
