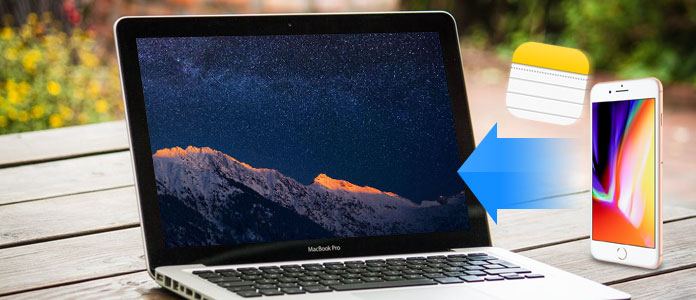
Notes app on iPhone provides an effective way to remember many valuable things in your daily life. You can use it to create checklists, write down a quick thought, beautiful sentences, sketch ideas and more. Go without saying that, all notes mean a lot to you. You must think they are important, then you keep them in notes. Here comes the question, how to transfer notes from iPhone to Mac?
You can sync notes from one iOS device to another. It's very convenient that you can check your notes anytime and anywhere. Actually, iCloud can help you do that. Moreover, if you are using Gmail or Exchange, you can also transfer your iPhone to Mac with them. This guide will show you several simple ways to copy iPhone notes to Mac.
Even though iTunes enables you to back up various iOS data (including notes) to your computer, it doesn't allow you to directly access or read notes on Mac. iTunes backup is a kind of SQLITEDB file which is not visible. Then how should you do to transfer notes from iPhone to Mac? Here we sincerely recommend the professional FoneLab to make the iPhone notes transferring.
FoneLab is an all-featured iOS backing up and recovery app which can help you transfer all types of iPhone data to Mac. So if you want to import or transfer notes from iPhone to Mac, it can be your good helper. It offers an easy to import your iPhone notes to Mac. You can free download it and take the following steps to get notes from iPhone to Mac.
Step 1 Launch iPhone notes transfer
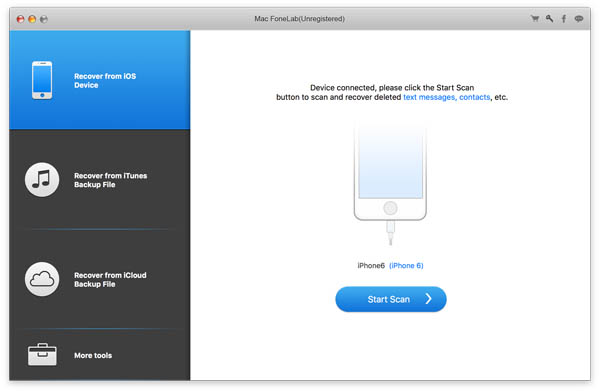
Download, install and open this iPhone notes transferring software on your Mac. Connect your iOS device to it with USB cable. It provides three ways to gee notes from iPhone to Mac. If you didn't back up your notes with iTunes or iCloud, here you can choose "Recover from iOS Device".
Step 2 Scan iPhone notes
Click "Start Scan" to analyze your iPhone files. From the pop-up window, you can only select "Notes" to scan. If you want to transfer other files to Mac, you can tick the data categories based on your need.
Step 3 Preview and choose notes
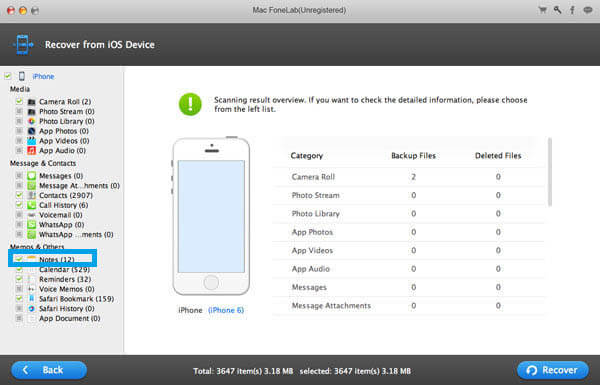
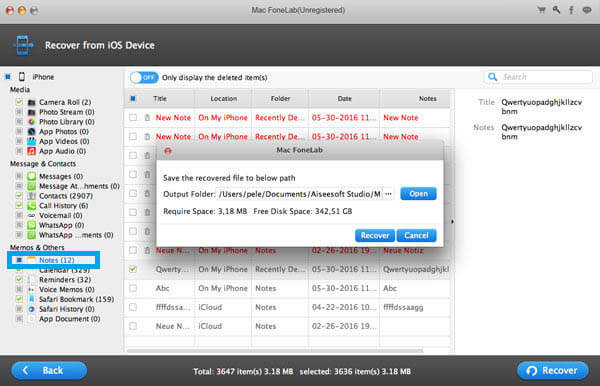
After scanning, all iPhone files will be listed in categories on the left control. click "Notes" and then you can check each note on the preview window. You are allowed to read the details of each note.
Step 3 Transfer notes from iPhone to Mac
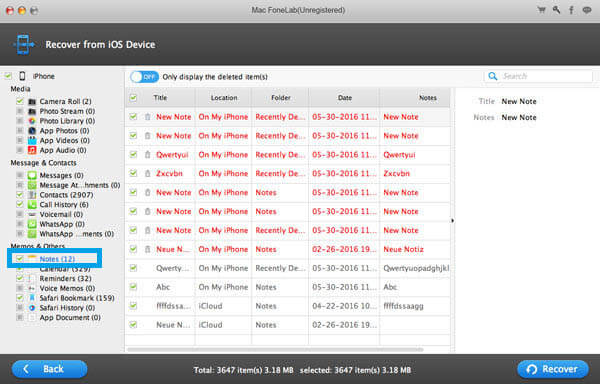
Select the notes you want to transfer and then click "Recover" button to import notes from iPhone to Mac.
Within just a few seconds, you can transfer your iPhone notes to Mac for backup. It highly supports any frequently-used iOS data like contacts, call logs, messages, videos, audios, and more. It also enables you to extract notes and other files from iTunes and iCloud backup. As a famous iOS data recovery tool, it surely can help you recover deleted/lost iPhone files. You can free download it and have a try.
Apple iCloud service connects all your iOS devices together and you can easily sync all types of data between different devices. When you have the need to transfer notes from iPhone to Mac, you can also rely on iCloud.
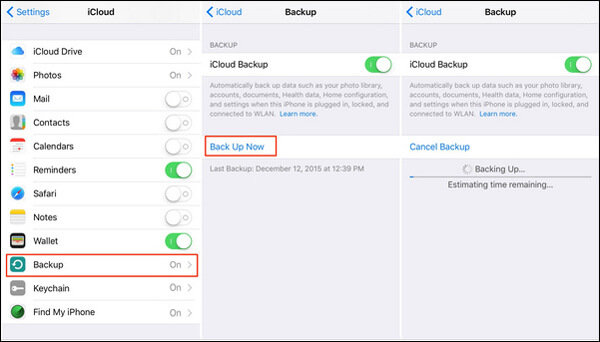
Turn on your iPhone and put it under a good Wi-Fi connection.
Open Settings app and tap "iCloud" > "Backup" > "Back Up Now" to back up all the notes to iCloud.
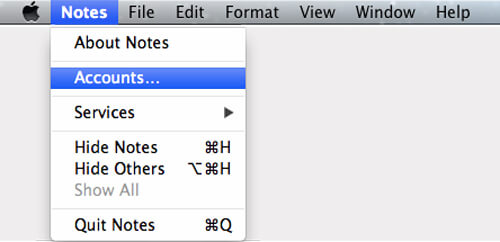
Launch the "Notes" app on your Mac and choose "Notes" from the drop-down menu.
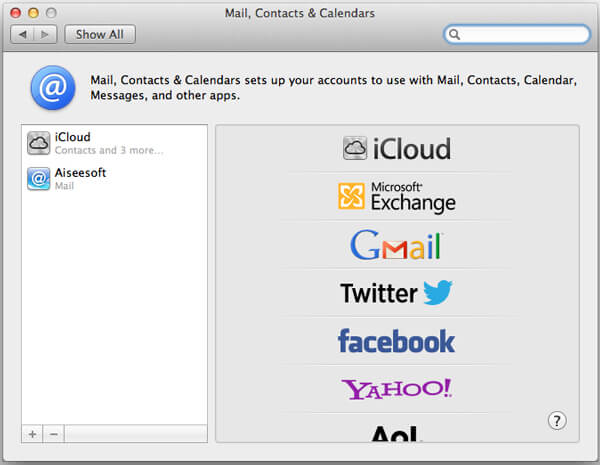
Click on "Accounts..." and enter your iCloud account witch you just used to back up all iPhone notes.
After you logged into your Apple account, you can access and transfer notes from iPhone to this Mac.
In most cases, notes only takes very small storage. It's very simple to manage and transfer these kind of small-size files. You can transfer notes from iPhone to Mac with Mail, Message and other social apps.
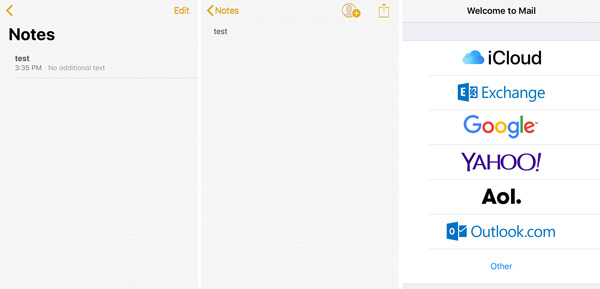
Step 1 Unlock your iPhone and open "Notes" app.
Step 2 Locate the note you want to view on Mac and tap on it.
Step 3 Tap "Share" icon on the top-right corner and then you can choose to transfer iPhone note with Mail, Message or other ways. Here we take Mail as an example.
Step 4 After sharing, you can open the inbox on Mac to check your iPhone note.
In fact, you can use many social apps to quickly transfer notes from iPhone to Mac. Considering that iPhone notes won't take large space, you can easily complete the transferring process.
We talk about how to transfer notes from iPhone to Mac in this post. We introduce you with three methods to get iPhone notes to Mac. You can pick any one of them to copy the iOS data. If you have any better way, please leave us a message.

June 07, 2018 09:11 / Updated by Louisa White to Recover iOS Data
 Top 5 Notes App for iPhone
How to use iPhone notes app? We list 5 great notes apps for iPhone and show you how to recover data from iPhone notes app.
 Useful Ways to Sync iPhone Notes
iPhone Notes enables you to record everything like your checklists, ideas or other collections. Learn how to sync iPhone note in this article.
 How to Transfer Notes from iPhone to New iPhone
How do you transfer notes from one iPhone to another? This article teaches you to transfer notes from iPhone to iPhone.
