Summary
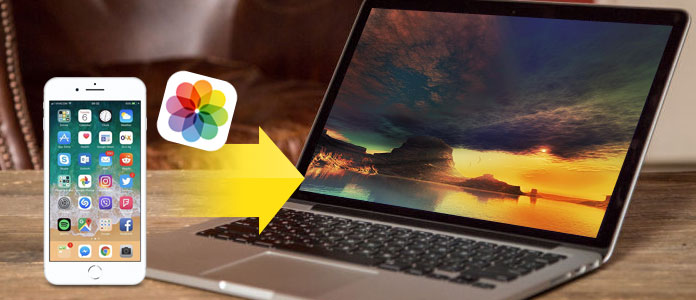
Try to transfer all your photos from iPhone to Laptop and have no idea how to do that, read this article and learn 5 ways to import iPhone X/8/7/6/5/4 pictures to your laptop easily.
Summary
Try to transfer all your photos from iPhone to Laptop and have no idea how to do that, read this article and learn 5 ways to import iPhone X/8/7/6/5/4 pictures to your laptop easily.
As I love to use my iPhone 6 to take photos and now all those pictures full my iPhone,. How do I download pictures from my iPhone to my laptop? Can I transfer photos from iPhone to computer without iTunes? Hope someone can help. -- A User from Apple Support Communities
You may find any kinds of question on finding ways to transfer photos from iPhone to laptop on Windows or Mac around the internet. Yes, there are easy ways can help the above user and more people to solve this issue. Just check the following methods we offer and find the way you like.
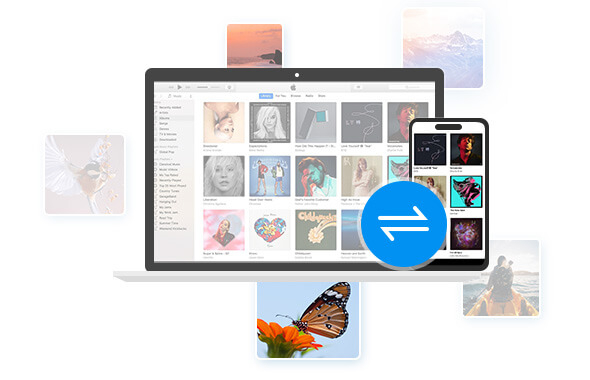
If you want to find the easiest way to import photos from iPhone to laptop, you can use FoneTrans which is a professional iPhone to laptop transfer to help you transfer photos, music, contacts and voice memos from iPhone to your laptop or reversely. You can transfer photos taken on iPhone with larger screen and photos in Camera Roll and Photo Library can all be transferred. Besides its strong transferring function, it is highly compatible with Windows 10, Windows 8, Windows 7, Windows Vista, Windows XP and iOS 12/11/10/9/8/7/6. Check the following tutorial to learn how to transfer photos from iPhone X/8/7/6s/6/5s/5/4s/4 to laptop with this professional transfer program.
Click here to learn more info about Transfer Photos from iPhone to iPhone.
Step 1 Install and run iPhone photo transfer
Download and install FoneTrans on your laptop and open it. Then connect iPhone to your laptop through USB cable. After connecting, the program will show all information of your iPhone on the main interface.

Step 2 Preview and select iPhone photos to transfer
Select Photos on the left sidebar on the main interface and the software will show all your photo albums on your iPhone including Camera Roll, Photo Library, Videos, Panoramas and other app photos. You can click those albums to check pictures inside them. Right click the image and choose Preview and you can preview any pictures. Then choose all or specific photos you want to transfer to your laptop.
Step 3 Transfer photos from iPhone to laptop
After selecting, click Export > Export to PC and select the folder you want to save the transferred photos or just use the default folder. Then the photos you selected will be automatically transferred to your laptop.
Besides importing iPhone photos to laptop, check what else FoneTrans can do for you:
Backup music from iPhone to computer or import music from computer to iPhone;
Transfer iPhone contacts to computer for backup or move contacts to a new iPhone;
Export text messages from iPhone to laptop for backup or printing;
Copy recorded and downloaded videos from iPhone to laptop losslessly;
Transfer voice memos between iPhone and computer
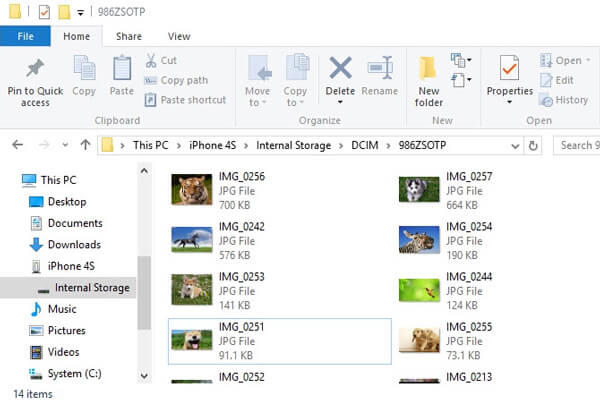
You can also use Windows Explorer to download iPhone pictures on Windows laptop. However, just keep in mind it can only support saving photos from camera roll to your laptop.
Step 1 Connect your iPhone with your laptop via USB cable and create a photo folder on the desktop.
Step 2 Go to My Computer >Windows Explorer on your laptop and click iPhone in removable storage. Then go to DICM folder in the internal storage to find your photos.
Step 3 Copy the photos you want to transfer to laptop and then paste these photos to the folder you just created in the desktop.
Step 1 Open your iPhone's Settings and tap your Apple ID on the top of the Settings menu which contains your name and image. Tap iCloud > Photos and slide "iCloud Photo Library" to the "On" position. Then all the photos in your Camera Roll will be saved to iCloud. Here you can tap "Optimize iPhone Storage" to store smaller versions of photos on your iPhone so that you can save your iPhone storage space.
Step 2 Slide "Upload to My Photo Stream" to the "On" position and let the new photos you take with iPhone to sync to all devices with your Apple ID when they are connected to Wi-Fi.
Step 3 Open Apple Photos app on Windows 10 laptop and log in Photos with your Apple ID to enable iCloud Photo Library. Click "Albums" at the top of the window and then click "All Photos", you can see photos from your iPhone in this folder after your iPhone and laptop have synced with iCloud.
You will also like reading: Clear iCloud Storage by Deleting Unwanted Files.

iCloud gives you 5GB free storage for photos, videos, documents, apps and data to keep all your devices up to date automatically. So it would be easy using iCloud to download files from iPhone to PC.
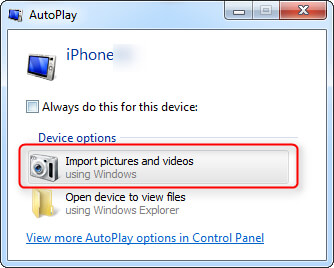
Step 1 Connect your iPhone to laptop with USB cable. Click "Import Pictures and Video using Windows" when AutoPlay window pop up.
Step 2 Choose the link of "Import Settings", click the "Browse" button and uncheck photos you don't want to download from your iPhone. Then click "Import images to" to choose the destination.
Step 3 Click "OK" to import photos from iPhone to your laptop.
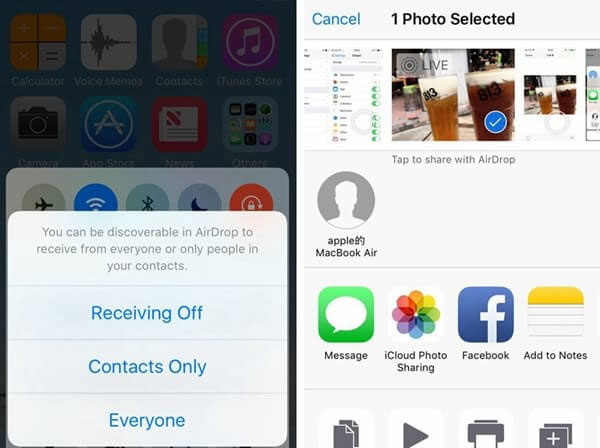
If you are a Mac user and using MacBook/MacBook Pro/MacBook mini, you can transfer photos from iPhone to laptop without USB. You can use AirDrop to create the peer-to-peer Wi-Fi network between iPhone and MacBook without network
Step 1 Turn on Bluetooth and Wi-Fi on both Mac and iPhone. Swipe up to open the Control Center and tap "AirDrop" on iPhone and choose to let your iPhone discovered by "Everyone".
Step 2 Make your MacBook discoverable by "Everyone" through "Finder" > "Allow me to be discovered by" on your Mac.
Step 3 Choose photos you want to transfer to your laptop and click the share button. Then click AirDrop and choose your MacBook. And then click "Accept" to receive the photos on your laptop.
Here we introduce 5 methods to let you know how to transfer photos from iPhone to laptop. No matter you are using iPhone 7/6/5/4 or the latest iPhone X/8, iOS 10/8/7/6 or later iOS system iOS 12, and Window 10/8/7 or Mac OS X on your laptop, you can easily import photos from iPhone to laptop.

June 28, 2018 20:00 / Updated by Louisa White to Transfer iOS Data
 How to transfer music from iPad to iPod
This article shows you how to transfer music from iPad to iPod step by step.
 How to Manage iPod without iTunes
Read this article to manage iPod without iTunes easily and freely.
 Top 6 M4A Audio Editor (Free & Paid) to Edit M4A Files as a Pro
When you want to edit M4A audio files, an M4A editor is needed. This article shows 6 best M4A editing software to edit your M4A files on Windows and Mac easily.
