Note
As you can notice, apart from "Export to PC", iPod transferring tool also provides you another option, "Export to iTunes Library", so that you could use this program to move songs directly into iTunes.
As we all know, iPod is one of the most popular MP3 players around the world. And iPod models, including iPod, iPod touch, iPod shuffle, are widely used. Many people download and listen to music with their iPod. However, most of them may not backup iPod to computers regularly. For these people who don't have backup files, you may not be able to listen to your preferred music with iPod once it runs into unexpected situations. For example, your iPod touch can't get into your music library anymore, or you accidentally delete playlists. Surely, you may consider to recover music fromi iPod, but that would be rather complicated and troublesome, compared with transferring iPod to computer for backup.

Therefore, it is necessary to back up iPod music to computer. Then, how? iTunes may be your first thought. Unfortunately, to avoid file sharing, iTunes only allows you to move your songs and playlists from computer to iPod, but not vice versa. In order to transfer iPod music to your computer, you may need the help from iPod transferring software.
FoneTrans is one of the best. It not only enables you to transfer music from computer to iPod/iPod touch like iTunes does, but also copy iPod touch songs as well as playlists to computer easily. The following are step-by-step guides.
Step 1 Download and install this iPod transfer software
This iPod transferring program provides Windows version as well as Mac version. Take iPod transferring on Windows as an example, download, install and run the iPod touch transferring software. The interface of this software shows as below:
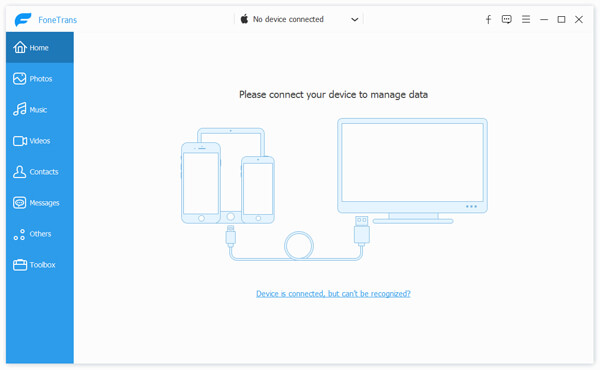
Step 2 Connect iPod to PC
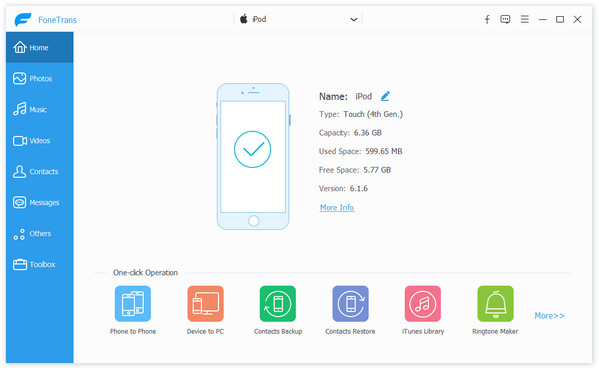
Connect your iPod to your computer via USB cable, wait until your iPod is automatically recognized. You can see the basic information about your iPod in the preview window.
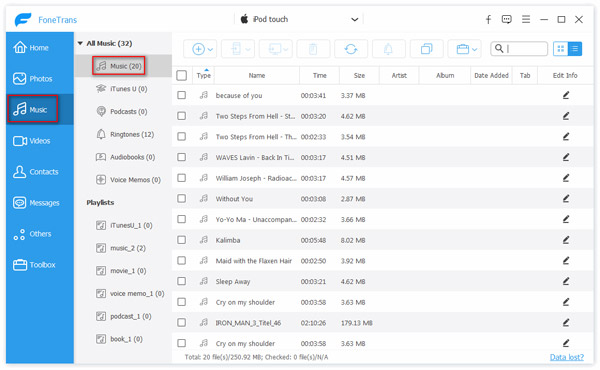
Step 3 View iPod music
After connection, your iPod files will be categorized as "Media", "Playlists", "Photos", "Books", "Contacts", "SMS" and more. Click "Media" from the left list, and then "Music" on the top menu bar in the right window, you can view all the songs in the iPod.
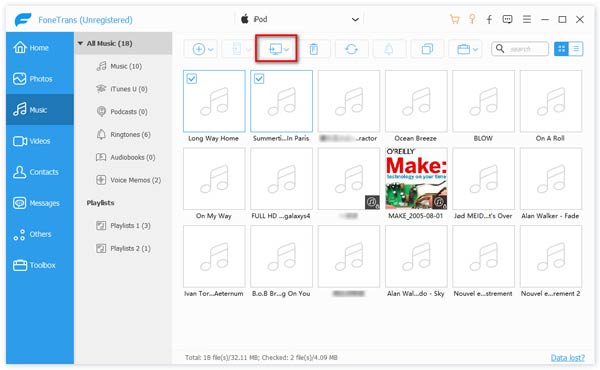
Step 4 Export iPod songs to PC
Choose all the songs you want to save on your computer, then click "Export to" on the toolbar. When the drop-down list shows up, select "Export to PC" and then the folder destination to store these songs. Wait for the transferring finished, and then you can find your iPod songs in computer.
Note
As you can notice, apart from "Export to PC", iPod transferring tool also provides you another option, "Export to iTunes Library", so that you could use this program to move songs directly into iTunes.

Easy, right? This iPod transferring tool could not only put iPod songs in your PC, it could also transfer other files in your iPod/iPod touch, including playlists, SMS, photos, books, movies, etc. For instance, choose "Playlists" in the left list, and then you can copy playlists in your iPod following the same steps.
Want to learn more? Download it and explore by yourself!
Although the music files in your iPod are hidden when you connect iPod with computer, you can follow the steps below to find them and then transfer songs from iPod to computer.
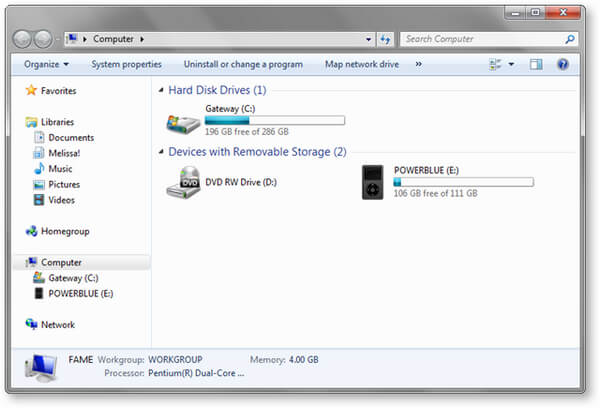
Step 1 Connect iPod with computer via its USB cable. Then the drive of the connected iPod will be displayed on "Computer".
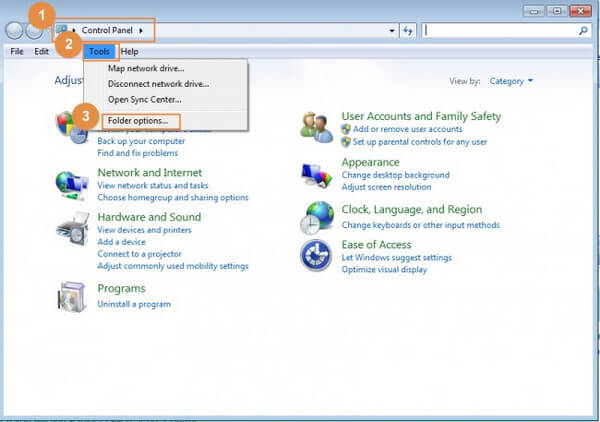
Step 2 Now navigate to "Control Panel" > "Tools" > "Folder Options" on your computer.
Step 3 Select "View" tab and then select option of "Show hidden files, folders, and drives".
Step 4 Now again go to "Computer" where iPod is visible and there a folder named "iPod_Control" will be visible.
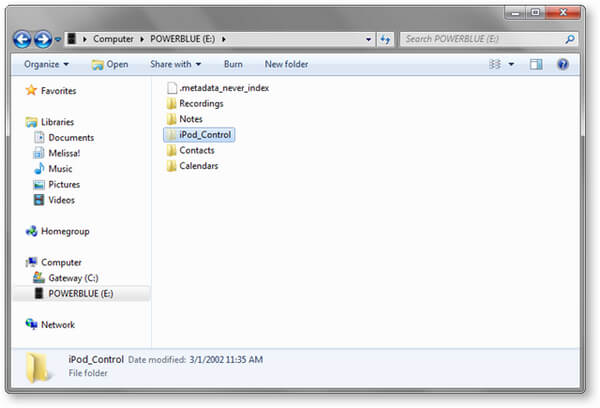
Step 5 Open the "iPod_Control" folder and choose "Music" folder from there. All the songs from your iPod will show. Choose and transfer songs from iPod to computer.
This article shows you how to transfer songs from iPod to computer. If you use Macbook or Mac Pro, you can transfer music from iPod to Mac.

June 06, 2018 08:58 / Updated by Louisa White to Transfer iOS Data
 How to Add Music Files to iTunes on Windows 10/8/7
It is not a hard thing for you to add your favorite songs to computer. This article provides two simple ways for you to do that.
 How to Transfer Music from iPod to iPhone
How do you transfer iPod music to iPhone? With iTunes? Yes. But you will become skilled of moving music from iPod to iPhone without iTunes in this post.
 The Easiest Way to Transfer Music from One iPod to Another One
How to copy music from one iPod to another iPod? iTunes definitely. Without iTunes, you still could transfer music between iPods with music transfer software.
