Green screen is a prevalent visual technique in movies and on television. The weather girl, for example, stands behind the green screen and you can see the animated weather map instead of the green screen. Actually, ordinary people could use a green screen to create fantastic movies by ourselves too. But how to use a green screen in our movie making is still a challenge to many people. To help you make professional looking videos, we will talk about how to use a green screen in Photoshop, Premiere, Windows Movie Maker, iMovie and OBS.
Use Green Screen
Green Screen is a green color background. You can superimpose your subjects onto the green background and capture some motions. Then the video editor software is able to help you separate green screen from the subjects and replace those backgrounds with pretty much anything, from real landscape to virtual scenes.
It is true that video editors could key out any color from the background, red, yellow, purple or blue. So, why the screen is green? The biggest factor is contrast. If you want to isolate the subjects from the background, the background color must be distinctly different. Bright green is the first choice.
When you use a green screen, there is one thing you should notice: don't use green color on the subjects you want to isolate.
In this part, you can learn about how to use a green screen in the best video editor software.
Aiseesoft Video Editor is an easy-to-use video editor. And it simplifies the process to use a green screen in movie making.
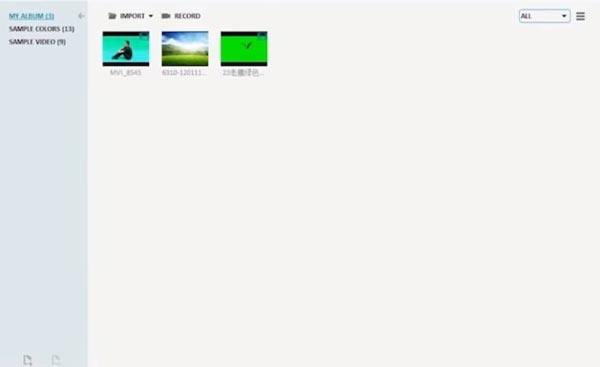
Step 1 Import the raw video file into the video editor
Download and install the video editor on your Windows PC. There is a dedicated version for Mac. Launch the video editor and import the raw video with green screen background into the media library.
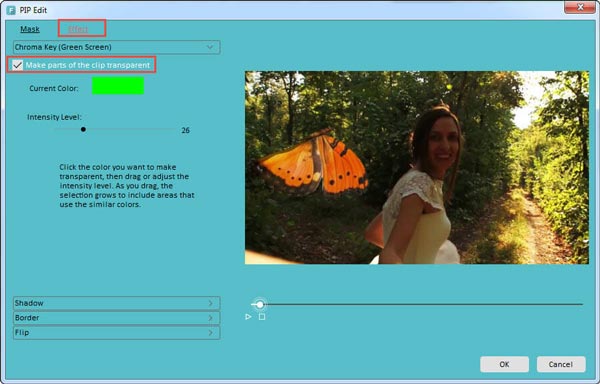
Step 2 Remove green screen background in one click
Double click the raw video file to open the settings window. Go to the "Advanced" tab and then click "Effect" on top ribbon. Tick the checkbox in front of the "Make parts of this video transparent" option and select green in the "Current Color" panel. Adjust the "Intensity Level" and then click "OK" to remove green background.
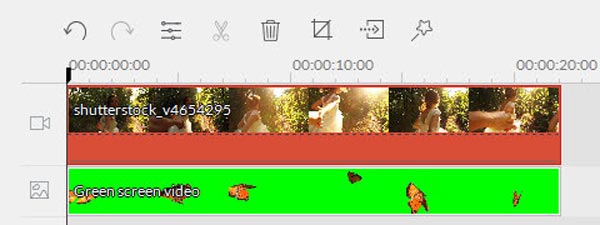
Step 3 Add desired background to your video
Position your desired background on the timeline and overlap with the background transparent video. Adjust the position and size until you are satisfied.
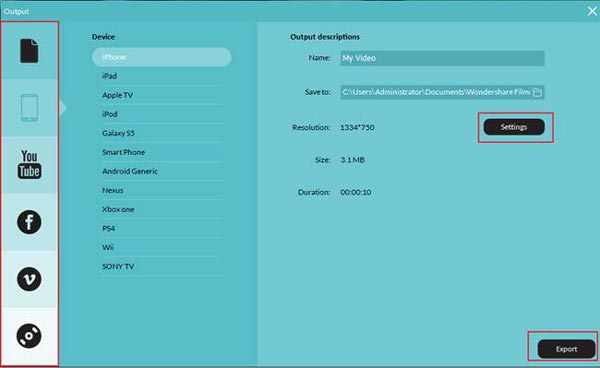
Step 4 Save the fantastic video to your PC
Finally, go to the output settings window. Here you can name the resulting video, drop a path to save it, reset resolution and other parameters. Click the "Export" button to save the video to your PC, or share it to social media.
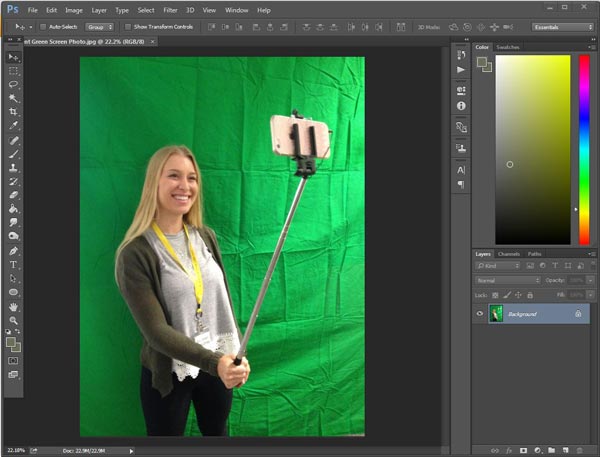
Step 1 Open the project using a green screen in Photoshop. Choose "Color Range" in the Select menu to open the color range dialog. Then pick "Sample Colors" from the "Select" dropdown option, choose the "Selection" radio button below the image preview area, and select "Quick Mask" from the "Selection Preview" list.
Step 2 Use the "Magic Wand" tool to select the background color, and you can adjust the value of Fuzziness and Tolerance options to select the green color exactly. Click "OK" button to confirm the selection.
Tip: If you have more than one color to remove, you can use the "Magic Wand" tool marked with "plus" icon.
Step 3 Use the "Refine Edge" tool in "Select" menu to soften the selection edge. Then hit the "Delete" key on your keyboard to remove the green background immediately.
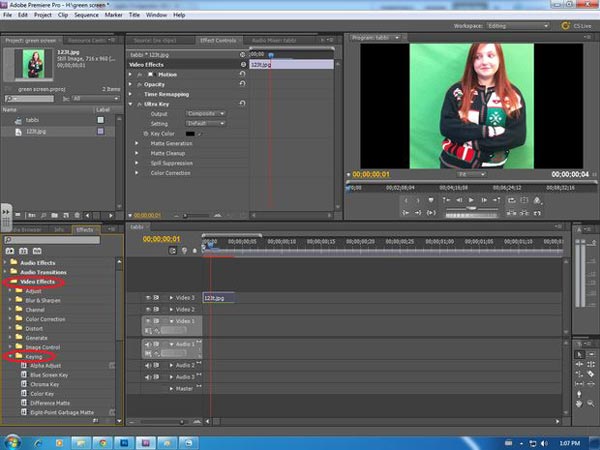
Step 1 Put the video using a green screen to the timeline in Premiere. Go to the "Effects" tab next to the timeline panel and head to "Video Effects" > "keying" > "ultra keying". Drag it onto the video.
Step 2 Locate to the panel next to the player and pick "green" in the "key color" option. Unfold the "output" dropdown list and choose "Alpha Channel". Then set the area to remove to black and the area to keep to white. Change the "output" to "Composite".
Step 3 Place the background video on a separate track of the timeline. And adjust the scale and position of the background.
Step 4 Finally, go to "File" > "Save As" to export the resulting video to hard drive.
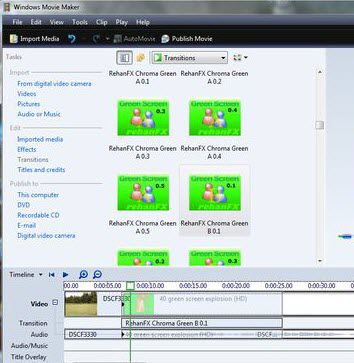
Step 1 Install Shader plugin for Windows Movie Maker. Import both the video using a green screen and the replacement video into the video editor.
Step 2 Click Transitions on the left sidebar and select "Chroma Key" from the transitions collection.
Step 3 Put the replacement video in front of the the green screen video on the timeline. Drag the green "Chroma Key" transition and drop it between the two videos. Extend the transition as long as the video using a green screen.
Step 4 Finally, save the output. The green screen will be Chroma Keyed.
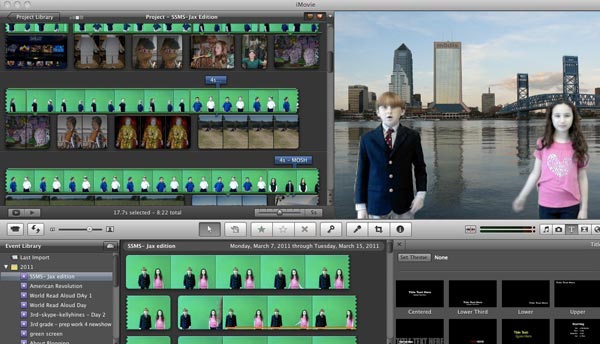
Step 1 Create a new project in iMovie and import the background video and the video using a green screen into the project. Go to Preferences and turn on "Show Advanced Tools" option.
Step 2 Select all frames of the video using a green screen on the project browser and click the "Plus" icon to open the toolbox. Then pick "Green Screen" on the toolbox, you will be presented marquee tool on the video. Drag the control points to adjust the areas to apply green screen effect.
Step 3 When settings completed, click "Done" button to confirm it.
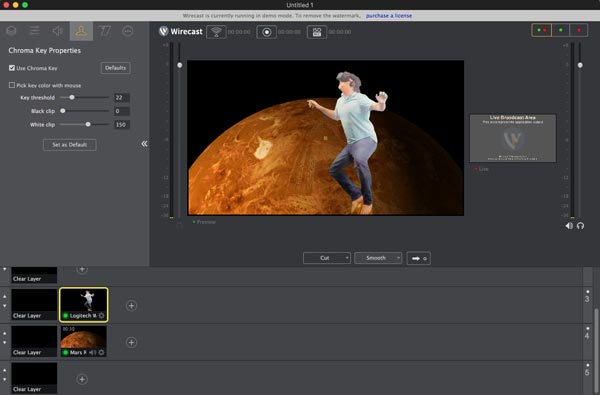
Step 1 To use a green screen for live streaming, Open Broadcaster Software is a powerful tool. Launch your OBS and add your video source.
Step 2 Right click the video source and choose "Filter". Press the "Plus" icon in "Effects Filters" area and then select "Chroma Key". Name the effect layer and your OBS will preset automatically based on your situations.
Step 3 After confirmed the settings, add the replacement background layer below the chroma keyed camera layer.
Based on the tutorial above, you might understand how to use a green screen in Photoshop, Premiere, iMovie, Windows Movie Maker, OBS and other video editors. As you can see, it is not very difficult to create a video using a green screen and edit it with popular video editors with our guides.

January 12, 2018 15:18 / Posted by Jenny Ryan to Edit Video
 5 Best Video Crop Editors on Windows/Mac/iPhone/Android
Still searching for the method to crop videos, here are the best 5 easy-to-use video crop editors for Windows, Mac, iPhone and Android devices.
 6 Best Video Stabilization Tools on Windows, Mac, Android and iPhone
This article will introduce several best professional video stabilization applications to improve the stabilization of videos on computers and smartphones.
 10 Best Microsoft Video Editors for Windows 10/8/8.17/XP and Vista
If you don't want to pay a lot of money and effort into your video editing exploits, here are a few Microsoft video editors and our free guides.
