Aiseesoft video converting software, the best video editor, provide you with powerful and useful editing functions, such as trimming, cropping, merging, watermarking video, etc. Now I will show you how to apply these functions one by one.

Step 1 Adjust the video effect
If you are not satisfied with the original movie picture, Aiseesoft video converting software can help you adjust the video effect.
Click the "Effect" button to open the Video Edit interface.
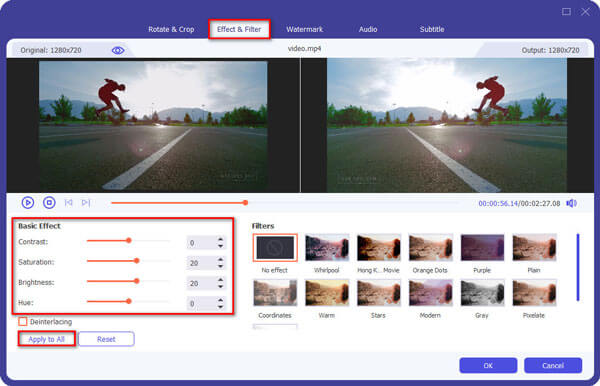
You can adjust the video brightness, contrast and saturation by dragging the slider bar. Even you can convert an interlaced video to a progress one by checking the "Deinterlacing" box.
Step 2 Trim video files
Click the "Clip" button to open the trim window.
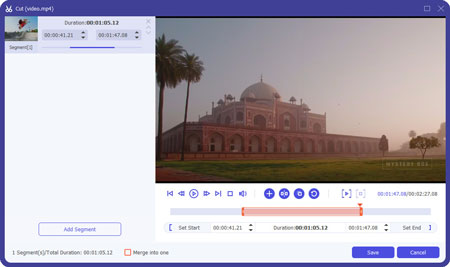
And we provide you with three ways to trim your video to your preference.
Step 3 Crop video files
Click the "Crop" button and go to the "Video Edit" interface.
Also three ways provided for you to crop your video.
You can also set the output aspect ratio from the Zoom Mode according to your need. There are four choices available: Keep Original, Full Screen, 16:9 and 4:3.
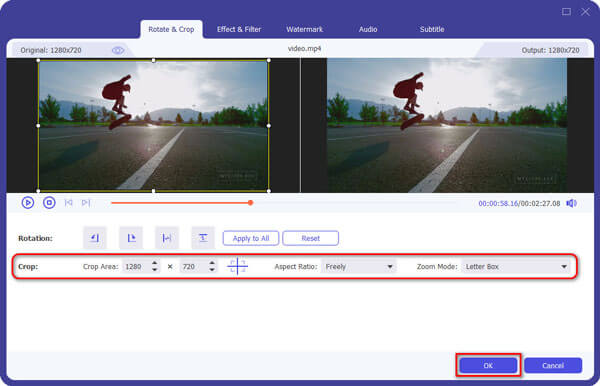
With this function, you can easily remove the useless black edges around your movie video and customize the aspect ratio to fit your player.
Step 4 Add watermark to the video
Our product also provides you with a fantastic function- watermark. With this function, you can add a special watermark to your video and get the personalized output video.
On the Video Edit interface, you can see there are two watermark forms- text and picture. And you can choose either the "Text" radio button or the "Picture" one. Then you can input whatever you want in the text input frame or select your preferred picture.
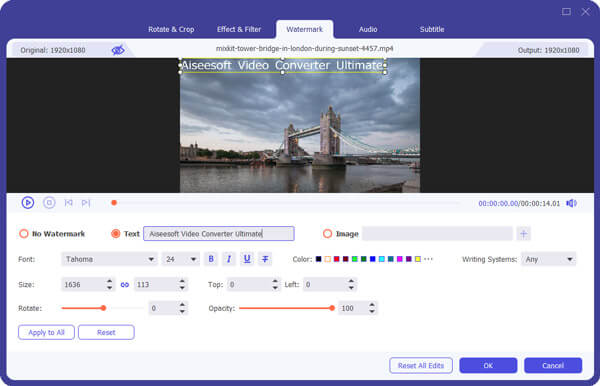
And you are allowed to adjust the watermark's position by setting the horizontal and vertical values or just dragging the watermark on the frame. Also you can adjust the transparent value to get the satisfactory effect.
Step 5 Capture picture from the video.
With Aiseesoft video editor, you are able to capture your favorite picture when you preview you video.

Click the Snapshot button to capture the picture. And you can save the picture. The Snapshot Folder button can open the file where the capture picture is saved.

July 05, 2018 17:55 / Updated by Jenny Ryan to Edit Video
 How to Play AVI Videos on iPad
You might be confused about how to import AVI to iPad and how to play AVI files on iPad. The article provides a perfect solution for iPad videos.
 3 Simple Ways to Convert MXF to MP3 [Free & Professional]
How to convert MXF to MP3 free? Is there any simple and free way to convert MXF to MP3 with high audio quality? This post shows 3 MXF to MP3 converters including 2 free ones to help you easily make the MXF to MP3 conversion.
 How to Convert Audio to MP3
This article introduces the best audio to MP3 converter, which could easily free convert music to MP3 online.
