What is the quickest and easiest way to manage thousands of iPhone photos? Well, maybe you can transfer large amounts of photos to your Mac computer for further editing. After all, you can get larger storage space and better photo editing experience than operating in iPhone. In addition, it is also a good way to backup and transfer photos from iPhone to Mac.

Mac iPhone Photo Transfer
Considering different requirements of iPhone photo transferring, this article collects many iPhone photo transfer apps and solutions. You can find the best one to follow. Therefore, you can free up more space by transferring iPhone photos to Mac.
Click here to learn more info about Transfer Pictures/Photos from Android to iPhone.
By using Mac FoneTrans, you can transfer and manage most iOS files to Mac in easy ways. There is no need to ask help from other iOS transfer programs, since FoneTrans offers many useful features about file transferring already.
Step 1 Launch FoneTrans to transfer iPhone photos
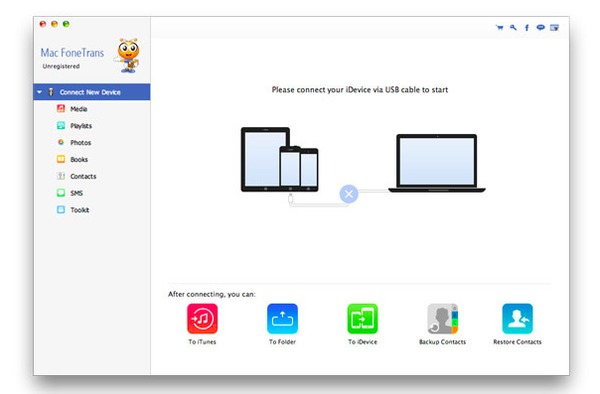
Download and install Mac FoneTrans. Run this iPhone photo transfer software. And plug iPhone to your Mac computer with the original USB cable.
Step 2 Access all iOS files
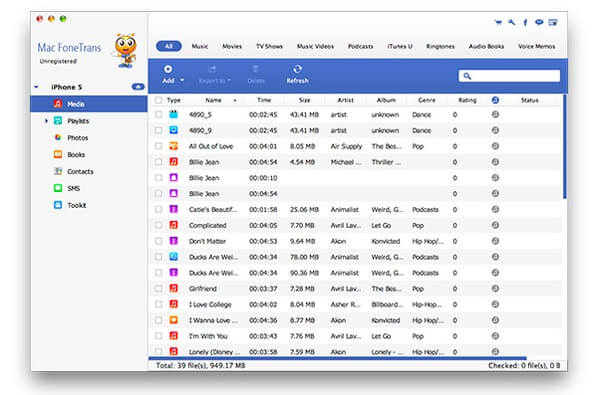
Wait few seconds to load all available iPhone files in the main interface of Mac FoneTrans. You can see media, playlists, photos, books, contacts and other categories in the left panel.
Step 3 Transfer photos from iPhone to Mac
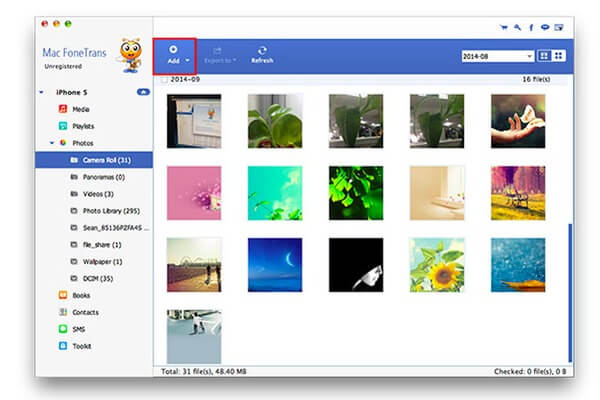
Choose "Add" on the top first. Then click "Photos" and choose the certain folder below to output iPhone photos on Mac. For instance, you can click "Camera Roll" and select which picture to transfer freely.
Though Photos is a quite common application for all Apple users, you can use Photos app to transfer only Camera Roll photos from iPhone to Mac.
You will also like reading: Backup iPhone Photos to Mac.
Step 1 Run Photos app on Mac.
Step 2 Plug iPhone into your Mac computer.
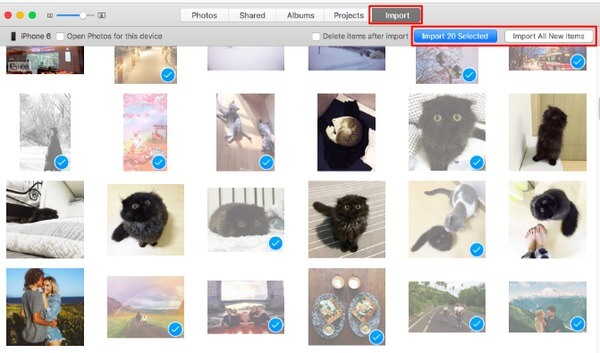
Step 3 Choose "Import" and select iPhone photos.
Step 4 Click "Import Selected" or "Import All Items".
Step 5 Wait to complete the iPhone photos to Mac transferring process.
You should be familiar with Preview as well, which works on Mac and enables users to transfer iPhone photos from Camera Roll only.
Don't miss: Transfer Pictures/Photos from Android to iPhone.
Step 1 Connect iPhone to Mac and launch Preview.
Step 2 Choose "File" option on the top on Mac.
Step 3 Go back to iPhone to click "Import".
Step 4 Choose the target iPhone photos to import.
Step 5 Set a destination folder to transfer iPhone photos to Mac.
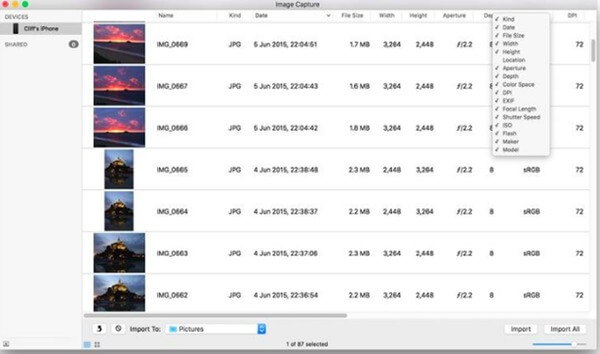
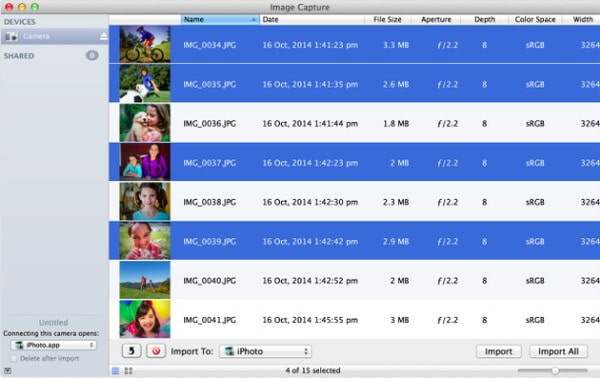
Similar with Photos and Preview, Image Capture supports users to output photos in Camera Roll from iPhone to Mac too. So if you just need to export iPhone Camera Roll photos, you can use Image Capture to transfer photos from iPhone to Mac.
Step 1 Run Image Capture on Mac
Step 2 Plug iPhone into your Mac computer.
Step 3 Choose your iPhone icon after being detected.
Step 4 Select iPhone photos and set an output folder.
Step 5 Choose "Import" or "Import All" to confirm iPhone to Mac photo transferring.
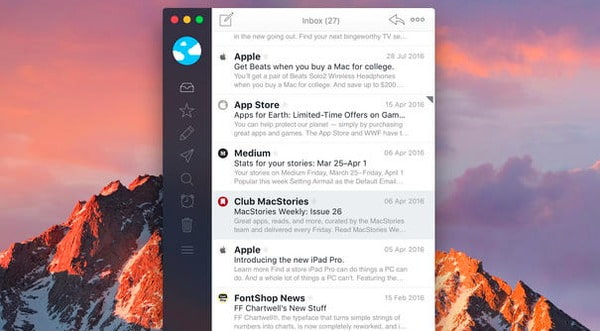
If you only need to transfer few pictures from iPhone to Mac, you can send photos through email directly. Just send an email to yourself to download these photos on Mac. But it may take you a bit more time if the Wi-Fi condition is not good or you upload too many photos.
Step 1 Run Photos app to open Albums.
Step 2 Choose "Edit" and select the output picture.
Step 3 Click "Share" and choose "Mail".
Step 4 Enter your email address and complete this email.
Step 5 Click "Send" and receive the email on Mac.
AirDrop is specially designed for iOS and macOS users. Therefore, you can run Airdrop to transfer photos from iPhone on Mac wirelessly. Remember to transfer a small number of photos, because AirDrop enables to transfer one photo per time.
Step 1 Open Finder and run AirDrop on Mac.
Step 2 Choose "Contacts Only" or "Everyone" below.
Step 3 Open Photos and select the photo on iPhone.
Step 4 Click "Share" and "AirDrop" to receive by your Mac.
Step 5 Get transferred iPhone photos on Mac.

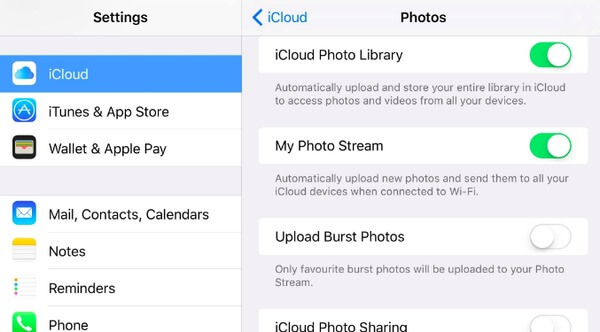
It is also supported to transfer iPhone photos through iCloud photo stream. The first time you register iCloud, you can get free 5GB cloud storage space. As a result, you can download those iPhone photos on any other digital devices directly.
You will not miss: How to Make iPhone Backup on iCloud.
Step 1 Open "Settings" app and choose "Photos" on iPhone.
Step 2 Trigger the on-off "My Photo Stream" option.
Step 3 Run Photos and click "Preferences" and "iCloud" on Mac.
Step 4 Check if you have selected "My Photo Stream" or not.
Step 5 Transfer photos from iPhone to Mac with iCloud photo stream.
That's all for how to transfer photos from iPhone to Mac. You can choose the certain solution according to which type of photos you want to output.

June 30, 2018 18:41 / Updated by Louisa White to Transfer iOS Data
 How to Restore Contacts from iTunes Backup to New iPhone
How to copy contacts to new iPhone? Following the steps, you can recover iPhone contacts from iTunes and move them to your new iPhone.
 2018 Best 12 Alternatives to iTunes for Windows or Mac
Find the best 12 alternatives to iTunes on Windows/Mac in 2018, when iTunes fails to backup/restore iOS data, play media files, or convert music files in this page.
 Cannot Replace Your Bent iPhone? Recover Data Right Now
If Apple store does not replace/fix your bent iPhone and your iPhone warranty is out of date, how to recover data from iPhone X/8/7/SE/6s Plus that bends?
