Photographic Tricks for Better iPhone Camera Effects
Many iOS users like to take photos with iPhone, and iPad. Have you ever thought of taking your own astonishing photos with iPhone camera to surprise others? Camera app of iPhone brings great convenience to capture beautiful sceneries or take a picture of your face. With the rapid technology, now you can make 4K video by using your iPhone camera. To let you get better iPhone photographic experience, in this article, we will show you several iPhone camera effects for better iPhone photographs.
How to Use iPhone Camera Effects
In iOS 12, there are some new features in the Camera app. But some of them are geared specifically to iPhone 7 Plus, iPhone 8 Plus as well as iPhone X users. Fresh camera features range from new filters and effects to better file size management and more lively photos all around.
How to take a photo
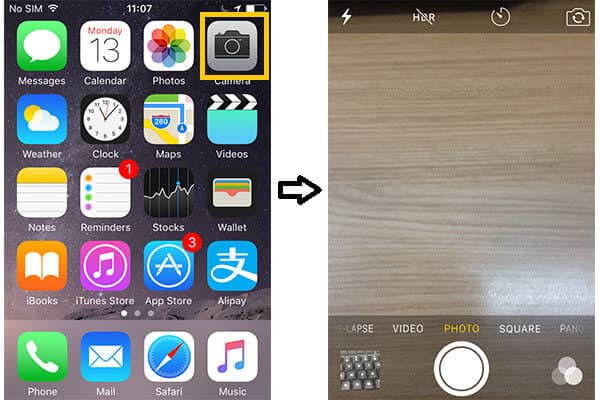
Step 1Go to your iPhone Home screen, and tab "Camera" app.
Step 2Frame the target scene to get ready.
Step 3Use your finger to tap the circular "Shutter" button. Or press the button of "Volume up" of your iPhone or headset to trigger the button of "Shutter".
Scan QR codes with Camera app
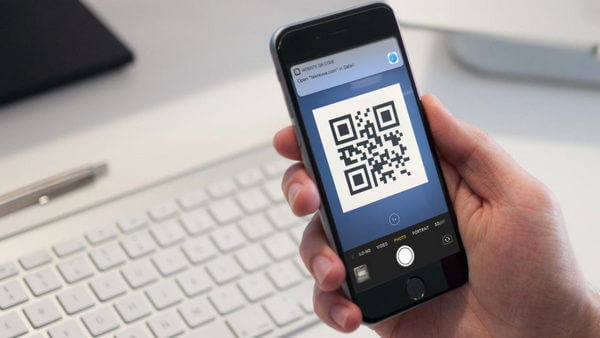
The first new update to the Camera app in iOS 12 should be the addition of a built-in QR code scanner. Now you are able to scan them directly with the Camera app. QR codes can be scanned not only from billboards, posters and flyers but also from other mobile phones or tablets, as well as on computer screens. The camera app can scan very amazingly as long as the QR code is visible no matter what angle it's scanned from.
New compresion methods
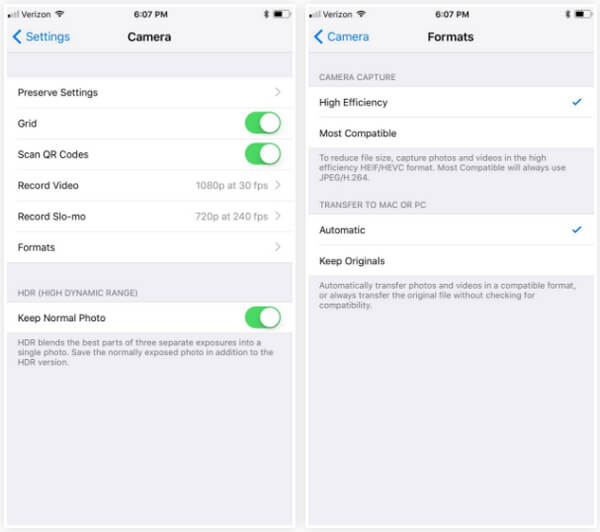
According to Apple, your photographs and videos shall keep the same quality and clarity, but half the amount of storage space will be used as before. For videos, there's HEVC (High-Efficiency Video Coding) at H.265 instead of H.264, and for photos, there's HEIF (High-Efficiency Image File Format). To better use this feature, just navigate to Settings > Camera > Formats and make sure "High Efficiency" is checked. Videos will be saved as HEVC .MOV files, while images will be saved as .HEIC instead of .JPG. How to convert HEIC to JPG?
Free HEIC Converter
- A professional freeware enables you to convert photos from HEIC to JPG or PNG.
- Free Convert HEIC to JPG/JPEG or PNG, keeping the best image quality.
- Fast and easy to use.
- Keep Exif data.
- Support iPhone, iPad and iPod touch running iOS 12.
Turn on the Grid
Consisting of double horizontal and double vertical lines to divide the camera screen into nine square blocks, the Grid is one of helpful iPhone photograph tools. Have you ever heard of the rule of thirds? It's a fundamental principle to let iPhone photos be improved. And the Grid feature is good for applying the principle of the thirds rule. You can turn it on by clicking "Settings" > "Photos & Camera" > Slide "Grid" to "On".
Notes: Settings were used to gathered in the Photos app (listed as "Photos & Camera"). While in iOS 12, Camera app has its own settings, so you are able to turn on the Grid feature by going to "Settings" > "Camera" > Toggling on the button of "Grid".
Select Burst mode
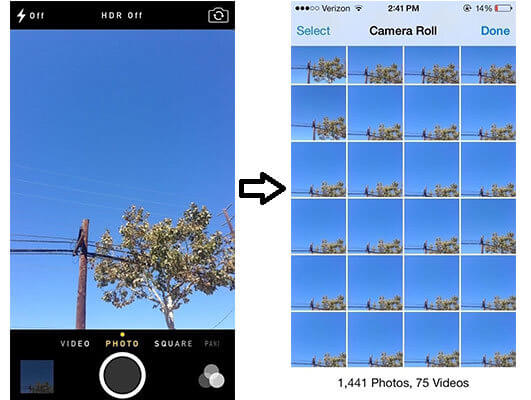
Is it annoying to take no satisfying photos when frame some unpredictability or movement? Don't worry. iPhone provides burst mode to help you solve such problem. Burst mode only applies to the settings of "PHOTO" and "SQUARE". To enable the mode, you just simply tap and hold the button of "Shutter", and then iPhone will take 10 photos one after one. And then choose your preferred pictures by tapping "Thumbnail" next to "Shutter".
Use HDR mode on iPhone camera
Short for High Dynamic Range, HDR is an excellent default photography tool for improving iPhone photos. HDR mode enables the camera to capture three diverse exposures of one image, and then combine the three captures into one new image. You can see the picture to distinguish the difference. The left one has no effect, and the right was captured in the HDR mode. The right one is greater, right? Though HDR mode is very helpful, you should not use this mode for framing movements, capturing directly the sunlight, or shooting the vivid colorful light bulbs. To active the HDR mode, make sure slide the feature of "Keep Normal Photo" to "On".
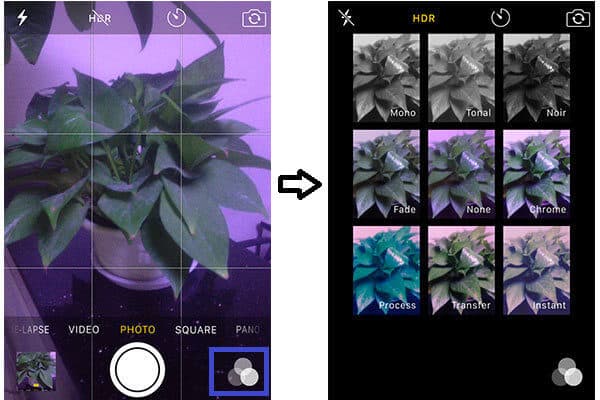
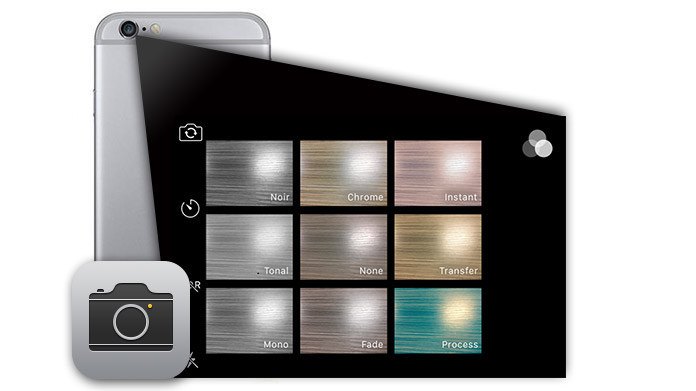
Enable filter effects
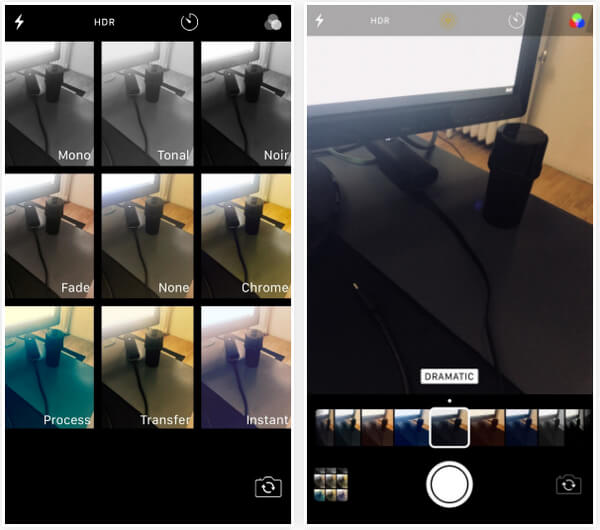
Filter effects on iPhone camera enable your photo to be more vivid or colorful, but the feature of filters only applies for settings of "PHOTO" and "SQUARE". The effects provide nine filters: Mono, Tonal, Noir, Fade, None, Chrome, Process, Transfer, and Instant. How to active filters effects? Launch "Camera", choose "PHOTO" and "SQUARE" as you like, and frame the target scene. Tab the three partially overlapped circles to choose the suitable filter effect.
Notes:New filters in iOS 12 seem similar to the old ones in iOS 10, only with different names. Actually, they are slightly better than before. The new filters include Vivid and Dramatic, along with some variances that either add or reduce the warmth of the picture. Less blue for a warmer picture, more blue for a cooler picture. We also see some old filters like Chrome and Instant cannot be found in iOS 12.
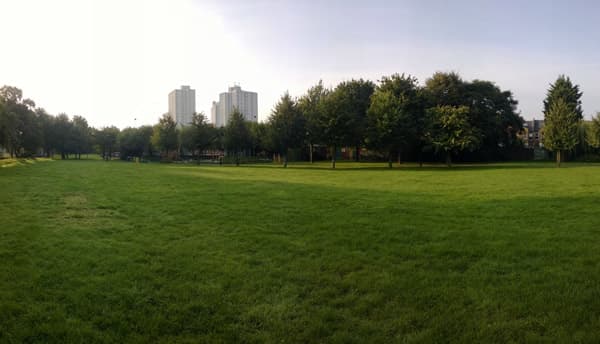
Take Panorama photos
Want to take panoramic photo of group of family members or friends, magnificent landscapes, endless see scenery and so on? You can use iPhone panorama feature to do that. Kindly note that don't use this feature when framing the movements. To better get iPhone panorama photos, you may need a tripod to let the device stable. To active the mode, swipe the camera screen to the settings of "Pano", tap the "Shutter" and move iPhone continuously when taking the Panorama picture.
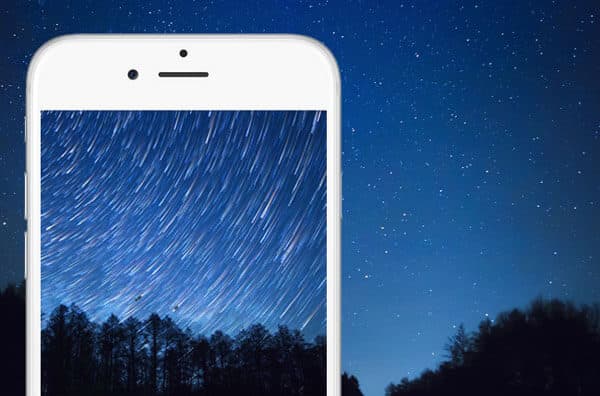
Take Time-Lapse videos
Time-lapse video is a great camera feature, which can make you condense a long-time of continuous capture in short clips. This mode is effectively applied in beautiful sunrise or sunset, browsing flowers, moving cloud and so on. How to active it? Make sure your iPhone or iPad is running the version of iOS 8 or higher. Launch "Camera" > scroll to the right of the interface and let your camera in the shooting mode of "Time-lapse". Tap the red "Shutter" to record what you want.
In this article, we mainly talked about the usage of iPhone camera effects for you. You can be an excellent iPhone photographer after grasping these tricks well. Also, if you like you could make your photos more attracting by using iPhone burst modes.