How to do a color correction in Final Cut Pro?
Color correction is also known as color timing or color grading. Final Cut Pro has Color correction process for users to alter the color values and brightness of a video clip or a image they editing in FCP. Cameras and phones nowadays are capable of letting you record with great quality though, you will feel it necessary to do a color correction. Here in this post, we are going to show you how to do a color correction in Final Cut Pro step by step.
How to Do a Color Correction in Final Cut Pro
Some of the main reasons are listed below why you would consider doing a color correction.
◆ Correct mistakes sometimes persist when you are taking a shot.
◆ Match your shots if taken at different times and location to show they were taken in the same timing.
◆ Create a look or style for a particular mood, such as creating the shot scene seeming bright, warm, cold and dark and foreboding.
Whatever your reason for color correction is, Final Cut Pro has enables you to grade your videos. Below is the detailed guide for making a color correction in FCP.
Two main tools are needed for adding a color correction in Final Cut Pro: Color Board and Video Scope.
Color Board: Open the Inspector and select the Video pane if necessary. There are three ways to open Color Board.
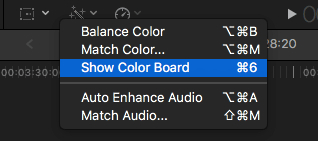
• Select audio enhancement and color correction options available below viewer and then hit "Show Color Board" option. You can also press Command + 6 to trigger it.
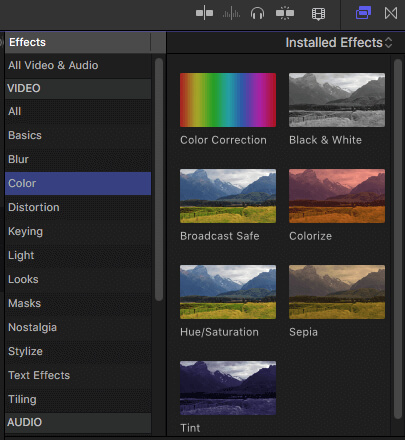
• Access color correction on effect browser effects, which is inside the color category.
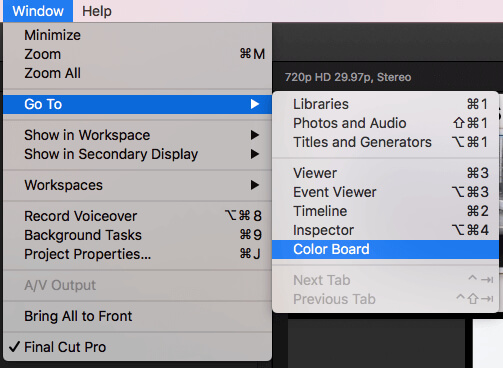
• Click Window and then choose Go To, you will find Color Board option on the drop down menu.
Video Scope: When you work on Color Board, you'd better open Video Scopes as well on your system. To open Video Scopes, click on the light switch icon at top right corner of viewer and then choose Show Video Scopes option from pop-up menu. You are able to press Command + 7 to realize it.

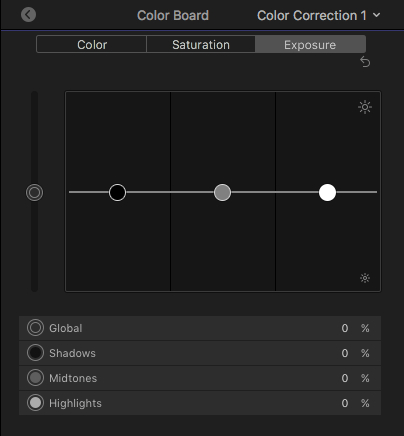
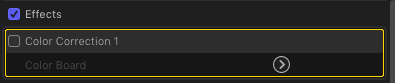
Step 1At the beginning, open Color Board on FCP. You can see all the color correction effects appearing in effects section from video inspector. The color board has a master slider on the left, helping you adjust the overall exposure and three more controls for adjusting midtone, shadows and highlights. You simply drag them up and down guided by the waveform to deal with your shot.

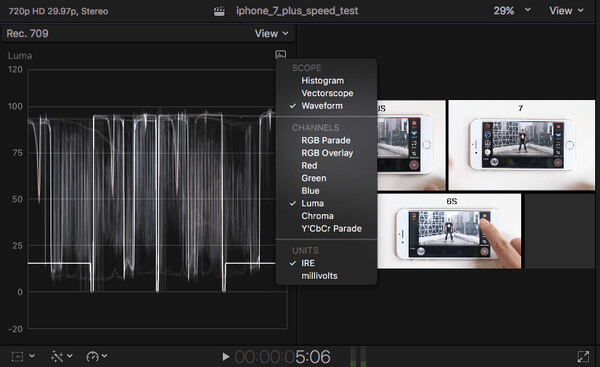
Step 2Open Video Scopes, the video scopes window will automatically appear. Here you can obtain information with ease, about current video frame. Go to settings option available at top right side of window and then hit Waveform option.
Step 3Now do color correction directly. Three types of color corrections are require that users need to work on: Hue, Saturation and Exposure. Here is some brief information about all of these:
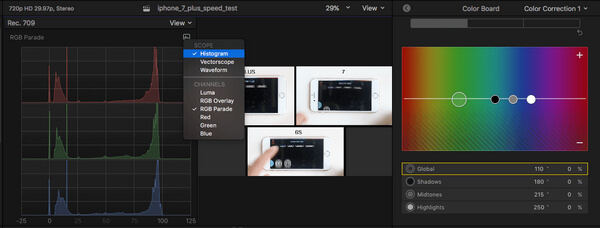
• Hue: Hue shows the actual color values in image or frames in terms of primary colors: red, blue and yellow. Adjusting hue in the color pane. Here you can manipulate values for highlights, midtones and shadows according to your need. Use histogram option on settings menu, helping you to adjust all components.
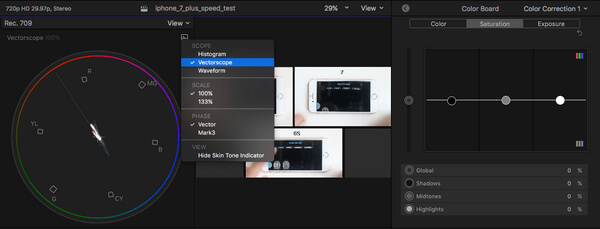
• Saturation: It is the richness of colors in image. Choose saturation pane from color board and on video scopes window to adjust saturation information for every pixel.
• Brightness: From the Color board window, you are able to adjust brightness levels of video clips. When you move on different image portions, ranging between dark and white parts, the scope will be displaying waveforms with values between 0 to 100 representing darkness and brightness respectively.
Step 4Preview all the corrections on original image before output the object. Simply click the arrow on top left corner of Color Board and then go back to video inspector. Check the box to switch Color Correction On and Off options.
For many new users, Final Cut Pro is not an easy problem to use for video editing. Here we would like recommend an easy-to-use free video editor if you want to easily edit videos and adjust video effects.
Check how to use this Free Video Editor from the video below:


We mainly show you a guide about Final Cut Pro color correction. We show you the detailed steps to do a color correction in Final Cut Pro. Any idea or suggestion can be left below.

December 14, 2020 13:50 / Updated by Jenny Ryan to Edit Video
 Final Cut Pro for Windows - Programs like Final Cut Pro
You can find Final Cut Pro for Windows 10/8/7/Visa/XP to download it and edit movie.
 [Solved] Top 10 Audio Editor Review
What is the best audio editor among online video editing software, Windows/Mac audio editor, free sound editor, etc?
 How to Download and Use Ezvid for Editing and Recording Video
Ezvid is a free video editing and screen recording software, check its pros and cons and how to use Ezvid in this article.
