Tip
If you cannot find the lost file, click the Deep Scan button at upper right corner to perform a deep scan to your hard drive.
Apple has introduced many useful features into iOS, such as iTunes and iCloud backup. For Mac, Time Machine is a utility for making backup and preventing from data loss. It is useful in many situations. For instance, when you delete an important file, Time Machine is able to bring your file back. Any time when a MacBook is crashed or frozen, it has the capacity to restore your Mac system. Moreover, if you decide to upgrade your old Mac to the latest model, Time Machine could transfer your Mac backup to the new machine quickly. Therefore, we are going to talk about how to restore from Time Machine.

Restore from Time Machine
Time Machine is not only able to restore lost files from backup, but also could restore entire system, which means that all your existing files will be replaced with the backup.
That is the advantage, and meanwhile is the disadvantage. So you had better backup Mac before restoring.

Step 1 Make sure that your Time Machine backup disk is connected and turned on.
Step 2 Open a window and locate where you stored the lost file originally, and open any version of the file.
Step 3 From the Time Machine menu, select Enter Time Machine.
Step 4 There are several ways to find the lost file:
Step 5 After finding the lost file, click the Restore button to restore the file from Time Machine.
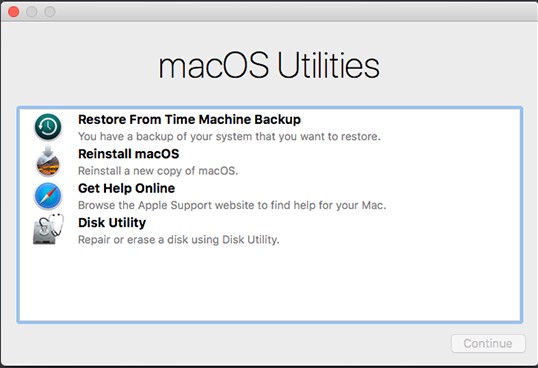
Step 1 After connecting the Time Machine backup drive to your computer, reboot your Mac and press the Command + R keys at the same time to go into the Recovery mode.
Step 2 Until the Mac OS X Utilities screen pops up, select Restore from Time Machine Backup and press the Continue button.
Step 3 Then choose a backup according to the backup time and click Continue button to start restoring from Time Machine backup.
Step 4 Wait for Time Machine to finish the process. Then your Mac will restart into the restored state.
Time Machine is also a useful file transfer when you upgrade to a new Mac computer. It will migrate all your file, settings and preferences from an old Mac to a new one.
Step 1 Plug the backup drive into your old machine, open System Preferences, hit Time Machine and then Back Up Now to make a backup.
Step 2 When it is done, remove the backup drive from the old device and connect it to the new Mac. Then power on the new device.
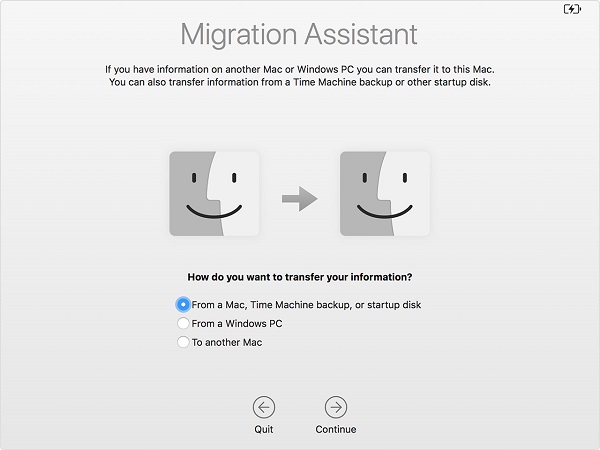
Step 3 Open Migration Assistant by pressing Space + Cmd keys, click Continue and then select From a Mac, Time Machine Backup or startup disk.
Step 4 Hit Continue and pick the latest backup to initiate restoring from Time Machine. (Carbon Copy Cloner is a good tool for data backup and restore.)
You can restore a file or an entire system from Time Machine, but the prerequisite is that you have turned on Time Machine backup on your computer. A part of users believed the backup would take up the limited storage. Is that means you cannot restore lost files without Time Machine? The answer is no. Aiseesoft Mac Data Recovery could meet your need.
All in all, Mac Data Recovery is the best way to restore Mac without Time Machine backups.
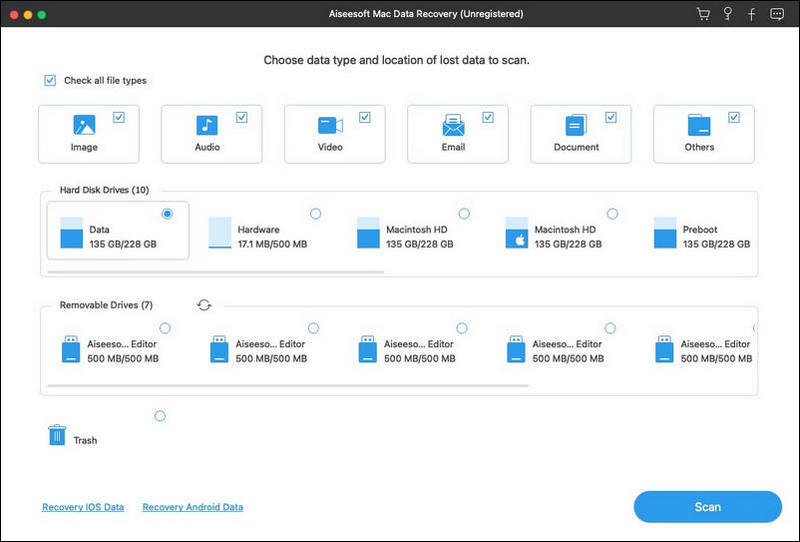
Step 1 Get the best alternative to Time Machine
Download and install Aiseesoft Mac Data Recovery to your Mac. When you discover some important files disappeared, launch the data recovery software. Select the data types you want to restore in the first section and then choose where you save the lost files under the Hard Disk Drives area.
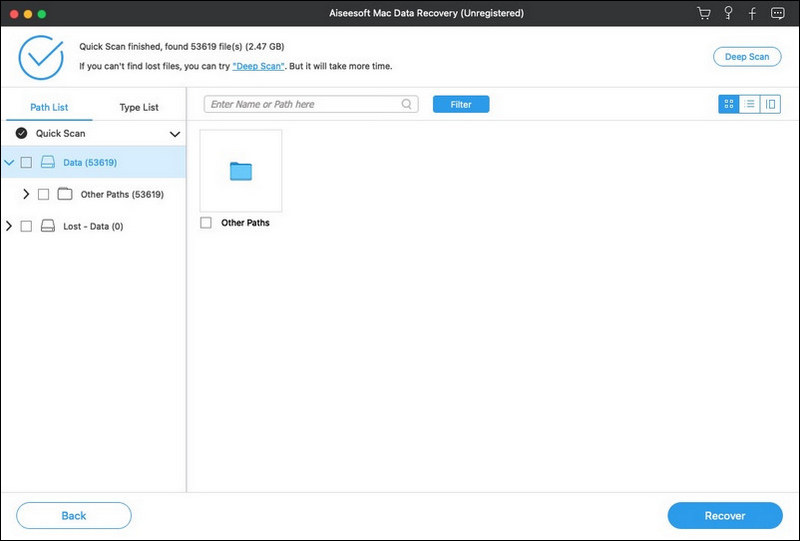
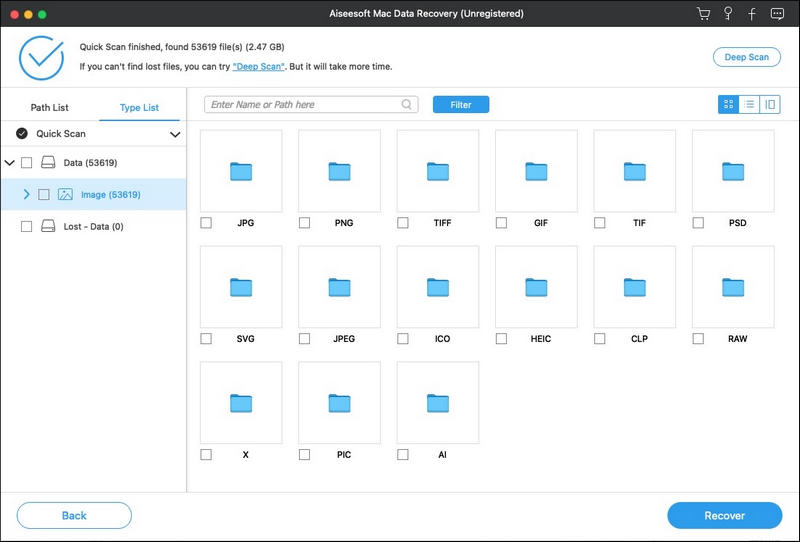
Step 2 Scan your hard drive to look lost files
Click the Scan button to start looking for lost files on your hard drive. When it finishes, you will be taken to the preview window. You can search for the lost file with the Search Bar or find them from the Type List or Path List. For example, to restore a PNG photo, go to Image -> PNG from the Type List on the left side, and then you can look at the thumbnails of the images and find the desired file.
Tip
If you cannot find the lost file, click the Deep Scan button at upper right corner to perform a deep scan to your hard drive.
Step 3 Restore files without Time Machine
Make sure to select all lost files and click the Recover button to initiate the lost data on Mac without Time Machine backups. According to our testing, it only takes a few minutes to recover hundreds of documents from a computer, but it may depend on your hardware and amount of data recovery.
Note
Mac Data Recovery will restore the lost files to another drive, in order to prevent from data loss if your drive is broken or corrupted.
This article shared several ways to restore from Time Machine. First of all, it is able to recover lost files and documents on your Mac computer. Moreover, you can use Time Machine to restore Mac system, settings and preferences whenever your computer is crashed. If you decide to upgrade to a new Mac, Time Machine backup is also a convenient way to transfer data from the old device. Even if you did not set up Time Machine backup, Aiseesoft Mac Data Recovery could help you to get back lost files from your hard drive.

April 22, 2019 10:00 / Posted by Andrew Miller to Recover Mac Data
 Recommendations of Free Data Recovery Software for Mac Users
Here are 12 free data recovery software for Mac users. You can read and choose the best Mac data recovery here. So why not read and get some useful advices right now?
 Mac Hard Drive Recovery - Recover Data from Internal/External Hard Drive on Mac
What is the best Mac hard drive recovery? This post shows 5 great Mac hard drive data recovery software to help you restore deleted and lost files.
 Updated Reviews and Use of Stellar Data Recovery for Mac in 2019
Is Stellar Phoenix Mac data recovery free? How do I use Stellar Mac data recovery software? What is the latest review of Stellar Mac data recovery? Here is all the info you are seeking for.
