Summary
Taking your notes everywhere for easy use. Here we collect 6 ways to sync your iPhone notes to Mac. More importantly, you could learn the secret to get the deleted notes on iPhone to Mac.
Summary
Taking your notes everywhere for easy use. Here we collect 6 ways to sync your iPhone notes to Mac. More importantly, you could learn the secret to get the deleted notes on iPhone to Mac.
I take some notes on my iPhone 7, but I use my Mac frequently. Is there any way that lets me check the iPhone notes on my Mac ?
Of course, yes.
Apple makes life convenient with iPhone, iPad, and iPod. Taking notes is one of their great features. Especially, the latest iOS 18/17 brings more features on Notes app. You can deal with some business job through notes, like signature, checklist, photo/video attachment, note sketch, document scan, notes encryption, etc. So taking notes of important meeting, party, birthday, etc. makes life work in a planned way. When you create the notes on iPhone, you may also want to get a sync or view of notes on Mac, because you may use Mac frequently to carry out the notes.
Let's come back to the point in this page: How to get iPhone notes to Mac?

Sync/Recover (Deleted) iPhone Notes to Mac
We share 6 ways to backup notes from iPhone to Mac. Not only the existing notes, but the deleted notes can be moved from iPhone to Mac.
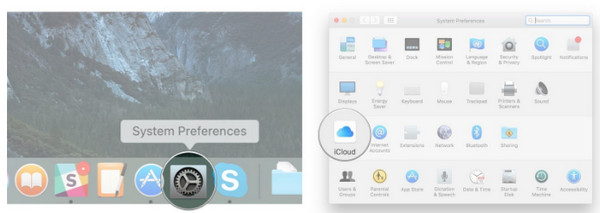
Step 1 Turn on Notes sync on Mac
On your Mac, run "System Preferences" > "iCloud" > Enter your iCloud account and password (the same iCloud account that you use on iPhone) > Click the box next to Notes from the list of "applications to sync".
Step 2 Sync notes from iPhone to Mac via iCloud
On your iPhone, go to "Settings" > "iCloud" > Log in iCloud account > Slide on "Notes".
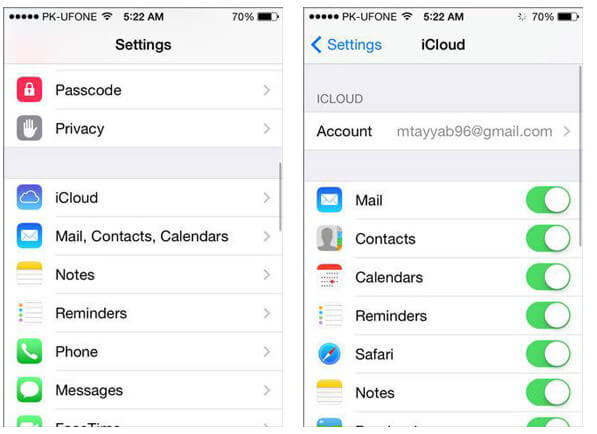
Then your notes on iPhone will be synced to Mac automatically when you connect your iPhone to WLAN to make iCloud backup.
Tip
In this way, you could view all iPhone contacts on Mac, but the deleted notes on iPhone will not show on your Mac.
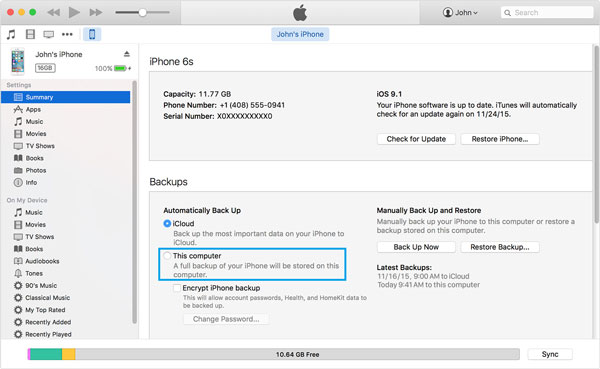
Another common way to save iPhone notes to Mac is using iTunes.
Step 1 Connect your iPhone to Mac with the USB cable. Meanwhile, run the latest iTunes on Mac.
Step 2 Find your iPhone icon in the upper-left corner, and click it > Click "Summary" > "Back Up Now" to start to put all iPhone data on Mac.
Tips
1. You have to copy all data including notes to Mac without selectively.
2. You cannot view the notes on Mac directly. You need to use notes extractor on iTunes to read the notes.
Due to wrong operations, updating, jail-breaking, device crash and so on, you may lose notes on iPhone for some unexpected reasons. At this point, can you recover the deleted notes from iPhone to Mac?
Yes, you can.
For iOS 9.3, you can directly get back the deleted notes from the device.
On your iPhone, hit "Notes" > "Recently Deleted" > "Edit" to checkmark the deleted notes that you want to retrieve > "Move to" to pick up the destination from "iCloud" (New Folder or Notes) or "ON MY IPHONE" (New Folder or Notes).
Then you can follow the above two solutions to put the deleted notes from iPhone to Mac.
Tip
This feature can permanently keep your deleted notes for 30 days. If your notes were deleted more than 30 days, take Mac FoneLab, the professional iOS Notes Recovery for Mac, to help you.
Mac FoneLab, iPhone Data Recovery for Mac is a safe iOS data recovery app to help you recover other lost files from iPhone, iPad, and iPod on Mac.
Now, it is time to use the full-featured program to recover deleted notes on iPhone from Mac step-by-step. Firstly, you need to download this software.
Check the video tutorial to recover the deleted notes on iPhone to Mac:

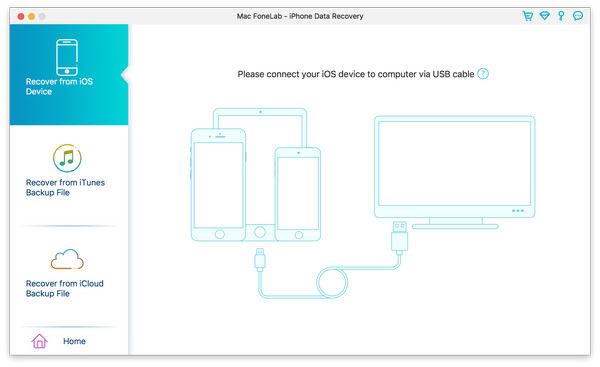
Step 1 Recover from iOS Device
After downloading this software to your Mac, install and run it. Select "iPhone Data Recovery" and "Recover from iOS Device".
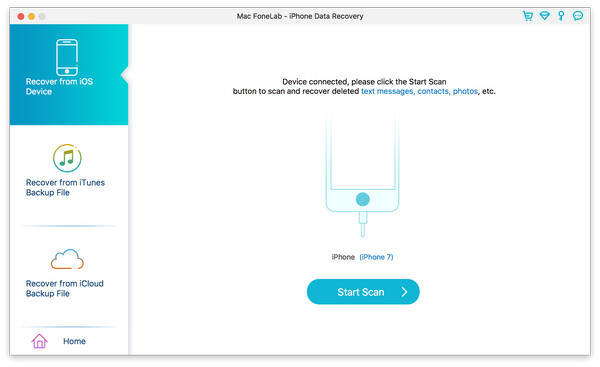
Step 2 Scan iPhone
Connect your iPhone to Mac with the USB cable. Click "Start Scan". Within seconds, all files will be scanned and listed in catagory in the left column, including notes.
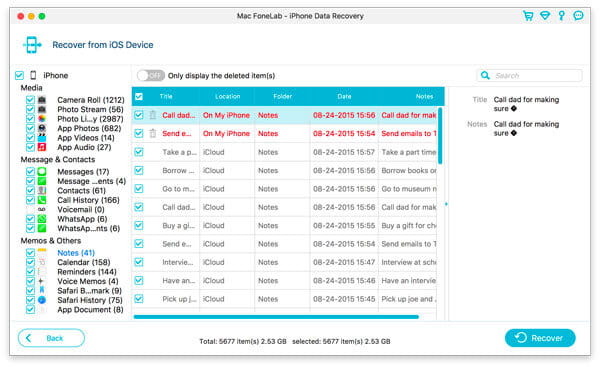
Step 3 Recover notes on Mac
Click "Notes", and you will find all existing and deleted notes are listed in two different colors. The notes marked in red color are the deleted while the black color are the existing notes. Highlight the notes you want. Click "Recover" to export the notes from iPhone to Mac.
If you ever made an iTunes backup for your device to Mac, you can also turn to iTunes for restoring the deleted notes. With this advanced software, you are able to view and manage iTunes backups as well.
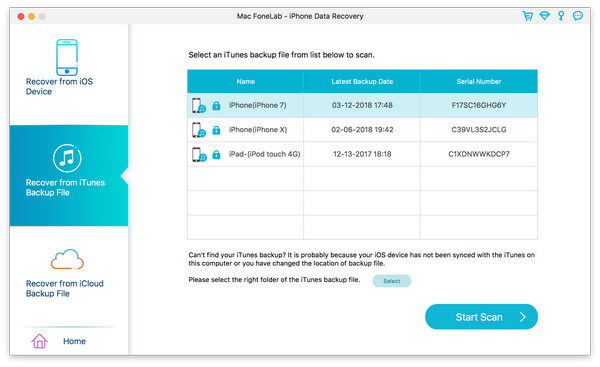
Step 1 Scan iTunes notes
After launching the brilliant software on your Mac that you have synced with your iPhone notes before, choose "Recover from iTunes Backup File". Select one iTunes backup that contains the deleted notes on iPhone, and click "Start Scan" to scan the notes on iTunes
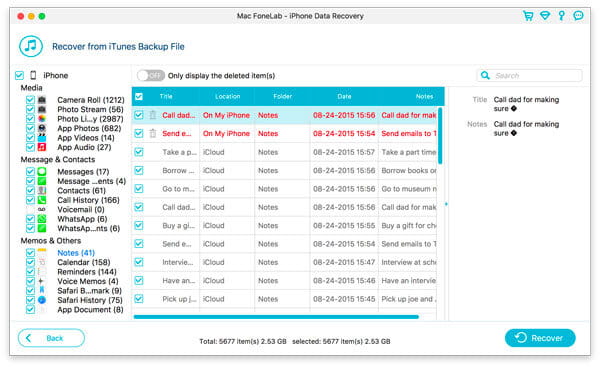
Step 2 Recover notes from iTunes backup
For seconds, the scan result will show. Click "Notes" from the left category and check the notes in the right interface. Click "Recover" and retrieve the target notes from iTunes to Mac.
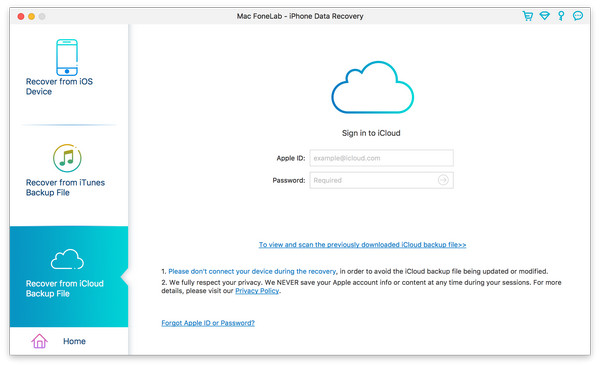
Step 1 Scan iCloud notes
Choose "Recover from iCloud Backup File" mode, and sign in to iCloud account with your Apple ID and password. The software will automatically detect your all iCloud backups with the iCloud account. Find and download the suitable iCloud backup file.
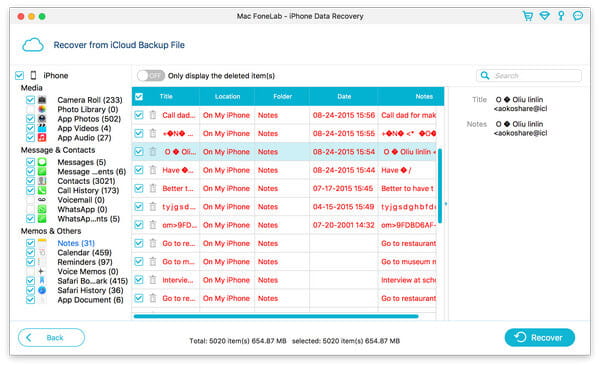
Step 2 Download notes from iCloud backup
Select "Notes"from the pop-up window, and click "Next". Within moments, it will scan your selected iCloud backup data. After scanning the iCloud backup, select the notes you want to get back, and click "Recover" to save them as an HTML file on your Mac.
Tip
With the app, you can sync notes from iPhone to Mac, and view them directly in HTML. However, if you want to import the notes into Notes app on Mac, then you need to do more steps in Part 3.
Notes in TXT, RTF, RTFD and HTML will be acceptable for being imported to Notes app on Mac. Let's check the steps as below:
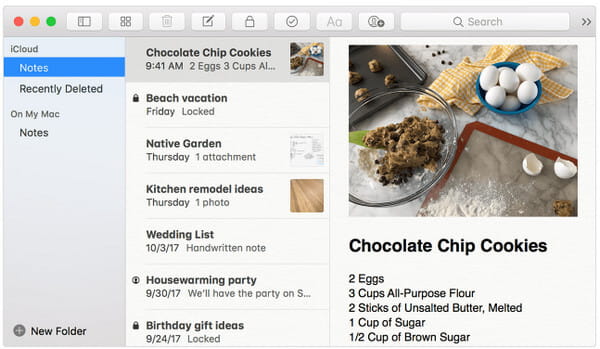
Step 1 Run "Notes" app on Mac > Choose to store your notes "On My Mac" or in "iCloud". Select the folder in the account that you want to use.
Step 2 Click "File" > "Import" in the menu bar > Select the file or folder > Click "Import" to put the exported notes on your Mac from iPhone.
Here, we need to summarize up that syncing notes from iPhone to Mac may be the easy thing that Apple told you. However, the difficulty is how to get the deleted notes from iPhone to Mac. This page exactly explains the solutions to you.
If you want to sync iPhone notes to Mac now, just do it.

December 17, 2020 09:00 / Updated by Louisa White to Recover iOS Data
 How to Convert Keynote to PowerPoint
Want to convert Apple Keynote to Microsoft PowerPoint? Want to view Keynote in PowerPoint? You can learn from this article.
 How to Restore Lost or Deleted Contacts on iPhone
Lost or delete contacts on your iPhone 4S/5/5s/5c/6/7/8/X? Don't worry, read this article and learn how to recover iPhone contacts on Mac in detail.
 How to Recover Notes from iCloud
This article shows how to restore the deleted iPhone notes on iCloud after updating a new iOS version or mistakenly deleting them.
