Video creation is one of the trending activities many netizens are participating in. Everyone is showcasing their talent, skills, and creativity in making videos. One of the best effects that a video enthusiast can apply is the reverse or rewind effect. It allows the maker to highlight humorous and funny moments, making the video more entertaining and catchier.
On the other hand, we all know that Premiere is a jack of all trades, allowing you to create incredible videos through authoritative tools and options. Professionals recommend them, especially if you are making professional videos. Nevertheless, you can use it to reverse your videos and make a rewind video effect. Here, we will demonstrate how to make a video go in reverse in Premiere. Read through the post.

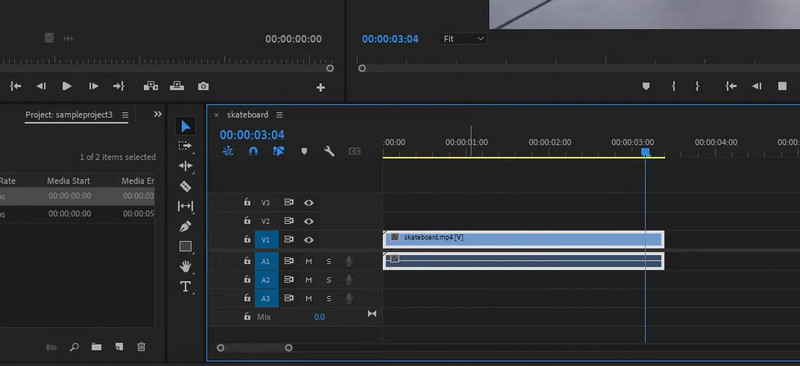
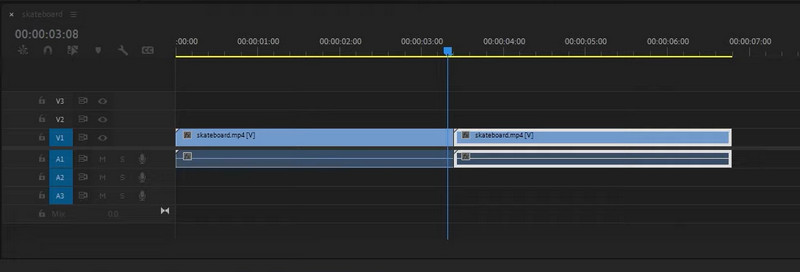
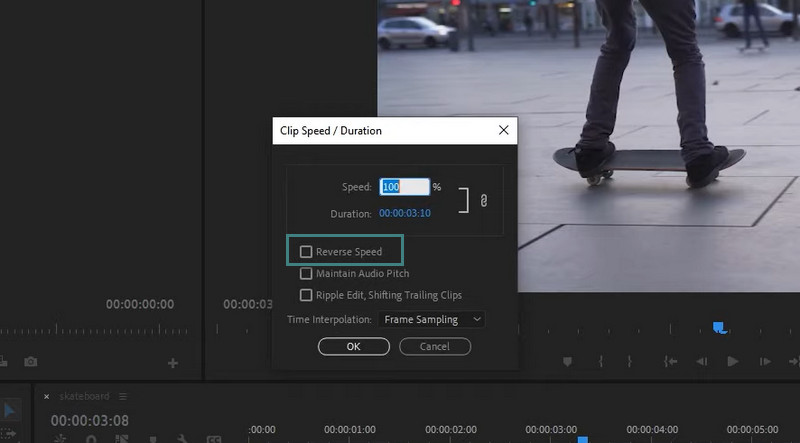
Adobe Premiere is considered an industry standard for video editing due to its powerful capabilities, nonlinear editing interface, and many more. It works on Mac and Windows computers, making it one of the best cross-platform video editing software. On top of that, it comes with a reverse effect that reverses video footage to help you rewind fast-moving sports action, highlight funny moments, and make a miracle effect with crumpled or cut paper. Without further explanation, here are the steps you should take to learn how to make a video play in reverse in Premiere Pro.
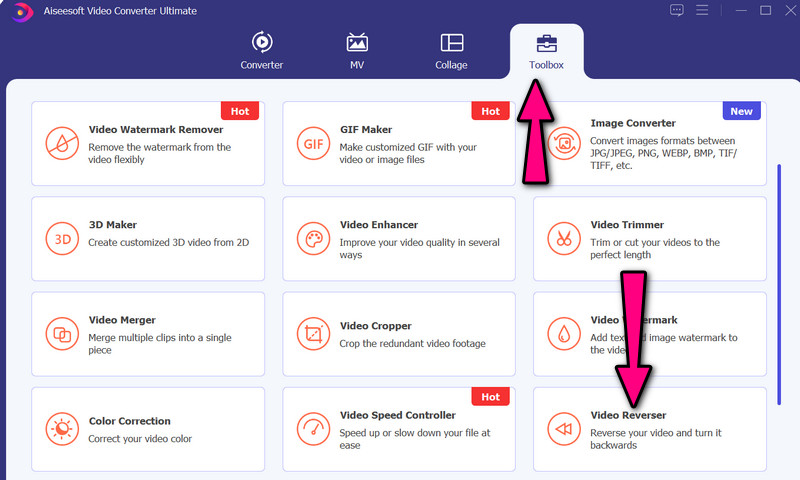
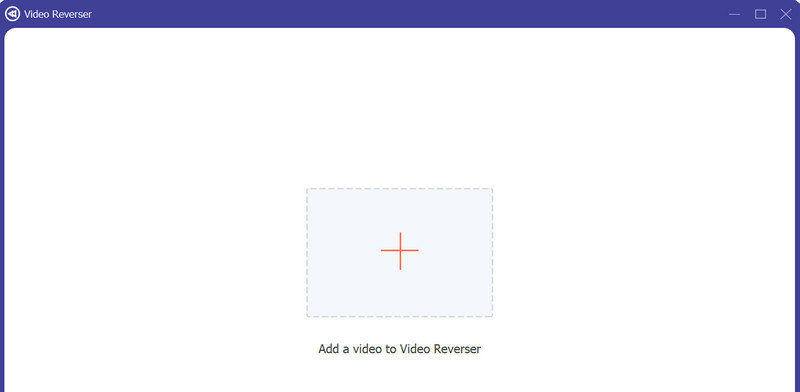
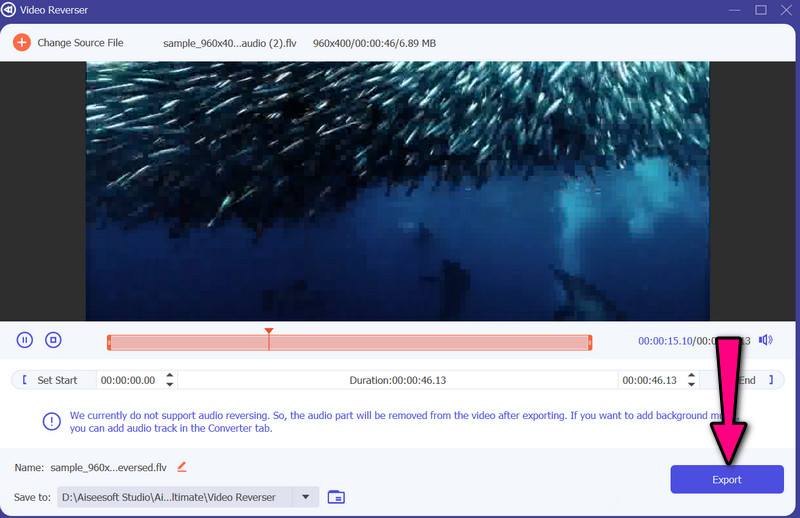
While Premiere Pro seems to be a great option for editing clips and footage, it can be very challenging and intimidating, especially for non-professionals. Video Converter Ultimate aims to help you edit videos without any complicated settings. After adding the video, you wish to reverse to the program, it will do the rest of the job for you. Moreover, there is no quality loss after the video is exported and reversed. Now, if you want to access more tools, like editing the orientation, merging other videos, cutting the length, and more, the tool has them for you. Therefore, here is a step-by-step tutorial on how to reverse a video clip in Premiere Pro.
![]() 100% Secure. No Ads.
100% Secure. No Ads.
![]() 100% Secure. No Ads.
100% Secure. No Ads.
If you are still not comfortable with reversing videos, you can go ahead and check out some tips and tricks. These will help you create a stunning reversed video to rewind footage.
Can I reverse videos online?
Yes. There are programs that will help you to reverse videos with the help of web-based tools. That includes Clideo, which is an online tool offering a lot of tools, such as reversing videos.
Does reversing a video have a quality loss?
If the video already has a low quality, expect that the output will be of low quality as well. Garbage-in-garbage-out. Nevertheless, you can expect that the quality will be retained when you use the tools introduced above.
How can I rewind videos on my iPhone using iMovie?
Unfortunately, the iMovie on iPhone does not support reversing videos. On the other hand, you can use the Mac version of the tool to reverse videos with iMovie on your Mac computer.
Conclusion
See, it is quick and easy to learn how to rewind a video in Premiere Pro. That is the case because you have the right solution. On the other hand, you may have trouble navigating this tool, especially if it is your first time. Hence, we provided a contingency plan which is using a simple yet effective tool, none other than Video Converter Ultimate. Ultimately, the decision is up to you on which tool fits your needs well.
 How to Reverse Video Clips with After Effects
In this After Effects tutorial, we show you my favorite way to reverse a video clip with After Effects in detail. Follow it to get what you want.
 3 Easiest Ways to Reverse a Video on TikTok on Computer/Mobile
You can reverse a TikTok video that you've recorded or an existing video on iPhone, Android phone or computer if you follow our concrete guide.
 How to Play a Video in Reverse on iPhone/Android/Computer
How to play a video in reverse on iPhone? How to reverse a video using Premiere Pro? Learn 3 ways to play a video in reverse on iPhone, Android and PC/Mac.

Video Converter Ultimate is excellent video converter, editor and enhancer to convert, enhance and edit videos and music in 1000 formats and more.
![]() 100% Secure. No Ads.
100% Secure. No Ads.
![]() 100% Secure. No Ads.
100% Secure. No Ads.
