The X version of Final Cut Pro is so cool with its flexibility, easier and more power, and can do all of this cool stuff Avid can't. Unfortunately, when it comes to Panasonic P2 MXF files, it fails. P2 MXF video format from Panasonic professional camcorder such as Panasonic AJ-HPX 300, Panasonic AG-HPX170 and so on is a special format and don't have the native support from FCP.
To import MXF to FCP, an economical and useful way for Mac users is to convert MXF video to Final Cut Pro X natively formats with the help of MXF conversion software.
Aiseesoft Free MXF Converter for Mac is such a software utility that can help Mac users import P2 MXF files into Final Cut Pro without rendering time with fast speed and high quality. This MXF to FCP Converter for Mac also provides simple editing functions for you and allows you to set the video/audio output parameters to get customized video effect.
Here we will show you how to import MXF to Final Cut Pro supported format step by step.
Step 1 Download and install Free MXF Converter for Mac
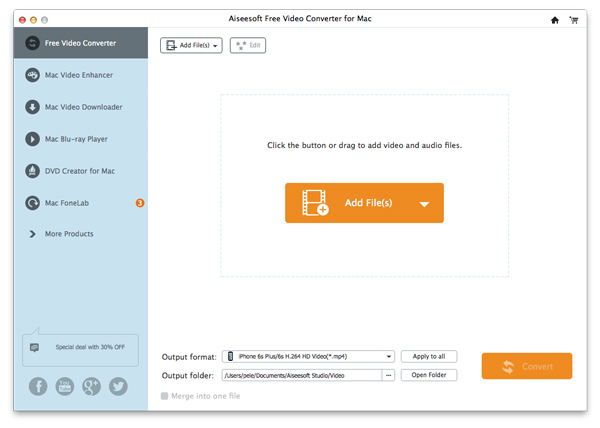
With the download button above, free download and install this free MXF to Final Cut Pro converting software on your Mac. Launch this MXF video converter and then connect your camcorder to it. You will see the interface as below.
Step 2 Import MXF files
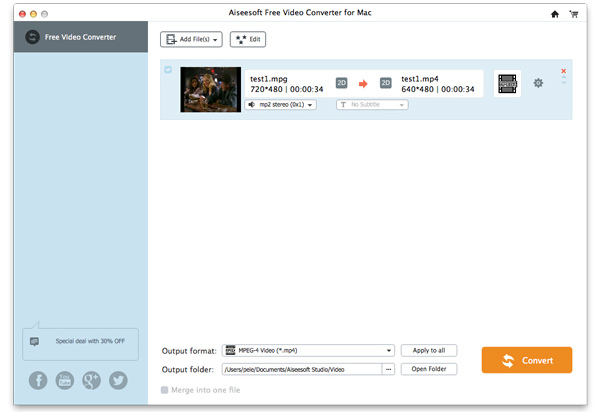
Click the Add File button at the top right of the main interface. In the open window, select the MXF video file from Panasonic P2 card. You can also transfer MXF files from your camcorder to Mac Hard Drive before loading.
Step 3 Simply edit MXF video
After importing files, you can do some basic editing before the final MXF to Final Cut Pro conversion. Many frequently-used video editing featurea are designed in this tool. You can clip video to only keep the useful parts, crop video to remove black edge, combine two and more video clips into one new file, and more. With the video converter and editor, you can easily output a video you really like. You don't even need to use the Final Cut Pro.
Step 4 Choose output format
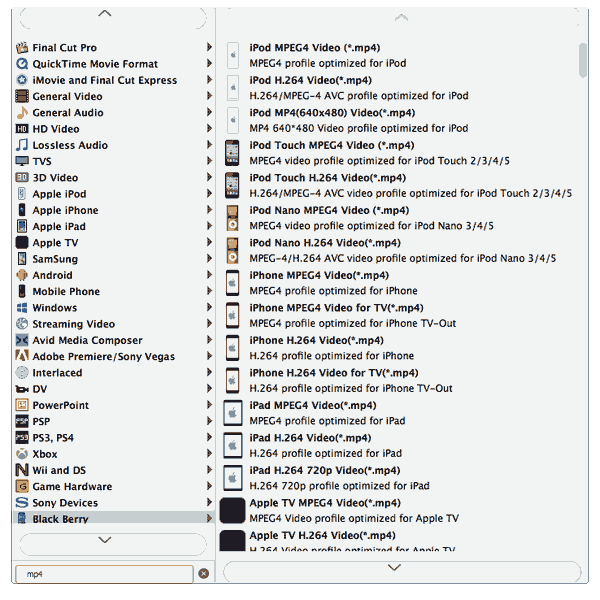
When all editing and settings are done, click the Profile button to choose the suitable output format you need from the drop-down list.
Also, you can click the Settings button and set detailed output parameters in the open window such as Video Encoder, Frame Rate, Sample Rate, etc.
Step 5 Convert MXF to Final Cut Pro supported format
When you finish the settings, click the Convert button to convert MXF to Final Cut Pro supported format. After that, click the "Open Folder" button to get the converted file and then import the converted MXF file to Final Cut Pro.
If you want to edit/split MXF videos in Final Cut Pro, you have to convert MXF to Final Cut Pro supported video format. After reading this post, you have already known the best free way to make the MXF file conversion. Actually, for some basic video editing works, you can directly do that in this free video converter.
If you still have any question, you can leave us a message.

July 09, 2018 07:27 / Updated by Jenny Ryan to Convert Video
 Tips and Tricks to Get Final Cut Pro for Free
Final Cut Pro costs $299.99. It is possible to get free Final Cut Pro? This post shows you some ways to get Final Cut Pro for free.
 How to Do Final Cut Pro Slow Motion
Want to use Final Cut Pro Slow Motion? Learn how to slow motion your movie in Final Cut Pro from this post.
 Sony Vegas VS Adobe Premiere, Which is Good for You
Sony Vegas VS Adobe Premiere, which one is better? Looking for a better video editor, you may want to learn more about Sony Vegas and Adobe Premiere.
