Getting Started
Introduction
FoneEase is a one-stop data management assistant that makes your mobile experience easier. It shatters the boundaries of operating systems and devices, offering a reliable approach to syncing, transferring, managing, and backing up data.
With FoneEase, you can:
• Transfer data effortlessly between iPhone and Android, mobile devices and computers, and iOS devices and iTunes.
• Backup and restore data from your phone to your PC safely and easily, and then restore it to any compatible device, so that your data is always with you.
• Manage your phone data more conveniently through a desktop screen. You can delete, edit, preview, or rename files on mobile devices using your computer.
Part 1. Transfer Data
In this modern era of technology, we use various devices for storing images, videos, contacts, and critical data. However, moving data from mobile to mobile or from mobile to computers comes with hassles of compatibility issues, slow transfer speeds, and limited transfer tools. Hence, there arises a prominent need for an efficient, hassle-free, and multi-platform tool for data transfer across multiple devices. Let’s learn now!
Necessary Connection Steps
Whether you transfer data between phones and computers, or back up, restore, or manage phone files, Step 1 & Step 2 are needed to create a connection between FoneEase and phones.
Step 1. Open the Program
Download, install, and launch FoneEase from the official website.
Step 2. Connect Phones to Computer
Connect two phones to your computer via USB cables or wireless Internet. (If you want to use the wireless connection, click My Device > Wireless to see the guide.)
Whether the way you choose is, after connecting, your phone will remind you to authorize the connection.
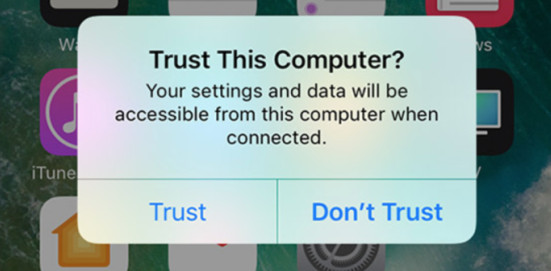
If you use iPhone:
There will be a pop-up question - “Trust This Computer?” Please click Trust and input your passcode.
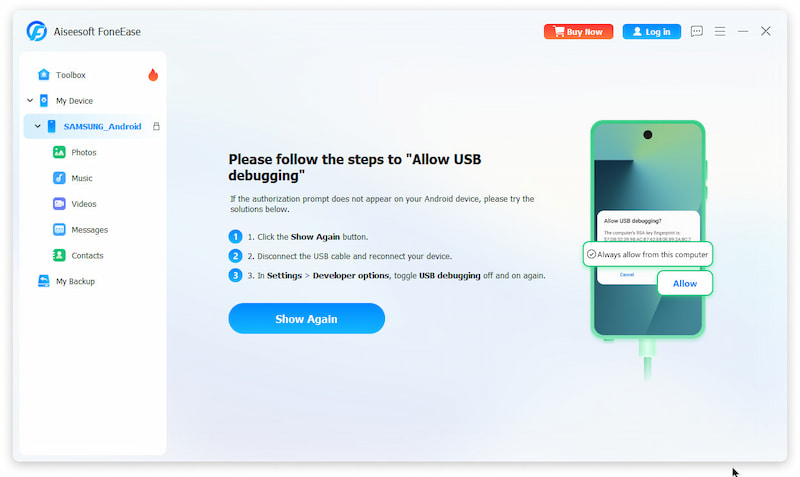
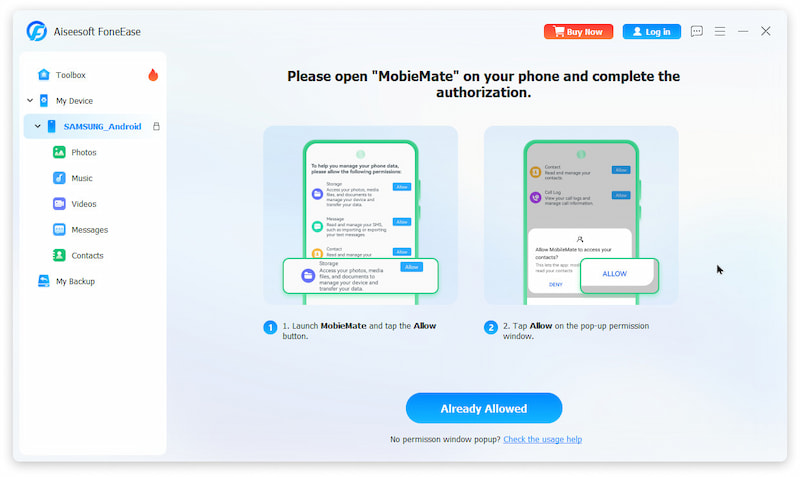
Or you use Android Phone:
Follow the screen guide to allow USB debugging, which is crucial for the connection between Android phones and computers. Then, a necessary firmware called MobieMate will be installed on your phone. Follow the screen guide to install and authorize MobieMate file access and click Already Allowed.

After the connection process, you can continue to operate other steps according to your different needs.
a. How to Transfer Data between Two Phones
The subsequent operations depend on Step 1 and Step 2 in Necessary Connection Steps mentioned earlier. If not completed yet, please return to the top of the page for configuration.
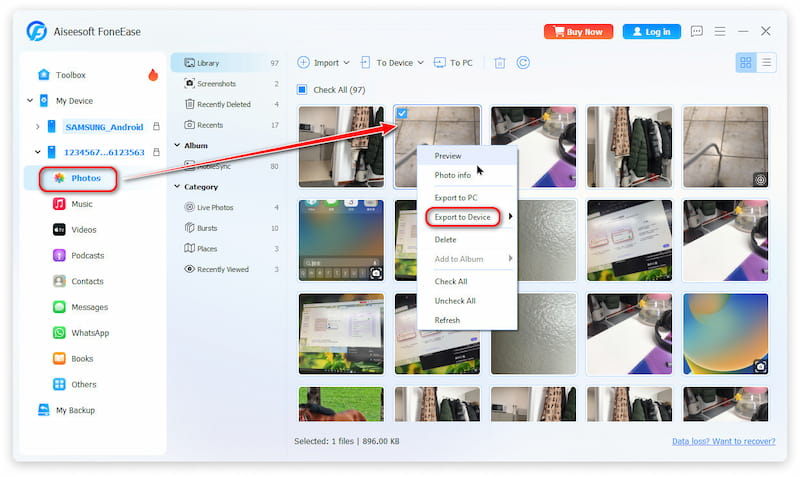
Step 3. Choose the Targeted Files
In the left panel, click the source phone to expand all supported apps and data types. Click the App from which you want to transfer files, and select the specific file.
Step 4. Start Transferring
Finally, right-click on the file, choose the Export to Device > the definition phone. Instantly, the transfer process will be finished successfully!
b. How to Transfer Data from Phone to Computer
The subsequent operations depend on Step 1 and Step 2 in Necessary Connection Steps mentioned earlier. If not completed yet, please return to the top of the page for configuration.
Step 3. Choose the Targeted Files
In the left panel, click the source phone to expand all supported apps and data types. Click the App from which you want to transfer files, and select the specific or all files.
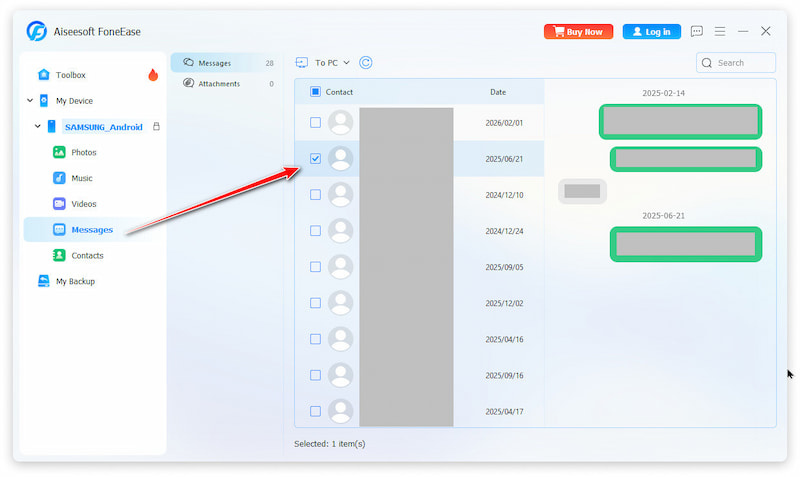
Step 4. Start Transferring
Finally, click the To PC downlist button in the top menu and choose the desired location. After a while, the transfer process will be finished successfully!

c. How to Transfer Data from Computer to Phone
The subsequent operations depend on Step 1 and Step 2 in Necessary Connection Steps mentioned earlier. If not completed yet, please return to the top of the page for configuration.
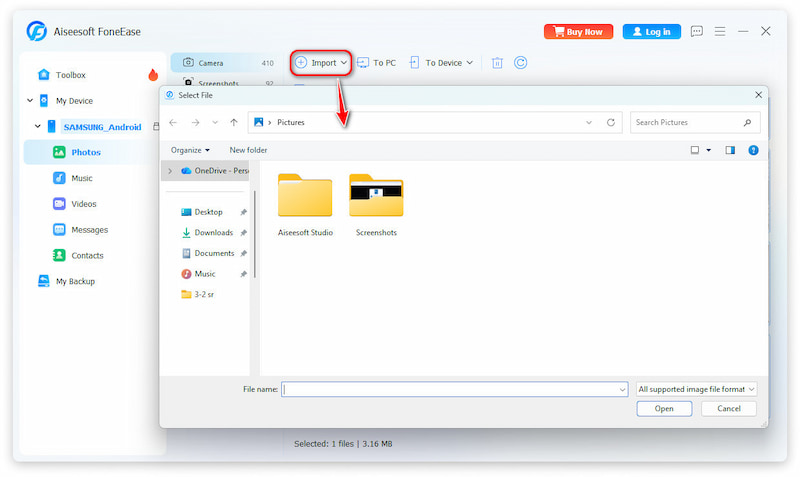
Step 3. Import Files
Click the Import button on the top, and you can skim all files on your computer. Select the files you want to move to your phone.
Tips: If your phone is iPhone, you have two ways to achieve the import operation.
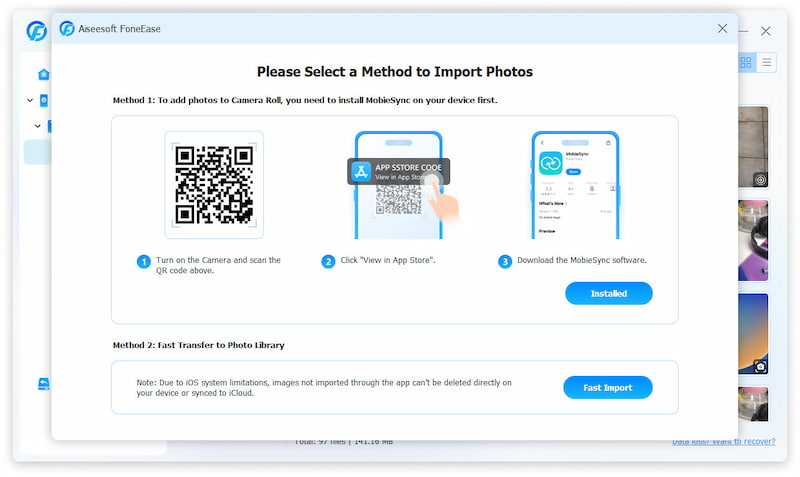
Option 1 (Recommended). You need a firmware, MobieSync. to finish the importing. Allow this installation and authorize it as the screen tutorial.
Option 2. You can also choose direct import without firmware. However, in this way, you can only delete the transferred data through FoneEase program afterwards, not directly via phones.
Just a moment, files from PC will appear on your mobile devices.
Part 2. Backup & Restore Data
The subsequent operations depend on Step 1 and Step 2 in Necessary Connection Steps mentioned earlier. If not completed yet, please return to the top of the page for configuration.
Step 3. Choose the Targeted Files
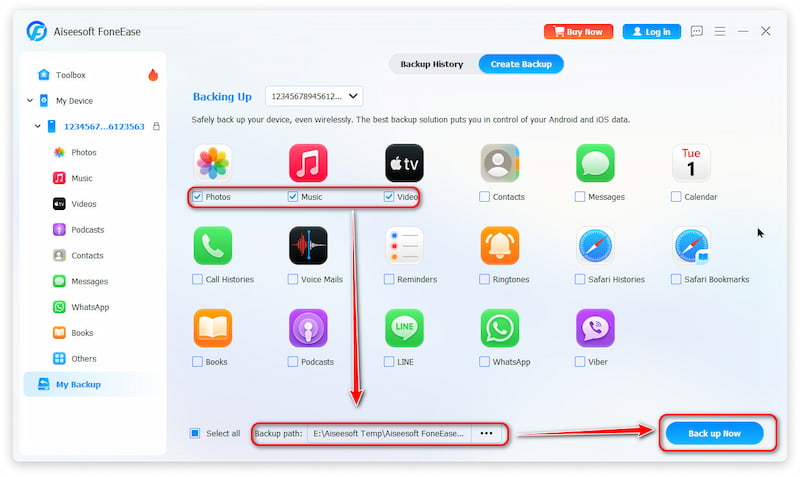
After connection, choose the My Backup section in the left panel. Then, choose Create Backup and pick the file box to be backed up.
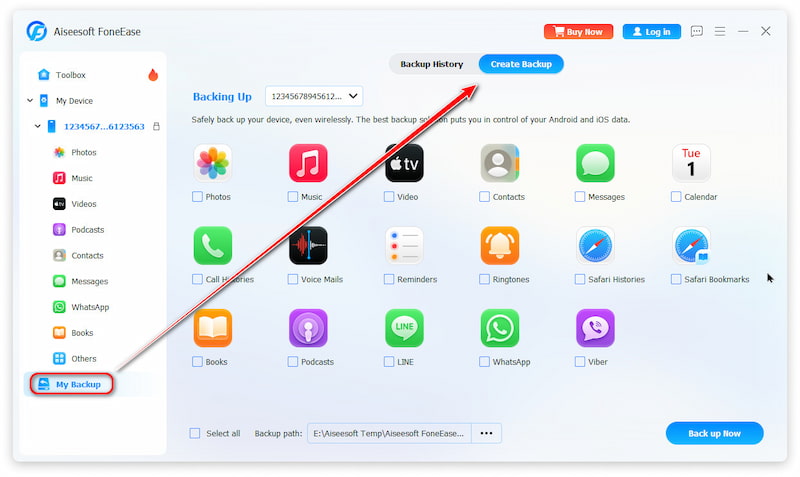
Step 4. Finally, choose the Backup path in the bottom-left corner and click the Back up Now button in the bottom-right corner.
Part 3. Manage Phone Data on Computer
The subsequent operations depend on Step 1 and Step 2 in Necessary Connection Steps mentioned earlier. If not completed yet, please return to the top of the page for configuration.
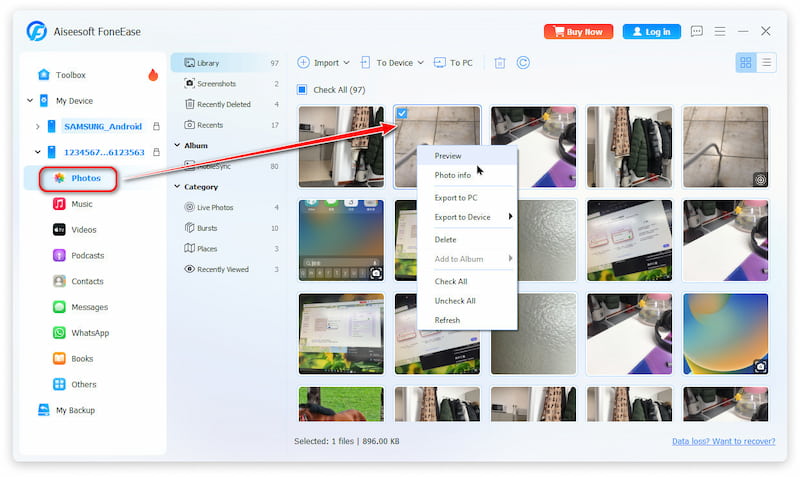
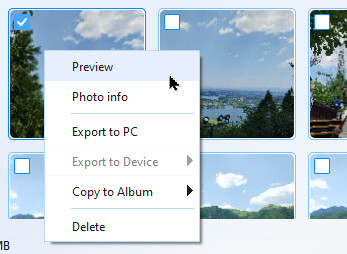
Step 3. One-click Management
Locate the App > file to be managed, right-click it, and you can see the Preview/Info/Export/Delete function options. With the desktop screen, managing numerous files on phones will become convenient! (Note: When you want to delete something from your iPhone, a firmware MobieSync is needed. Please follow the guide to authorize it.)
Tips: You can also add new files on your computer to mobile devices. Just follow the steps in Part 1 - c. How to Transfer Data from Computer to Phone.
