An external hard drive can be a lifesaver for storing and transferring files. However, there are times when your Mac might not recognize it. This can be frustrating, but there are several troubleshooting steps you can take to resolve the issue of external hard drive not showing on Mac. Follow us to read more!
Multiple reasons can cause this; here are some leading ones:
• Mismatched drive format - some drive file system formats, like NTFS, are not compatible with Mac.
• Damaged USB cables or ports can block regular connections.
• There are issues in the drive itself.
• Some software glitches or bugs will prevent the drive from being recognized.
• Some external hard drives need an additional power supply, especially when they are connected to a USB hub.
This method only works when your hard drive is compatible with Mac and it’s in good condition.
When Mac’s settings are fine, you need to check or even clean your USB connection conditions.
• Test different USB cables and USB ports on this Mac.
• If necessary, use compressed air to clean USB ports to wipe any dust or debris.
• Test this external hard drive on different Macs.
Stands for nonvolatile random-access memory, NVRAM is a medium that stores local settings like volume, screen resolution, and hard drive information. Therefore, NVRAM is often the source of most hard drive issues. For example, the Mac may not detect your external hard drive. Here, you can try the following steps to reset it.
You need to notice that this can’t work if your Mac uses Apple Silicon.
Related to file, app corruption, startup, and external hard drive problems, this is Mac’s built-in disk repair tool to find any errors that may cause Mac not to read external hard drives and try to take action to fix them.
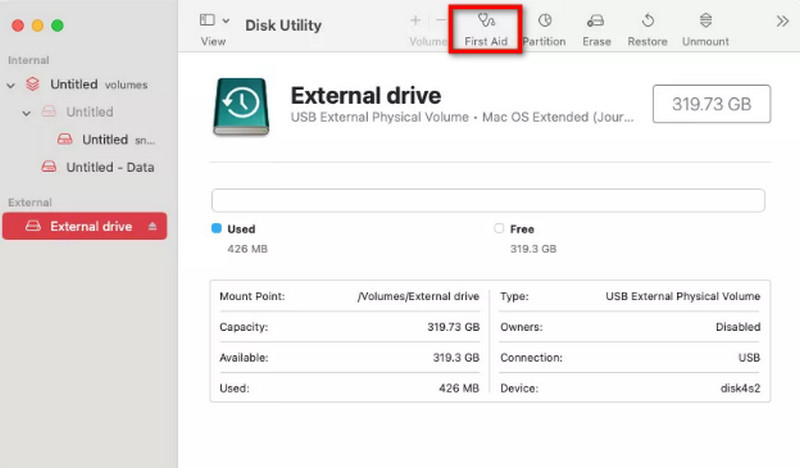

If First Aid detects any error, it will report it to you. For example, if it shows an “Overlapped extent allocation” error, it means some files in the hard drive are damaged. You can check them in the DamagedFiles folder and would better delete them.
If First Aid fails, there are two solutions. You can run this program again to fix your hard drive. Also, you can change the format of your hard drive to restore the present operating system. But you need to back up all the original data on your disk for recovery after the process finishes.
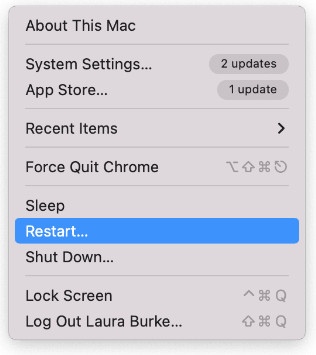
If there is no problem with your USB and hard drive, you can try to restart your Mac. Because even just a little glitch can make your Mac not show the external hard drive.
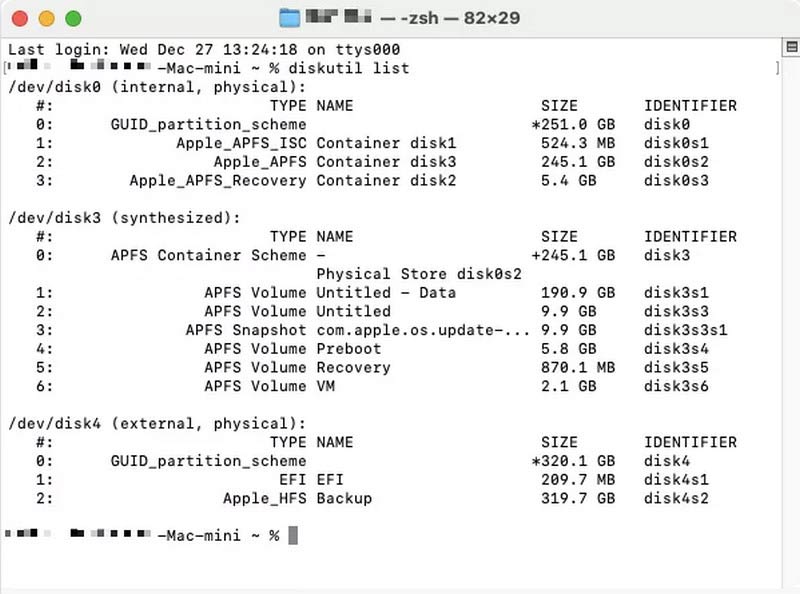
When all the above fail, there are also Terminal apps for regular users to solve this problem. Though it may be complicated to operate, the Terminal solution often works well. Here are some general steps of this method.
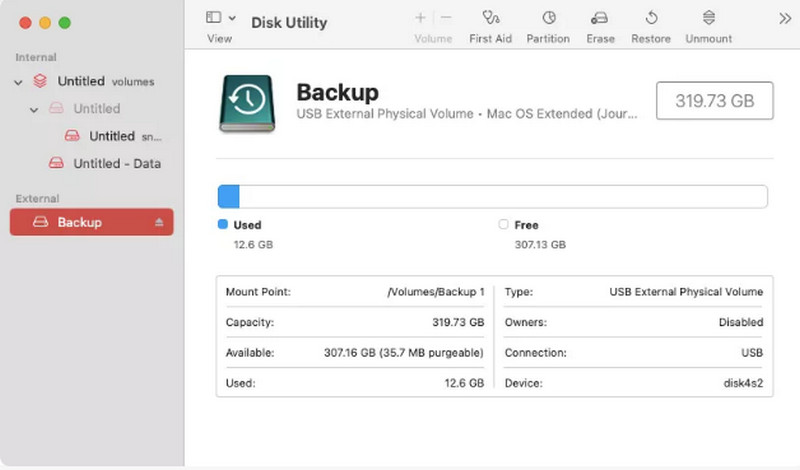
Disk Utility is a professional Mac program to solve this problem.
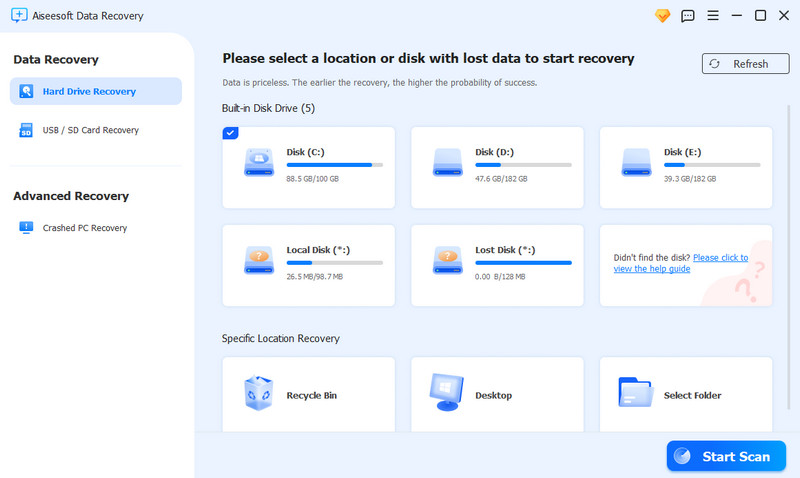
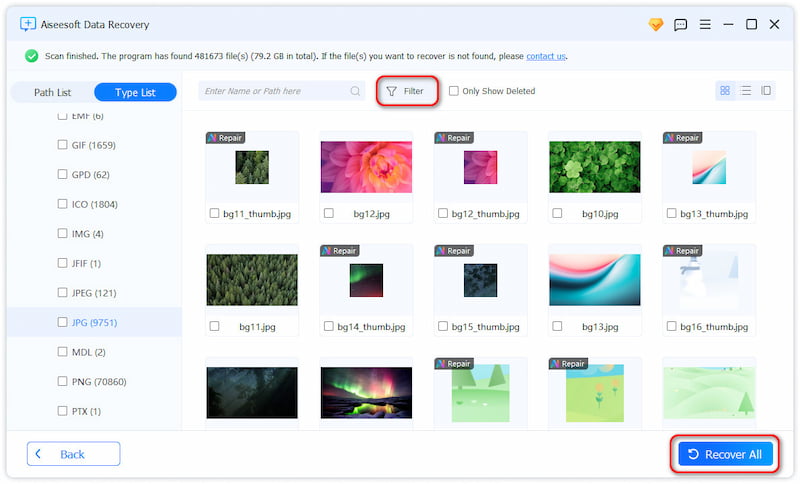
All the above methods are mainly to help your Mac show the external hard drive and process the internal data. However, what if your hard drive is damaged or the file system is corrupted? Here, we highly recommend a versatile tool to help you recover all lost data. Aiseesoft Data Recovery comes with the ability to recover all file types from any scenario. With a high success rate, you don’t need to worry about data loss anymore.
It’s easy to operate. All you need to do is download this software and select the file type for deep scanning. Aiseesoft Data Recovery offers a preview window for you to check clearly before recovery.
• Recover lost data in hard drives, computers, flash drives, memory cards, and more.
• Recover file types in image, audio file, document, video, email, etc.
• Super fast scanning speed with a thorough process.
• Reliable recovery tool without any share of important data to its server.
![]() 100% Secure. No Ads.
100% Secure. No Ads.
![]() 100% Secure. No Ads.
100% Secure. No Ads.
Why isn't my Mac finding my external hard drive?
It may be caused by poor connections, a corrupted file system, a damaged USB cable, or even the worst situation – a broken hard drive.
How to tell if a hard drive is corrupted on a Mac?
There are multiple phenomena for your reference: unusual noises, overheating, slow loading time, missing files, and system crashes. You can try different fixes to repair the damaged external hard drives.
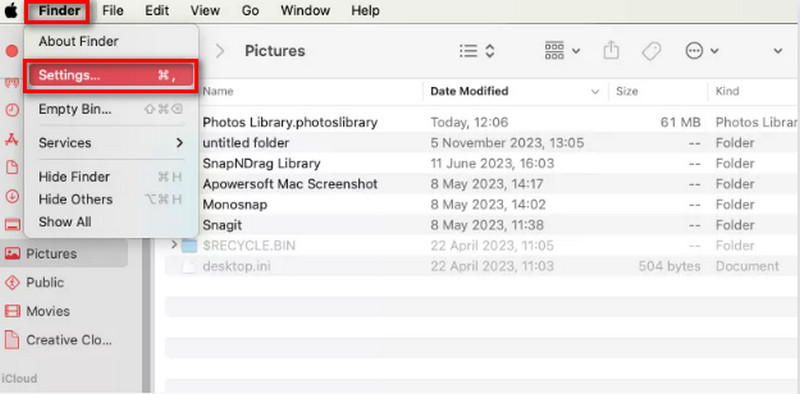
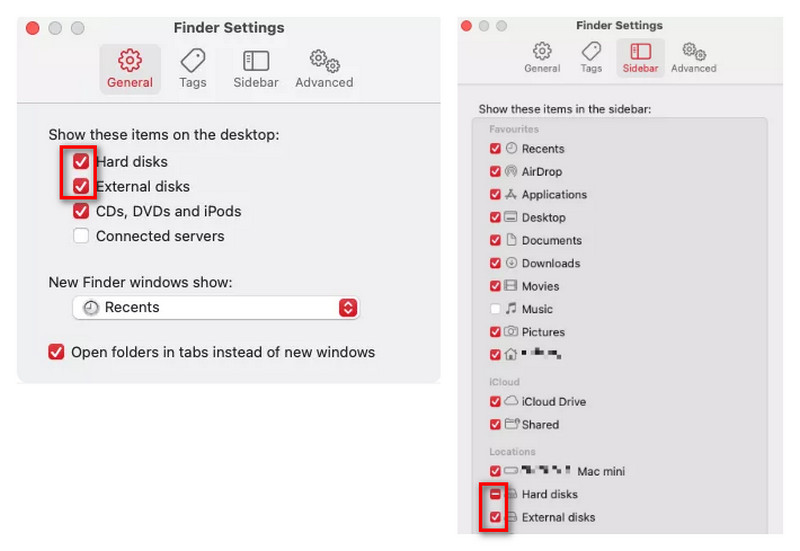
How do I force my Mac to find my external hard drive?
Go to Finder on the menu bar and select Settings from the scroll-down list. From the pop-up window, navigate to the General section and tick the box of External disks in Show these items on the desktop area. If not, you can conduct data recovery on Mac.
Summary
At last, external hard drive not showing on Mac can be a bothersome issue sometimes. But we listed 7 useful solutions to help you get rid of this trouble; you must be able to find one that suits you most. Also, we recommended a powerful data recovery tool, Aiseesoft Data Recovery, to manage all complex data recovery scenarios. You can download it for free and try it now!
 Top 5 Tips to Fix External Hard Drive Not Mounting on Mac
Why is the Seagate hard drive not mounting on a new Mac? Why my Mac won’t mount external hard drives? Fix the Mac not recognizing external hard drive issues.
 5 Solutions for Files Disappeared from External Hard Drive
Why have my files disappeared from an external hard drive? Figure out why files are not showing up on an external drive and get 5 tips to recover missing files.
 Get the 5 Best External Hard Drives for Mac in 2025
What is the best external hard drive brand for Mac? Will all external hard drives work with Mac? This post shares five great Mac external hard drives for you.
Aiseesoft Data Recovery is the best data recovery software to recover deleted/lost photos, documents, emails, audio, videos, etc. from your PC/Mac.
![]() 100% Secure. No Ads.
100% Secure. No Ads.
![]() 100% Secure. No Ads.
100% Secure. No Ads.
*Required field
*Please enter a valid email
