One of the biggest strengths of using a Mac is that you can access all data from all startup disks while you boot one of them.
That is also its demerit.
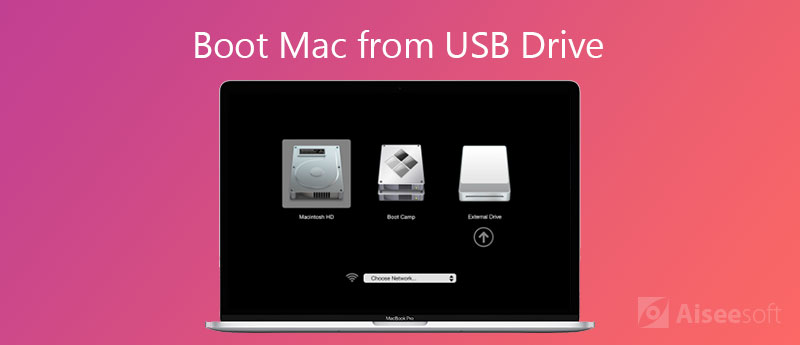
Mac starts from its internal disk by default, and you will get no entry to access your data once it won't' boot from the internal disk.
The solution to it is that you can boot Mac from an external hard drive.
Booting Mac from an external drive, e.g. USB drive, enables you to access all the content of your internal drive.
Moreover, the Mac computer can recognize compatible bootable contents from a startup disk. In other words, it is sure to install a Windows 10, Linux, a beta upgrade Mac OS version, etc., on a MacBook Air/Pro, iMac (Pro), Mac Pro/mini, etc.
That's what we shall talk about next, a detailed guide to boot Mac from a USB drive in 2 ways.
Booting Mac from a USB drive is an easy task, but it requires you to get all preparations well. Let's check what you should do before booting it.
1. Intel-based Mac that have Apple T2 Security Chip
The Apple T2 Security Chip is Apple's second-generation, which delivers new compatibilities to Mac. They are iMac Pro, Mac mini introduced in 2018, MacBook Air introduced in 2018 or later and MacBook Pro introduced in 2018 or later.
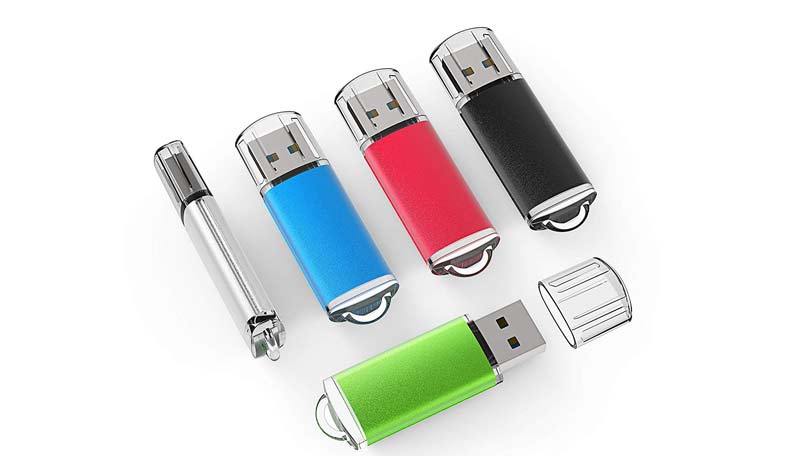
2. Get USB 3.0 with 16 GB and more
Bootable optical USB drive with a GUID partition type and an OS X installer or other operating systems.
USB flash drives are available in multiple ways. Most Mac computers have the USB 3.0 ports, so, you had better use a USB drive with supporting 3.0, which carries the faster read and write speeds.
Moreover, the USB drive should be left 16 GB or larger to install a complete copy of the operating system.
3. Backup Mac data
For avoiding any data loss, you had better backup your Mac data to other external drives.
4. Format USB drive with containing an operating system
A USB drive should be formatted with a GUID partition type, so that it can be used on Mac.
Note: A format of USB drive will wipe out all data within it. You should extract your important data firstly.
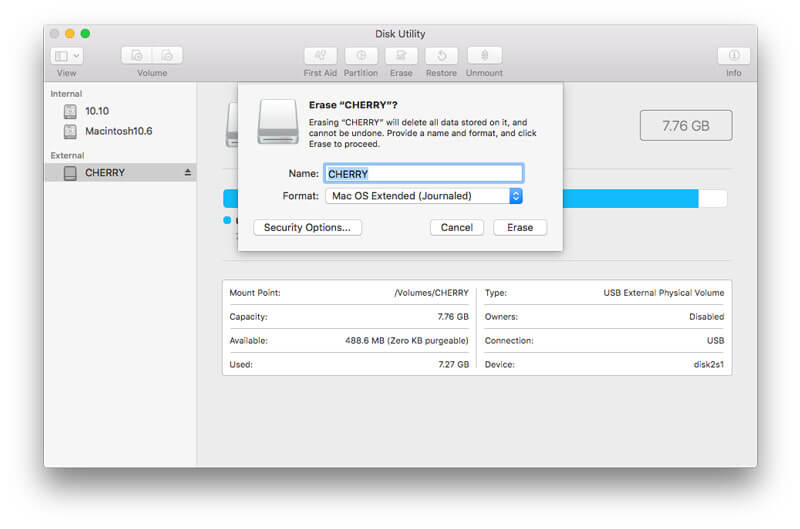
After the format process is done, quit "Disk Utility".
Then do not forget to download and install the operating system to this USB drive.
Once you suffer from data loss from formatted USB drive, just learn here to get the formatted drive recovery.
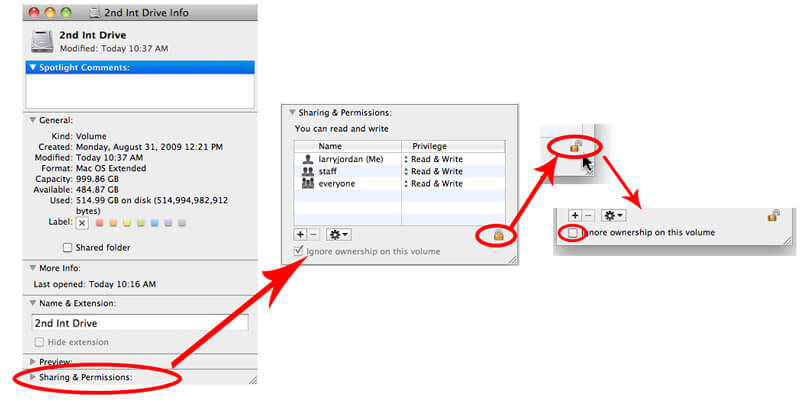
5. Enable ownership of your USB Flash Drive
For booting your Mac from a USB drive, you should grant the USB drive the specific ownership and permissions of files and folders.
Then close the window.
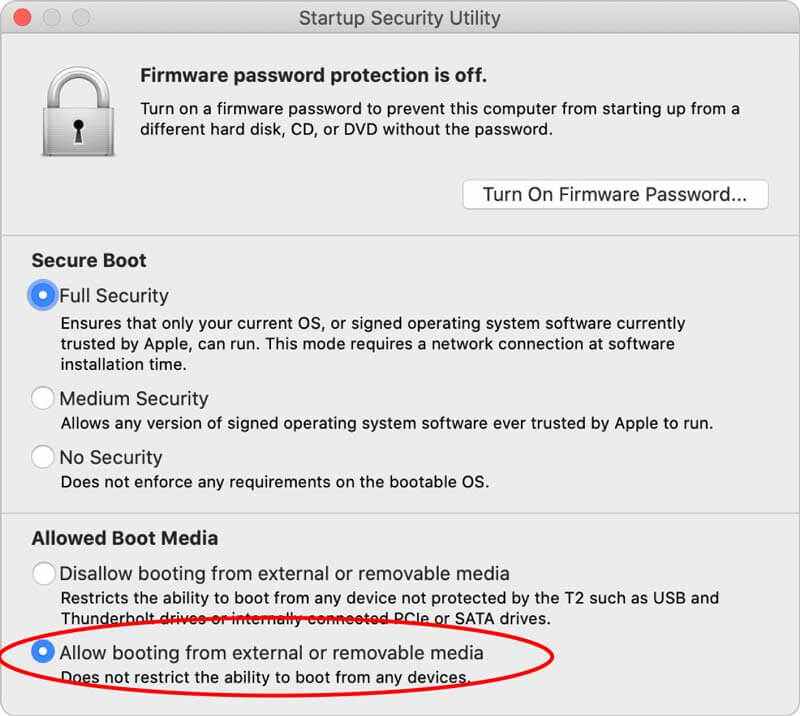
6. Enable external boot settings on Mac
Mac starting in 2018 is set by default to prevent your Mac from booting windows, Linux, BSD, Gentoo, Fedora, Atlas Supervisor, other Mac O/S/s on a USB, etc.
So, using the boot from USB drive on Mac, you should change the settings to enable it.
Ready for all the preparations?
Let's move the next part to startup Mac from a USB drive.
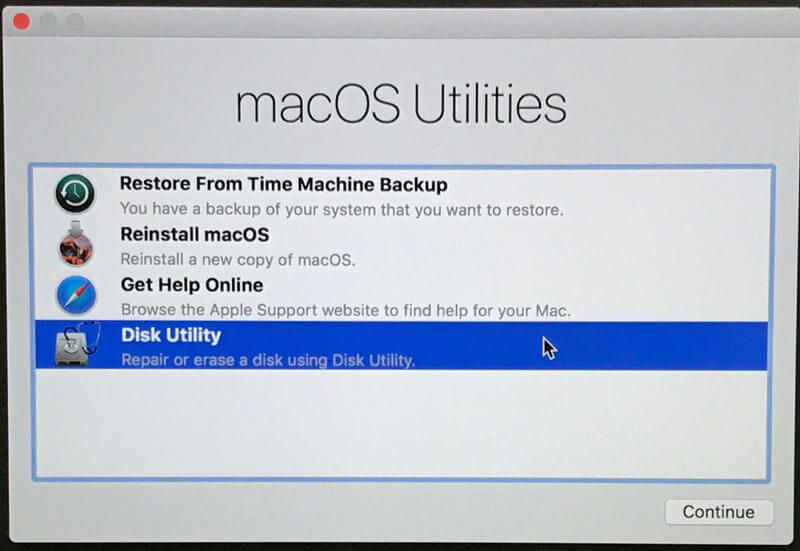
There are various ways to boot Mac from a startup disk. Also, you can boot Mac from a USB drive in different 2 ways.
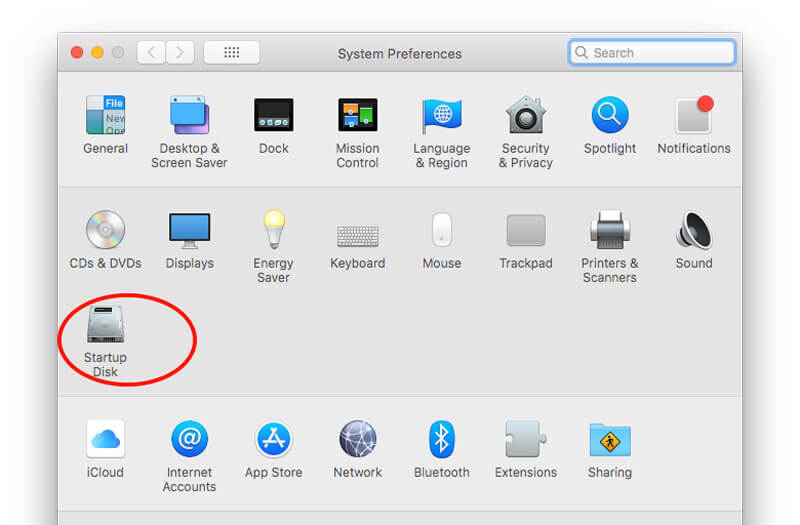
The fist method is using Startup Disk.
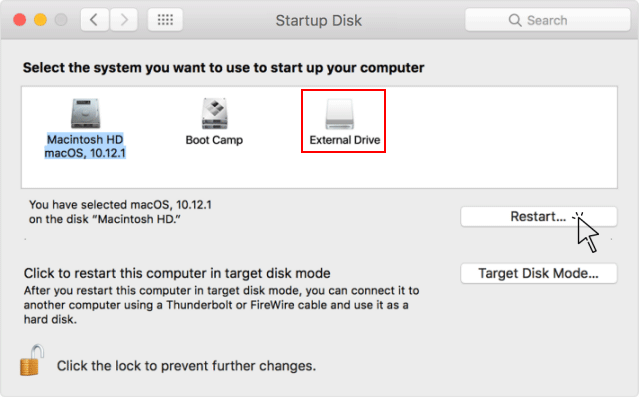
Then you can access all the data of unbootable disk on Mac from the bootable USB drive.
If you want to access the deleted data from the unbootable disk, then you will need Aiseesoft Data Recovery for Mac.
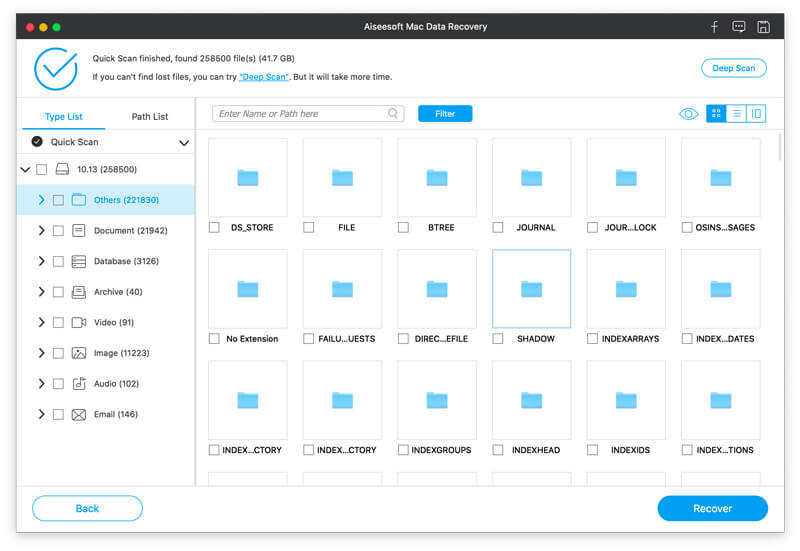
Aiseesoft Data Recovery for Mac is the professional data retrieval software from Mac internal and external hard drive, whether your Mac drive is accidentally deleted, formatted, system crashed, or emptied trash.
Downloads
![]() 100% Secure. No Ads.
100% Secure. No Ads.
![]() 100% Secure. No Ads.
100% Secure. No Ads.
Get the details here to get hard drive recovery from Mac.
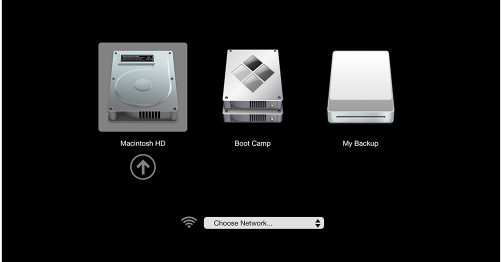
Another way of starting up Mac from a USB drive is using Startup Manager.
That's all there is to it.
Though Mac boots from its built-in hard disk, but the startup disk can be any storage devices that contain bootable contents. Creating a USB disk drive and install the different macOS, even Windows 10, Linux, etc., becomes available. The above is the detailed guide to startup Mac computer from a USB drive. It is not a hard task and you just get all the preparations well.
Now, it comes to your turn.
Have you succeeded in booting Mac from a USB drive?
Let me know by leaving your comments if any questions you have.
 5 Best Ways to Recover Unsaved Word Document Mac (Word 2019/2016/2017/2011/2013)
How to recover unsaved Word document on Mac? Whether you want to recover unsaved Word 2019/2016/2017/2011 document on Mac, or restore lost files, you can find best Mac data recovery here to help you.
 Best Free SD Card Recovery Software for Mac 10.7 and Above Users
It does not matter if your SD card got corrupted, deleted or formatted. You can recover photos, videos and more with the SD card recovery for Mac software in minutes.
 How to Fix Windows Didn't Load Correctly and Recover Lost Data
Have you ever met your Windows didn't load correctly? And how do you fix this error when you face it? If you don't know how to solve this issue, you can read and follow this article to get 4 useful methods.
Mac OS Tips
Reinstall Mac Mac OS Update How to Defrag A Mac Boot Mac from a USB Drive Boot Force Quit an App on Mac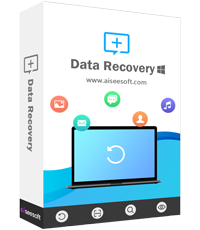
Aiseesoft Data Recovery is the best data recovery software to recover deleted/lost photos, documents, emails, audio, videos, etc. from your PC/Mac.
![]() 100% Secure. No Ads.
100% Secure. No Ads.
![]() 100% Secure. No Ads.
100% Secure. No Ads.
