TeamViewer, as the remote access, control and support solution, can remote in to computer or mobile phones anywhere, especially the COVID-19 spread in the globe. Since its upgrade of version 3.5, a session recording feature has been added to enhance meetings. It can record remote meeting session without any third-party recorder directly.
This tutorial shows you how to record remote meeting session on TeamViewer in 2 ways, with or without built-in recording feature.
The first recommended solution to record TeamViewer session is using the third-party recorder, Aiseesoft Screen Recorder.
Aiseesoft Screen Recorder is the desktop TeamViewer recorder to capture all activity on your screen. All the actions including music and video from remote computer will be recorded for the purposes of training, video tutorial, etc. Besides, it offers more customizable controls to adjust the recording quality, output format, hotkeys, recording modes, etc.
Downloads
Screen Recorder – TeamViewer Session Recorder
![]() 100% Secure. No Ads.
100% Secure. No Ads.
![]() 100% Secure. No Ads.
100% Secure. No Ads.
In brief, it is the must-have TeamViewer meeting recorder with powerful but easy controls.
Here's how to get started.
![]() 100% Secure. No Ads.
100% Secure. No Ads.
![]() 100% Secure. No Ads.
100% Secure. No Ads.
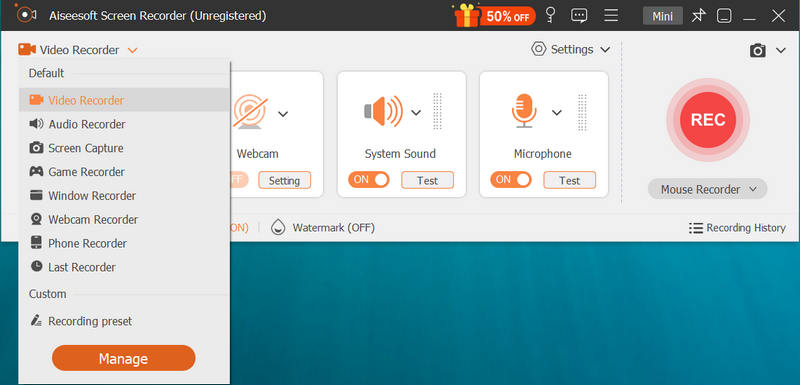
Initiate the window, select Video Recorder.
Select recording region: Full or Custom option lets you choose the recording region in the whole screen or customized region.
If you open TeamViewer in full-screen, then here you should select Full. Otherwise, click Custom to draw the customized region for recording.
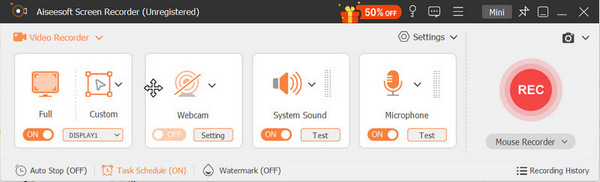
Select recording audio: Toggle on either Microphone or System Sound, or both of them to record sound from remote computer and yours.
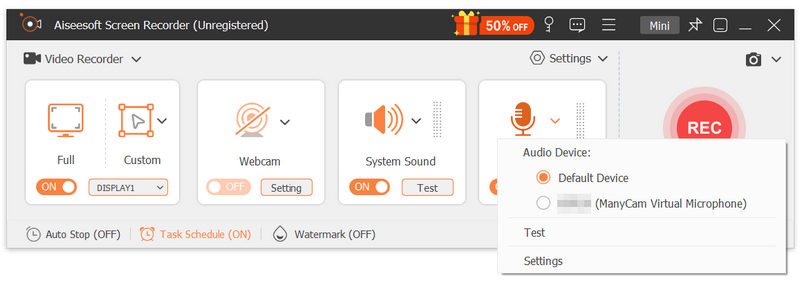
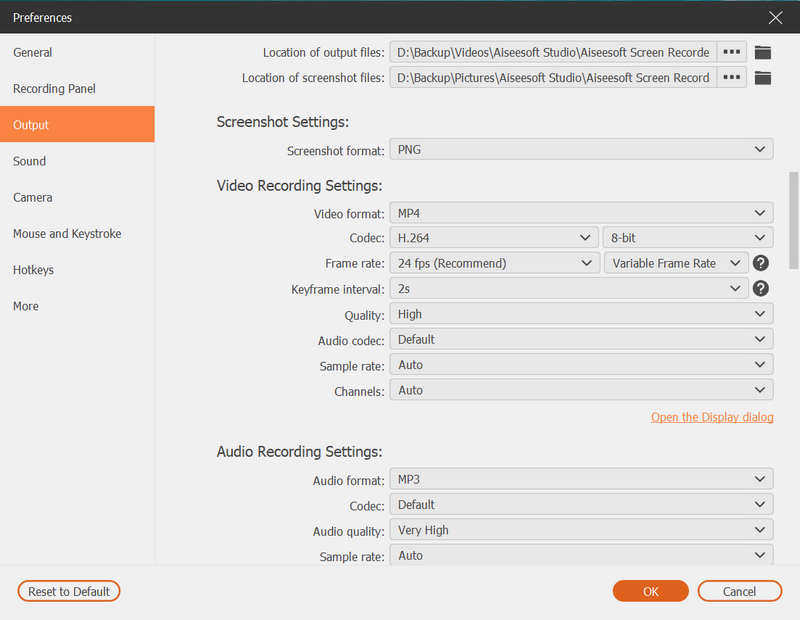
This software also offers other easy controls to change the hotkeys recording, output formats, recording quality, etc., by clicking the gear icon above Microphone.
The stop button in the float bar will put you into the preview window. The preview feature allows you to play the recording file directly before exporting. Clip feature also can get rid off the unwanted parts and click Save to choose the path to store the recording file.
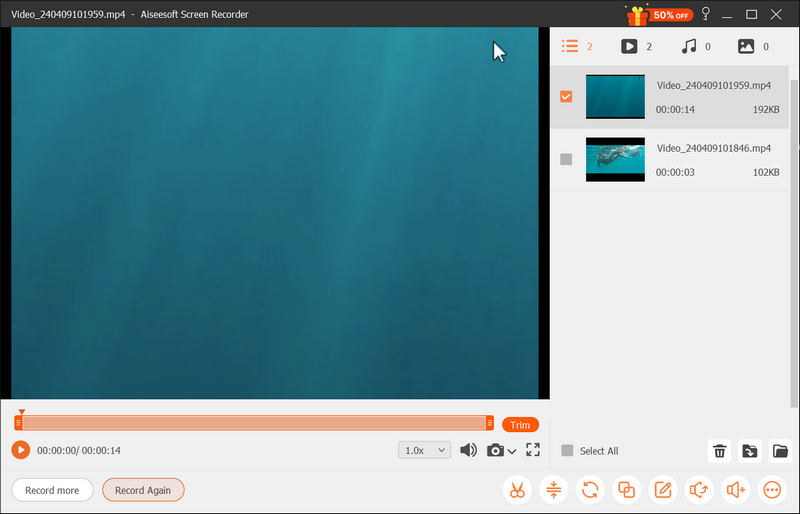
After saving it, you can upload the recording directly online. No matter how many incoming or outcoming sessions you have, you could record all of them easily.
Moreover, follow the steps above to record meeting from AnyMeeting, Zoom, WebEx, and more.
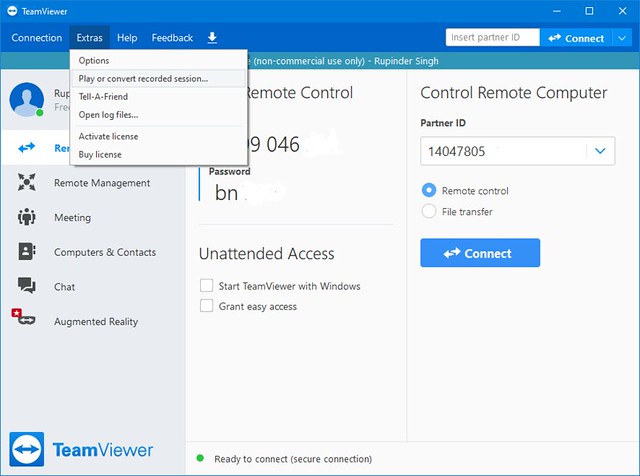
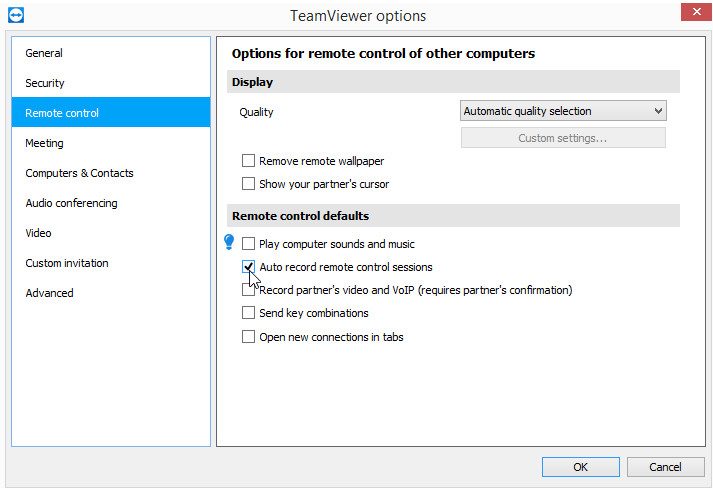
Introduced at the beginning, TeamViewer is built-in its session recording feature. Now, let's check how to record remote meeting on TeamViewer within app.


That's done to complete the TeamViewer session recording on computer. However, you may notice that the recording file is in the extension of .tvs, which can be opened by TeamViewer itself. For playing it or editing it further, you are recommended to convert session recording to AVI with TeamViewer 7 and above.
The above steps are making session recording manually on TeamViewer. It can also start the automatic recording whenever a remote-control session is started. The steps are pretty easy.
1. The conversion feature from TVS file format into an AVI file is available for Windows users currently. For Mac users, you need to get an AVI converter for Mac.
2. TeamViewer session recording should be granted the permission from the host and the remote computer users.
Where does TeamViewer save recordings?
TeamViewer meeting sessions are first saved into a temp folder. Once the session is closed, the recording file will be saved into the Session recording directory under C:/Users/username/AppData/Local/Temp/TeamViewer/Version.
Is TeamViewer free?
From the very beginning, TeamViewer has been available to everyone completely free of charge for personal. However, if you use it for business, it is free trial for 14 days.
How to fix TeamViewer recording missing on Mac?
Apple has introduced a security mechanism with macOS 10.14 (Mojave), macOS 10.15 (Catalina) and above. For recording TeamViewer session on Mac, you should grant access to TeamViewer on your Mac.
Conclusion
TeamViewer is the access tool to control other computers remotely. Session recording is the added feature, which can record computer activities remotely to keep all the points. This post is the detailed guide to recording session with audio on computer in 2 ways. You can use the built-in recording feature to capture the session but need to convert to AVI for playing on devices smoothly. In addition, you can also use the TeamViewer recorder app from third-party to record anything as export in a range of formats you like.
Which way would you try?
Do you have any other solutions to this issue?
Let me know by leaving your comments below.
 3 Easy Ways to Record Video for Google Classroom
What is Google Classroom video conference? How to record video for Google Classroom? How to record a video on Google Classroom as a student? This post share 3 simple ways to help you record Google Classroom video with high quality.
 Top 5 Mouse and Keyboard Recorders for Windows & Mac
How can I record my mouse and keyboard actions? Does Windows 10 have a macro recorder? What is mouse recorder? This post makes a list of 5 best mouse and keyboard recorders for you to record all your mouse and keyboard actions on computer.
 Web Launch Recorder Review and 3 Best Alternatives
What is Web Launch Recorder? Want to know more about the Web Launch Recorder? This post gives you a Web Launch Recorder review. Moreover, you can get 3 best screen recorder alternatives if you can't find or use the Web Launch Recorder.
Webinar Recording
Best Webinar Platforms Livestorm vs Zoom Record A Livestorm Webinar Meeting Recorder App Record Google Meet Record CyberLink Video Meeting Record TeamViewer Meeting Session Record RingCentral Meeting Record A Zoom Meeting Record A Webinar on Mac Record A Webinar on Windows
Aiseesoft Screen Recorder is the best screen recording software to capture any activity like online videos, webcam calls, game on Windows/Mac.
![]() 100% Secure. No Ads.
100% Secure. No Ads.
![]() 100% Secure. No Ads.
100% Secure. No Ads.
