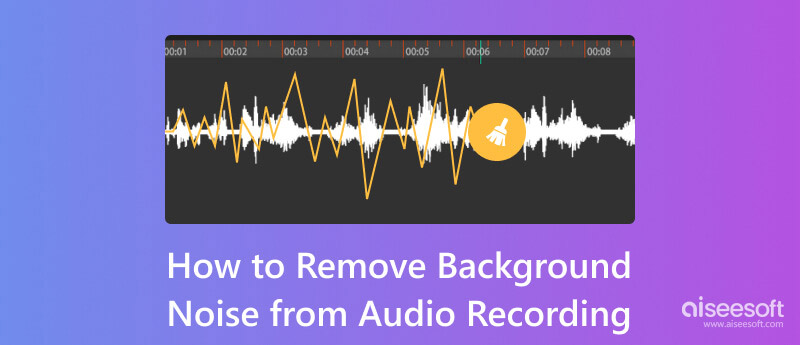
Everyone loves to record their voices for note-taking, singing, and voice-overs. Yet, there are unfortunate times when your recorded audio gets background noises. Removing this type of noise isn't difficult, even if you aren't a professional audio editor. A solution has already been posted online, but some are outdated. So, if you want to remove background noise from audio recording this year, read this article because we will teach you how.
Everyone loves to have a crystal clear audio recording, so it is essential to improve the audio quality of the recording. But thru that improvement of audio, background noises can't be removed; that is why you needed expertise. Some noises that can be generated when recording is environmental, electrical, and static. Even the quality of your audio recording is at best with the highest bitrate and best compression; with these noises, it will become non-sense to improve. For those who want to know how to remove background noise from audio recordings, you must prepare before and after the recording. Read the next part to know more information.
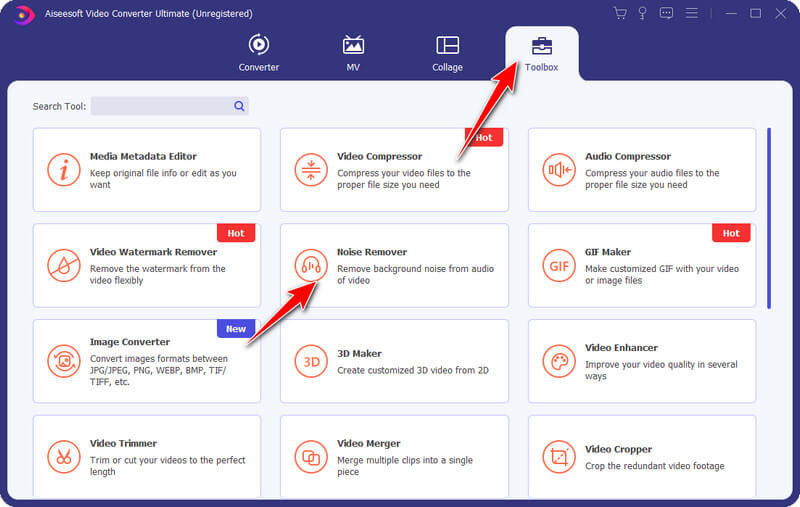
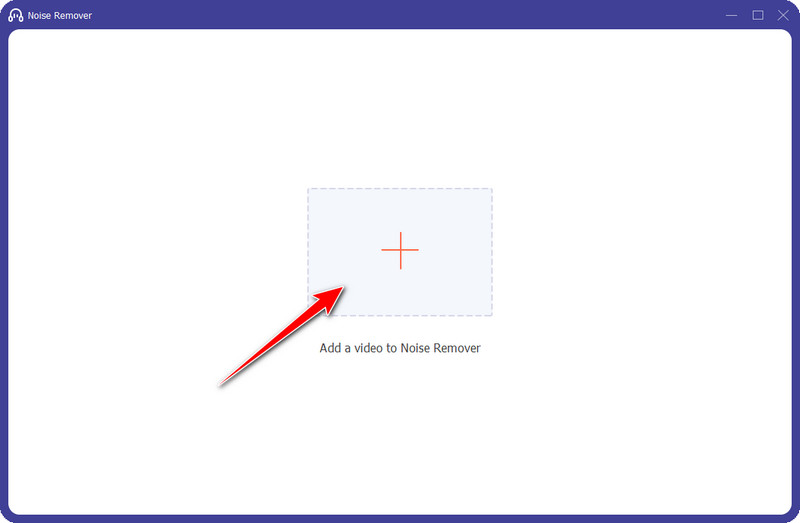
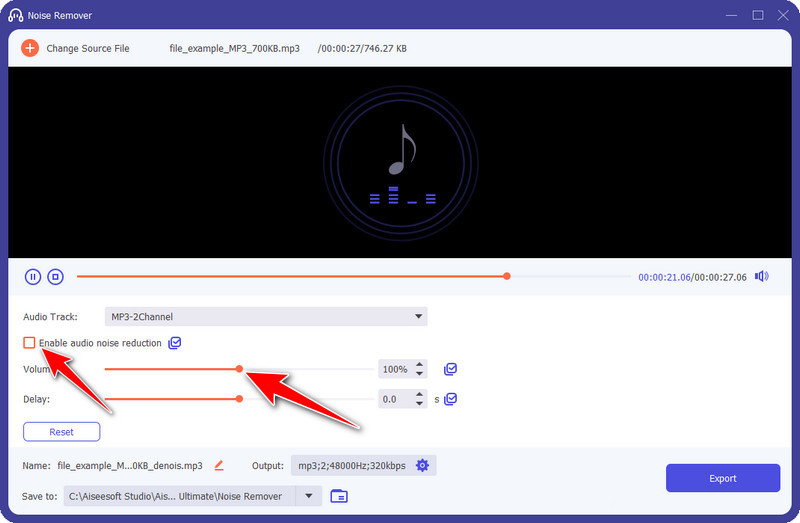
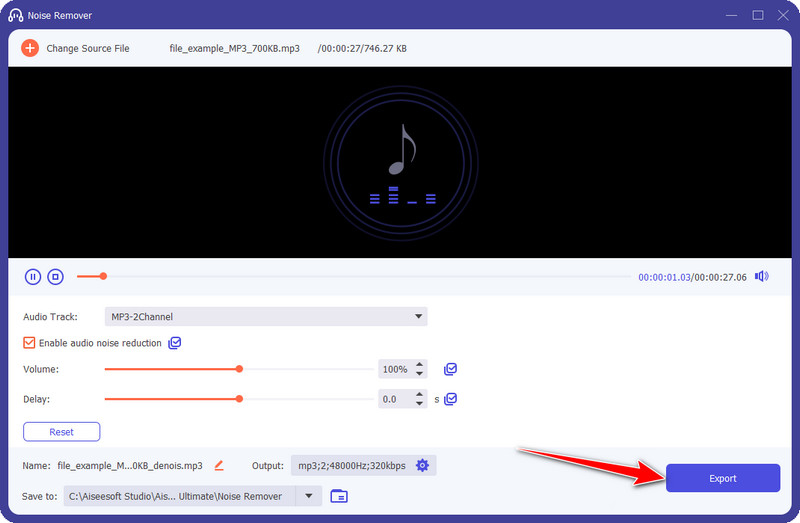
Aiseesoft Video Converter Ultimate has the best option for removing background noises from the audio clip. With this app, you can change the overall settings embedded into the audio track you will put here. If you need to change the audio format, you can use this app since it has the best-converting property in all of the converters on the market. But today, we will teach you how this app's noise-removing function works on the audio record you have saved on your computer.
![]() 100% Secure. No Ads.
100% Secure. No Ads.
![]() 100% Secure. No Ads.
100% Secure. No Ads.
In this part, we will go to introduce to you the best things you need to do before you start recording an audio clip. So, if you want to start a podcast or something similar that requires you to record audio, read the information we have added below to know the things to set up.
You should purchase a noise-cancelation microphone if you want a clean-up audio recording. With this device, your voice will have better clarity and automatically eliminate all the background noises it can catch while you are recording. Does setting it up difficult? You don't need to set it up because this feature is built inside the microphone, so you only need to plug it in and start recording. If you decide to purchase, we have an unarranged list of microphones you can purchase for your recording needs.
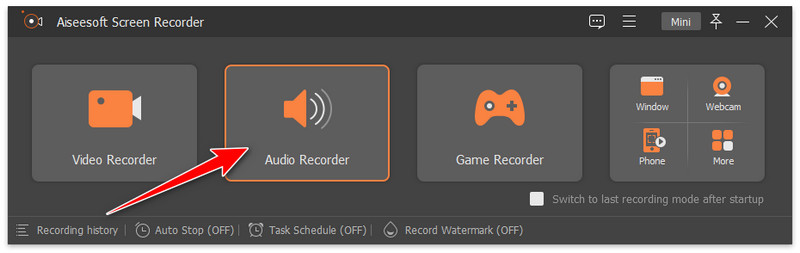
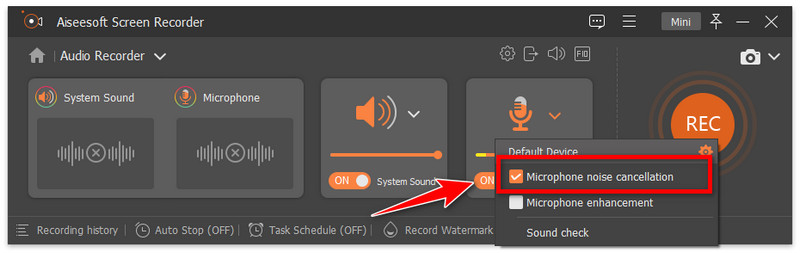
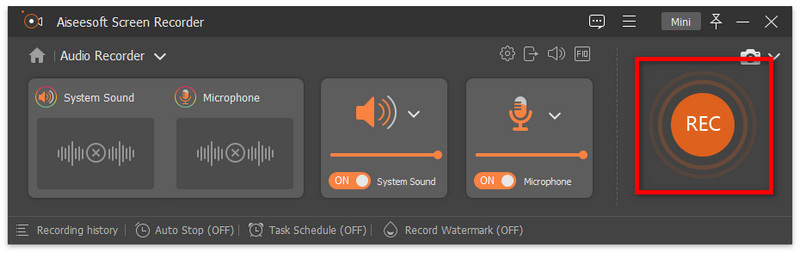
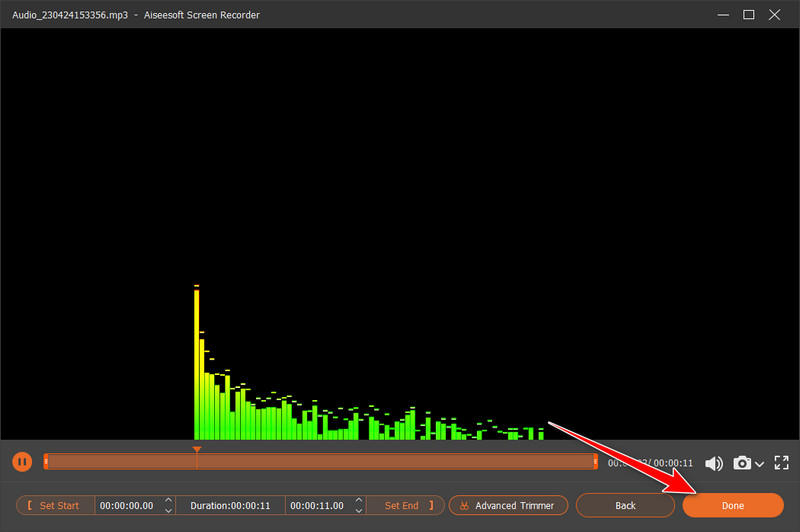
If the microphone can't cancel all the noises, you need an app to clean up the audio recording before you start. Aiseesoft Screen Recorder is the best application that offers microphone noise cancellation and enhancement that you can use to have the clarity and improved audio recording you will ever need. With the noise-cancellation microphone, you will no longer have any more noise signals added to your recording. Wondering how to use this app? Well, you can follow the steps here.
![]() 100% Secure. No Ads.
100% Secure. No Ads.
![]() 100% Secure. No Ads.
100% Secure. No Ads.
Can I use noise cancellation recording on my iPhone?
You can use some devices to plug in your iPhone to record your voice without background noises. Without it, you can still easily record audio on iPhone with the built-in recorder, then process it into the Aiseesoft Video Converter Ultimate to remove the noises.
What is the best way to record audio without background noises?
You can go into a quiet place before you start the recording. Instead of purchasing high-end equipment, you can go to a no-noise place to concentrate on the audio recording needed for your project or work.
Can I both record my voice and system sound while singing?
Indeed, you can do it with the help of the music voice recorder available on your platform. It would be better if you pick a third-party application to do the recording instead of relying on the built-in because it offers more than it.
Conclusion
After reading this post, you can get all the needed ways to remove static from audio recordings. Whether you need it for your project or any purpose, it is important to take note of all the information we have added here so that you wouldn't have a noisy audio recording again. Be prepared and enjoy the recording to your heart's extent with the helpful tips here. If you have any better recommendations to be added to this topic, we highly appreciate it if you share that information with us!
 Top 6 Video Background Noise Removal Applications
One of the crucial steps to have an appealing video is to assure that the audio quality is great. Here are the multiple ways to do background noise removal.
 What Is Noise Canceling - Facts About Noise Cancelation & More
What is noise canceling? Well, millions of users already have a query about this topic. For that reason, we created this for you to read!
 3 Best Efficient Ways to Remove Video Noise and Upscale Quality
Is there a way to remove video noise from a video clip shot by your Android phone? Here are 3 best ways to fix the problem and enhance the video quality from this article.

Aiseesoft Screen Recorder is the best screen recording software to capture any activity like online videos, webcam calls, game on Windows/Mac.
![]() 100% Secure. No Ads.
100% Secure. No Ads.
![]() 100% Secure. No Ads.
100% Secure. No Ads.
*Required field
*Please enter a valid email
