Subtitle can always be an important part of video to help you better understand the whole movie. Whether you want to learn a foreign language by watching movies, or avoid the background noise, subtitle can be there to do you a great favor. Here in this post, we will show you how to turn on subtitles on Plex Media Server.

Before we show you how to turn on Plex subtitle, we first give you a simple introduction of Plex.
Plex can help you organize all of your media files like video, music, photo collections and more. It can gives you instant access to them on all of your devices. Just install Plex Media Server on your computer, you can easily enjoy your favorite media files or share them with friends and family. Plex is designed with a premium Plex Pass subscription to help you sync videos, music, and photos to your portable devices. In this way, you are allowed to play them offline. You can also use Plex to make your media look beautiful with rich descriptions, artwork, and other related information.
Plex doesn't automatically load existing subtitles or download new subtitles. But you can set Plex to automatically download and use subtitles so that you can understand what actors are saying with ease. To turn on Plex subtitles, you can follow the next guide.
Step 1 Launch Plex Media Server on your computer and open Plex web app.
Step 2 Choose your Plex Media Server from the horizontal list.
Step 3 Click on "Agents" > "Plex Movie" (for Movies) or "Shows" (for TV Shows)
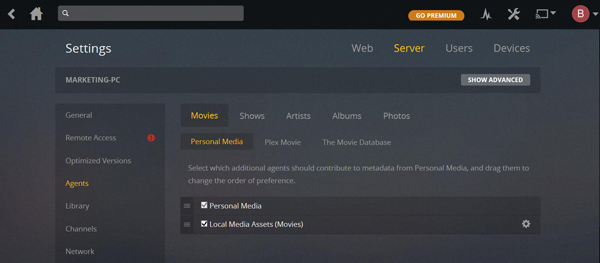
Step 4 Make sure the "Local Media Assets" section is checked
Step 5 Click "Languages" on the left control and then select "Always enabled" from the drop-down list of "Subtitle mode".
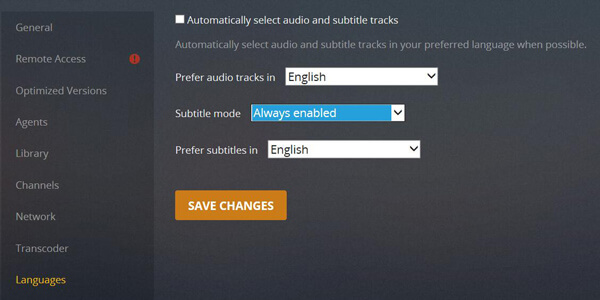
Step 6 Click "SAVE CHANGES" to enable Plex subtitles automatically display on Plex Media Server.
If you have proper subtitles for your videos, you can also load these external subtitles to videos. To do that, you need to rely on some powerful subtitle adding tools. Here we sincerely recommend the professional Video Converter Ultimate to help you do it. First, you can download it and have a free trial.
Step 1 Launch Video Converter Ultimate
Download, install and open this powerful subtitle adding software - Video Converter Ultimate on your Windows PC, if you are a Mac user, you can download the Mac verison to have a try.
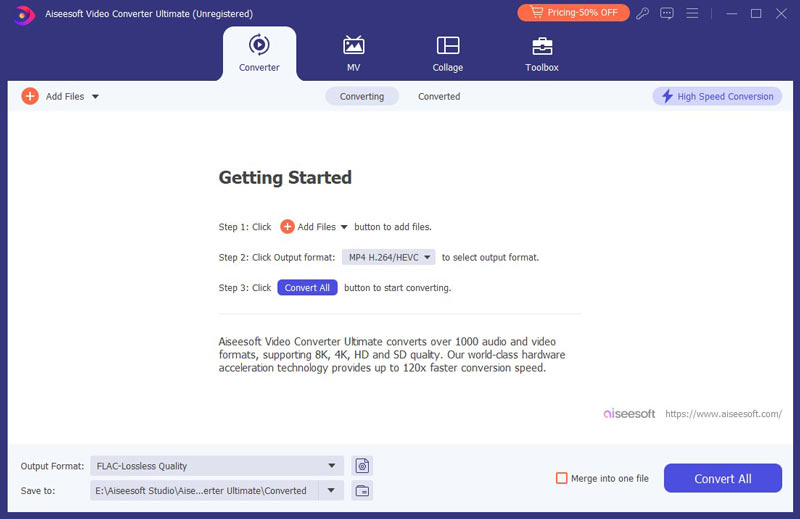
Step 2 Import video file(s) to the software
Open the main interface and click "Add Files" on the menu bar to select and import video(s) to this program, here you can see the mian information about the video you added.

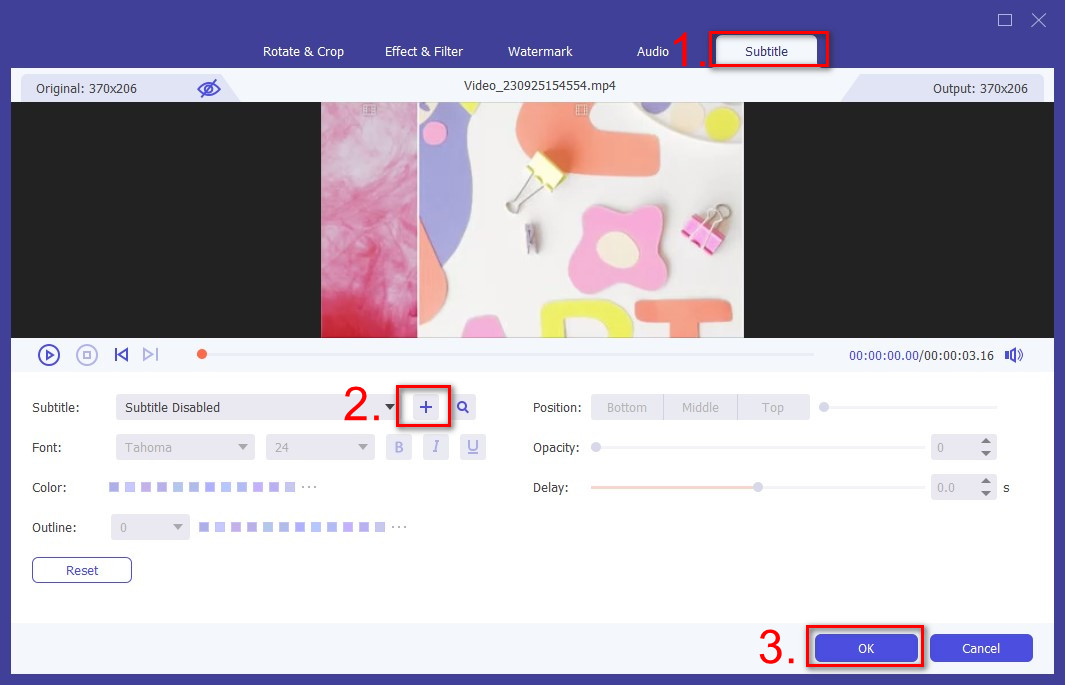
Step 3 Add subtitles to the video
Click "Edit" button and then choose " Subtitle" to insert the subtitle to your video. You are also allowed to add audio tracks to video.
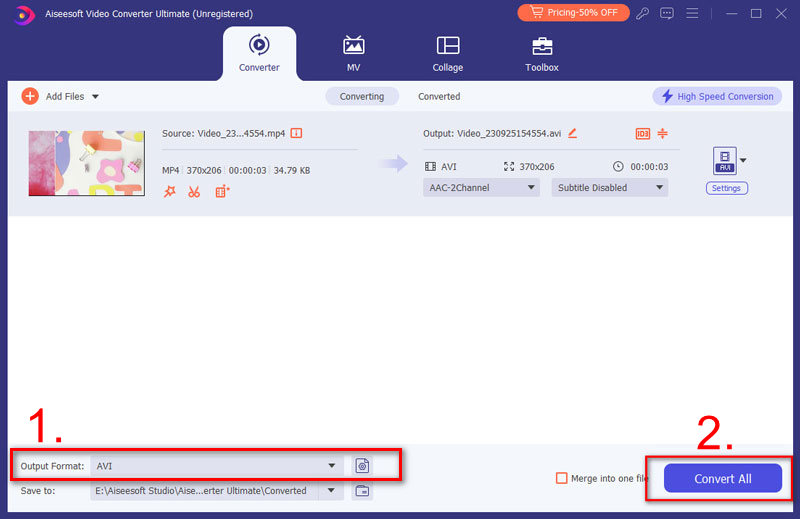
Step 4 Confirm the operation
Select the suitable output video format from the drop-down list of "Convert All to". Then click "Convert All" button to confirm the operation of adding subtitle to video.
In this article, we mainly talk about Plex Media Server and how to turn on Plex subtitles. What's more, we show you a simple way to add external subtitle to video. Whether you want to automatically load local Plex subtitles, or add suitable subtitles to videos by yourself, you can find the right method to do that from this post.

December 24, 2020 11:13 / Updated by Jenny Ryan to Convert Video
 Best 5 Subtitle Sites for Adding to MP4
Want to add subtitle to MP4? Here are top 5 subtitles sites for you to add subtitles to MP4 or other videos.
 How to Remove Subtitles on YouTube
You can learn how to turn off subtitles on YouTube and how to add subtitles to video in this post.
 Best Subtitle Remover to Erase Subtitles from Video
Want to remove subtitles from a video? You are able to find the best Subtitle Remover in this article.
 How to Turn on Subtitles on Apple TV
Want to turn on Apple TV subtitles? You can learn how to enable subtitles on Apple TV and how to turn off Apple TV subtitles in this post.
 Best Subtitle Editor to Add Subtitle to Movie
Want to edit subtitle and add new subtitles to DVD/video? You can learn more about Subtitle Edit and how to load subtitle in this post.
 Top 5 Best Subtitle Makers to Make Subtitles Easily
Looking for a subtitle maker to help you make subtitles smoothly? This article introduces you five best subtitles makers.
