If you have an iPod with color display, then you can view photos with this iPod instead of listening to music only. By transferring iPod photos to the external hard drive, you can backup important pictures for further usage. Moreover, you can output iPod Photos for better editing experience as well. Therefore, it is quite important to choose one powerful iPod photo transfer to sync photos from iPod to computer.
iPod Photo Transfer
According to numerous of users, there are some common requirements towards iPod photo transfer software. For instance, some people want to output the transferred photos in different formats like JPG, TIFF, PNG, etc. And it will be better if there are some built-in filters. As a result, this article introduces 3 different methods to transfer iPod photos to your computer in easy ways.
By using Aiseesoft FoneTrans, you can transfer photos between iPod and your computer with ease. FoneTrans is an ultimate iOS transfer that allows users to transfer, edit and manage most iOS files. You can output not only photos but also other file types including contacts, messages, videos, ringtones, eBooks and others. As for transferring iPod photos, you can follow steps below to put iPod photos to your Windows or Mac computer easily.
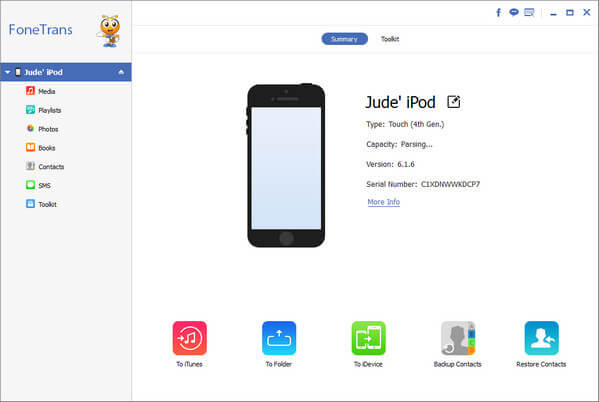
Step 1 Launch iPod photo transfer
Download and install FoneTrans on Windows or Mac PC. Run this iPod photo transfer software and plug iPod into your computer. Then FoneTrans can detect your iOS device automatically.
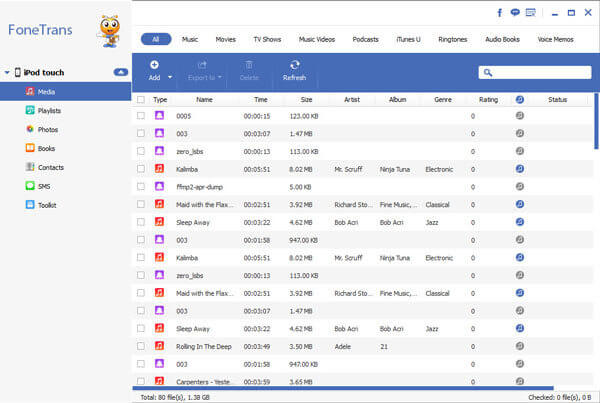
Step 2 Choose iPod photos to output
Choose "Photos" in the left panel of FoneTrans to see all categories of iPod photos. You can output photos from camera roll, photo library, my favorites and other folders freely. Just choose any photo you want to transfer.
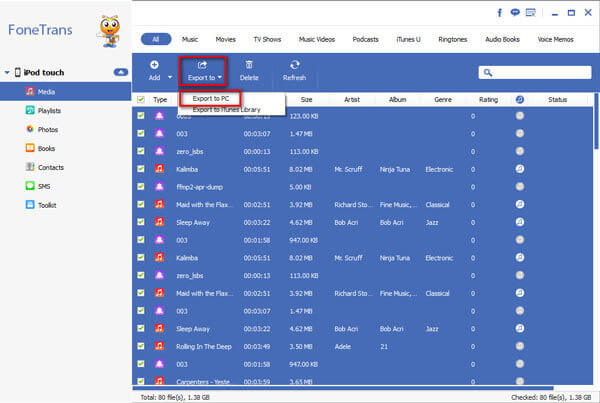
Step 3 Transfer photos from iPod to computer
Select "Export to" option in the toolbar and then choose "Export to PC". You can add iPod photos to iTunes library during this time too. At last, set a destination folder to save all your transferred iPod photos.
Well, you can try above steps to transfer photos from iPhone and iPod to your computer too.
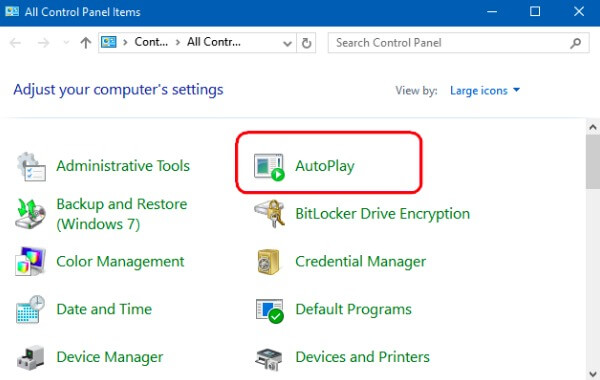
For people who use the PC system, using AutoPlay is another way to transfer iPod photos to PC. You can free up more valuable storage space on your iPod by moving iPod photos to your computer.
Step 1 Connect iPod to AutoPlay on PC
Use a lightning USB cable to connect iPod to your computer. Wait a few seconds for detecting your iOS device on PC. Later, you can see three popping-up options with "Import pictures and videos", "Download images" and "Open device to view new files". You can choose the first option when you are notified. Reconnect iPod to PC if you fail to see those options.
Step 2 Transfer photos from iPod to PC with AutoPlay
You can view those iPod photos by date and group them with different options. To organize iPod photos, you can add tags before clicking "Import". In addition, you can manage Import Settings to set the output folder name, rotate photos and do other customizations.
Actually, you can open "My Computer" or "Computer" on the desktop, right click the iPod Touch and select "Import pictures and videos" as well.
You can put your iPod in the disk mode to transfer photos from iPod to Mac computer. Furthermore, this method also works to transfer other iPod files including songs you have downloaded before.
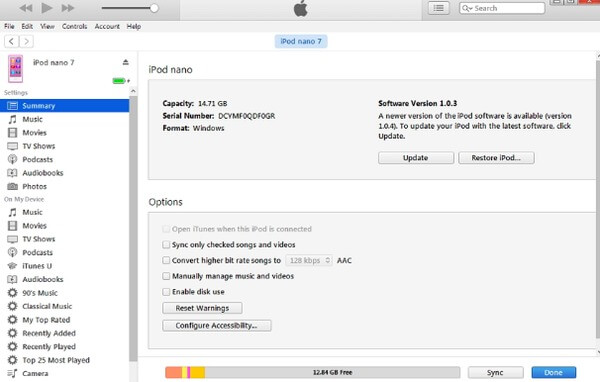
Step 1 Enable disk mode on iTunes
Connect iPod to your computer with a lightning USB cable. Later, open iTunes and click the iPod icon on the top "Device" menu. You will be in the "Summary" page by default. Scroll down "Options" section in the main interface of iTunes. Then tick "Manually manage music and videos" and "Enable disk use" options.
Step 2 Transfer photos from iPod to computer with iTunes
Choose the iPod icon on your desktop, you can see all files displaying in categories. Just select the certain files you want to transfer, then copy and paste them into the folder on your computer. It may take a while if you are transferring large amounts of iPod photos.
It is the common method to transfer files from your portable device and computer. Just remember to right click your iPod icon to eject manually.
With above three different iPod photo transferring methods, you can output photos to your computer easily and safely. But there are still some differences existing in three iPod photo transfer programs.
The first FoneTrans enables users to transfer, edit, manage and preview all iOS data without data loss. And you can output iPod photos to another iDevice, computer or iTunes library in one click. As for AutoPlay, only PC users can transfer photos from iPod to computer. While iTunes may erase your previous iOS data automatically.
Due to their limitations and similarities, you can read and choose the specific solution above to transfer photos from iPod to computer with ease. If you have any difficulty during the process, please don't hesitate to contact us.

June 15, 2018 08:07 / Updated by Louisa White to Transfer iOS Data
 How to Recover iPhone Data after Restoring to Factory Settings
Still wonder about how to recover lost data after restoring iPhone to factory reset? Read this post to restore your iPhone photos, text messages, contacts, etc.
 2018 Best 12 Alternatives to iTunes for Windows or Mac
Find the best 12 alternatives to iTunes on Windows/Mac in 2018, when iTunes fails to backup/restore iOS data, play media files, or convert music files in this page.
 Cannot Replace Your Bent iPhone? Recover Data Right Now
If Apple store does not replace/fix your bent iPhone and your iPhone warranty is out of date, how to recover data from iPhone X/8/7/SE/6s Plus that bends?
