In this comprehensive review, we'll dive into Premiere Pro transitions, exploring their diversity, functionality, ease of use, and ability to bring a cinematic touch to video editing projects. From basic cuts and fades to more intricate effects like wipes, slides, and intricate motion transitions, Premiere Pro's transition library caters to novice and experienced editors. Additionally, we'll highlight user experiences, discussing the ease of integrating and customizing transitions within the editing workflow and their impact on the video's overall pacing, mood, and storytelling.
Premiere Pro transitions refer to the visual effects applied between two video clips or images to create a seamless connection or change from one scene to another. These transitions are essential tools that enhance a video project's overall flow and continuity, making it visually appealing and engaging to the audience. Adobe Premiere Pro offers a diverse range of transitions that cater to different styles, moods, and editing needs.
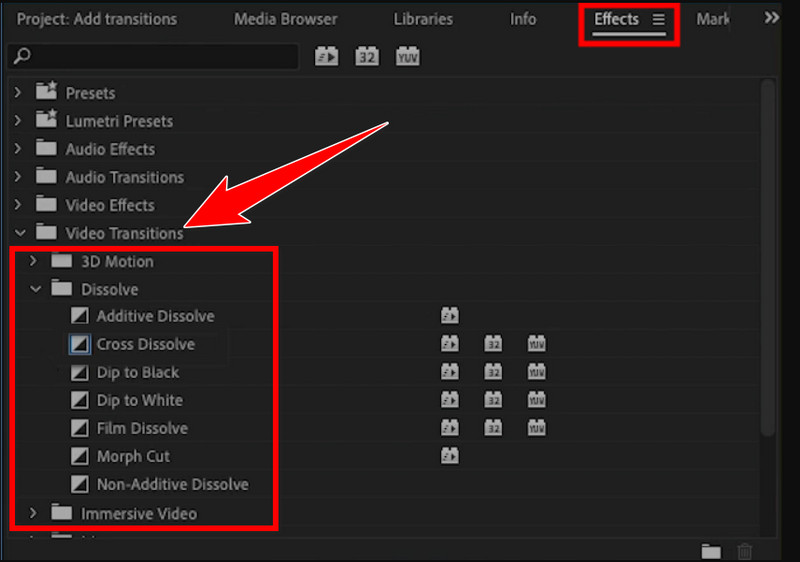
Some of the popular transitions available in Premiere Pro include:
1. CutThe most straightforward and free Premiere Pro transition, where one clip is abruptly replaced by the next, creates a sharp and immediate change.
2. Cross DissolveA gradual transition where one clip fades out while the following clip simultaneously fades in, creating a smooth and subtle blend between scenes.
3. Dip to Black/WhiteThe transition involves a gradual fade to black or white between clips, commonly used to indicate a change in time, location, or mood.
4. WipeThis video transition in Premiere Pro reveals the next scene by wiping across the screen in diagonal, vertical, or horizontal patterns, creating an engaging visual effect.
5. SlideLike the wipe transition, the slide transition moves one scene offscreen while the next scene slides into view from a particular direction.
6. ZoomThis transition zooms in on a video or out of the first scene while simultaneously revealing the second scene, adding a dynamic effect to the video transition.
7. IrisThe iris transition resembles the opening or closing of a camera iris, where one scene gradually appears or disappears within a shrinking or expanding circle.
8. BlurAdding transition Premiere Pro like this will blur out the outgoing clip while simultaneously bringing the incoming clip into focus, creating a smooth visual shift.
9. Luma FadeA transition that uses luminance values to create a fade effect, emphasizing bright or dark areas for a stylish transition.
10. 3D MotionAdvanced transitions are considered the best transitions in Premiere Pro since they involve three-dimensional movements, rotations, flips, or distortions that add a more intricate and dynamic effect to the scene changes.
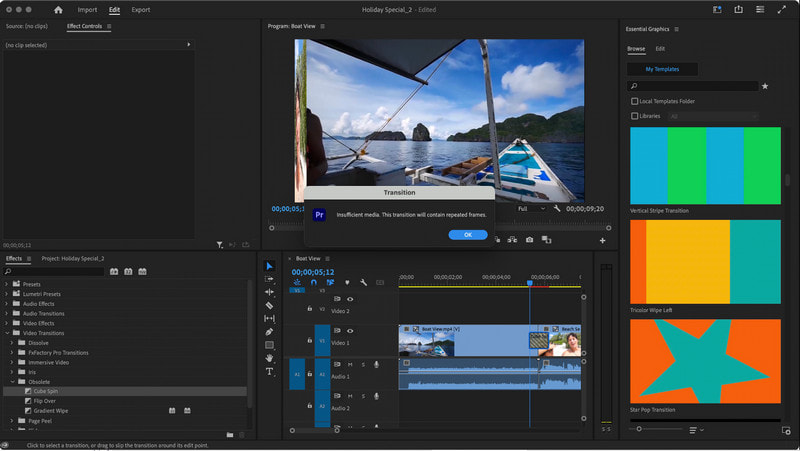
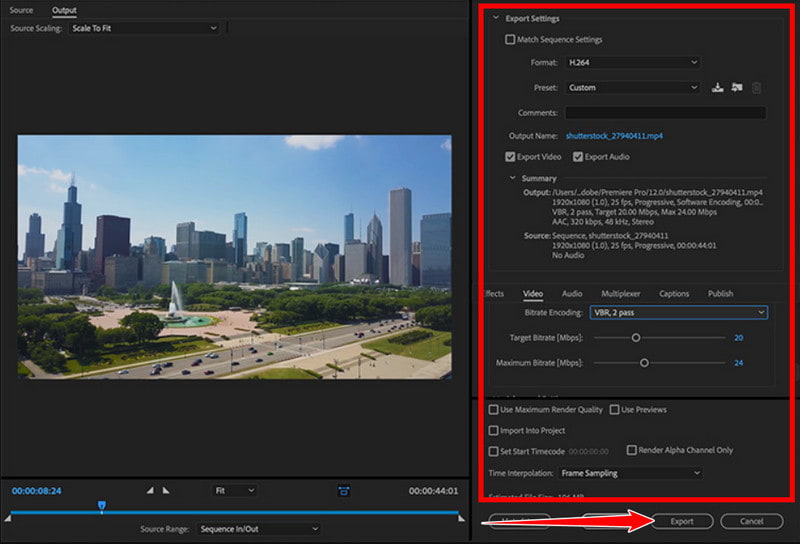
How do you add transitions in Premiere Pro? It is a straightforward process that enhances the visual flow between clips. Here's a step-by-step guide on how to add transitions:
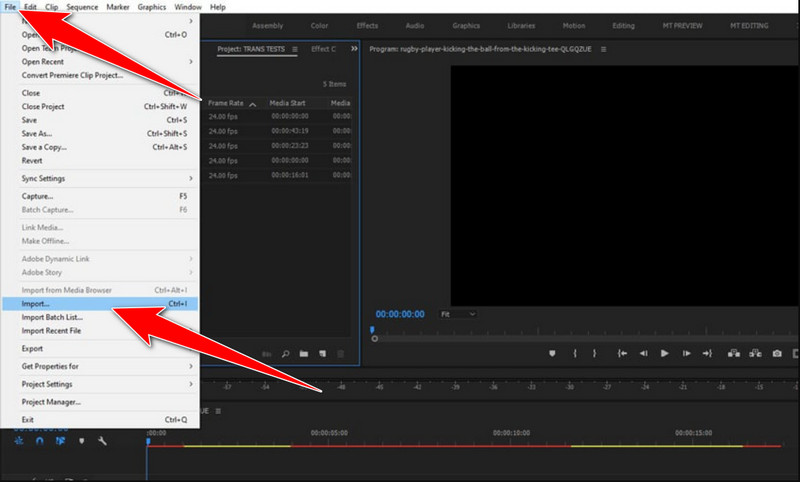
How do you import transitions in Premiere Pro? Importing transitions into Adobe Premiere Pro allows you to expand your transition library and use custom or third-party transitions in video editing projects. Likewise, you can also extend your font library as well by importing Premiere fonts Here's a guide on how to import transitions into Premiere Pro:
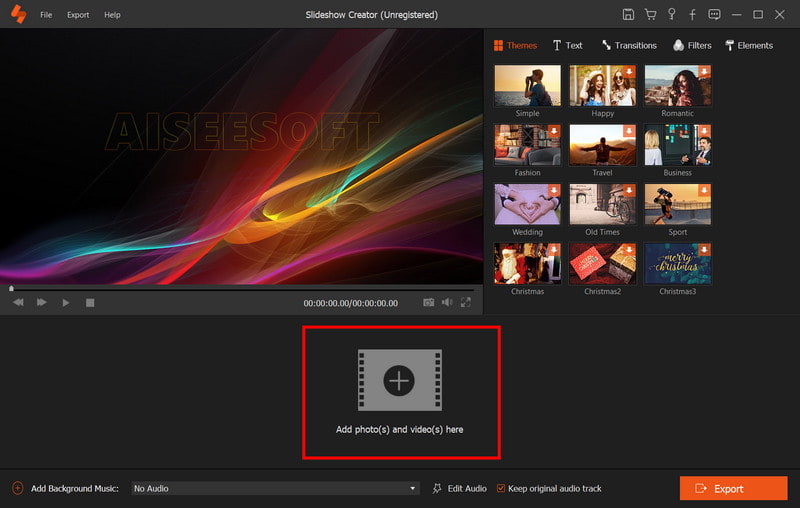
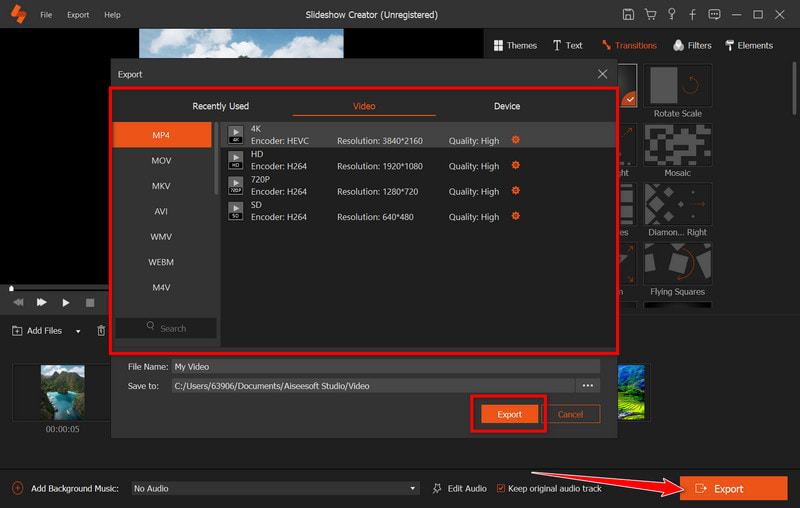
Aiseesoft Slideshow Creator is a user-friendly software that simplifies the process of quickly adding transitions to videos and creating slideshows. Applying this app's transition is simple yet as effective as the Premiere Pro. Learn how to use this app by reading the steps below.
![]() 100% Secure. No Ads.
100% Secure. No Ads.

How to do transitions in Premiere Pro?
To add transitions in Premiere Pro, import your media, arrange clips on the timeline, choose a transition from the Video Transitions folder in the Effects panel, drag it between clips, and adjust its duration and settings in the Effects Control panel.
Which transition is best in Premiere Pro?
The best transition differs based on context, but popular ones include Cross Dissolve for smooth blending, Cut for quick changes, and Dip to Black/White for subtlety; the choice should fit your storytelling and visual flow.
What are the best effects in Premiere Pro?
Premiere Pro offers versatile effects like Lumetri Color for grading, Warp Stabilizer for shaky footage, Gaussian Blur for blur effects, Ultra Key for chroma-keying, and Audio Effects for audio enhancement.
Can I customize transitions in Premiere Pro?
Yes, customize transitions in Premiere Pro by adjusting parameters like duration, direction, alignment, and additional effects in the Effects Control panel after applying a transition to the timeline.
How can I create my transitions in Premiere Pro?
Create custom transitions by utilizing keyframing and effects to animate properties between clips, combining clips, effects, and adjustments using masking and layering, and employing Premiere Pro's built-in tools like Effects, Transform settings, and Motion controls for unique transitions.
Conclusion
Where are transitions in Premiere Pro? Transitions within Adobe Premiere Pro serve as indispensable assets for video editors, enhancing visual flow and storytelling. Offering a spectrum from simple cuts to intricate effects, Premiere Pro boasts a diverse range of transitions to cater to various editing needs. Moreover, Aiseesoft Slideshow Creator offers a user-friendly alternative for effortless transition applications, further expanding options for enhancing video content.
 How to Loop a Clip in Premiere and an Alternative Program
Dig deep into this post to learn the procedure on how to loop playback in Premiere. Also, an alternative is introduced as your other looping option tool.
 Adobe Premiere Rush Complete Review with Pros, Cons, and Alternatives
Adobe Premiere Rush provides video editing that you can use on phone and desktop. But does it works professionally like Adobe products?
 How to Reverse a Clip in Premiere Quickly [Updated 2024]
In this blog tutorial, you will learn how to reverse a video in Premiere with great ease. Read on and make a rewind video effect.

Slideshow Creator is the best movie maker and video editor. Designed with various video/photo/music editing functions, you can adjust the visual effects easily.
![]() 100% Secure. No Ads.
100% Secure. No Ads.
