In many cases where you wish to improve the composition of a PNG image, reduce the unwanted part, or emphasize the focus and so on, it is of great necessity to learn how to crop a PNG picture. To be honest, the entire cropping process is really easy and can be done quite fast, particular when you use a PNG cropping tool.
This tutorial is going to discuss how to crop a PNG image with 3 different solutions. To try it yourself, keep on reading and learn the detailed steps.

Crop PNG
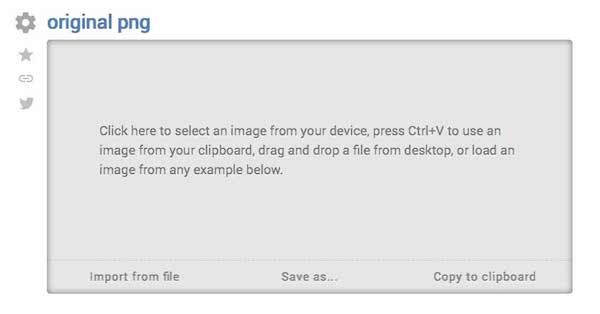
Onlinepngtools, just as its name implies, is an online Portable Network Graphics image cropper. It is named as the simplest PNG tool among the world. Just load your selected PNG image to the editor on the left, and you will get a newly cropped PNG file on the right.
Step 1 Open its webpage
Load the official website of Onlinepngtools with your browser, or you can enter onlinepngtools.com directly.
Step 2 Import a PNG file
Click the "Original PNG" box to select an image from your computer, or drag and drop it from your desktop. In addition, you can hold down Ctrl+ V to add from clipboard.
Step 3 Crop the PNG image
Next you are able to select the cropping area with resizers in this online cropper, or use precise cropping dimensions in the tool options to fine-tune the selected area.

Step 4 Enable the crop button
Once you enable the "Crop" option, the cropped PNG image will take the place of the original one.
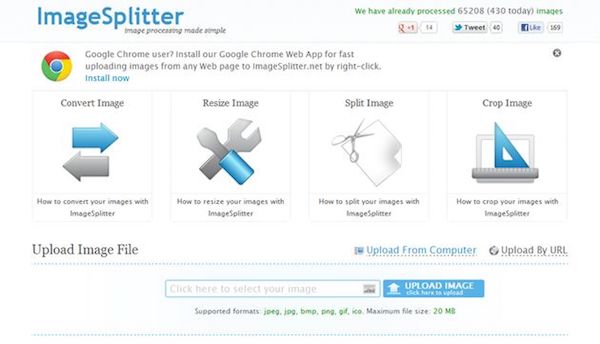
ImageSplitter is another online PNG cropping tool for you to take into consideration. It offers a Swiss army knife solution for your simple image processing, including resizing, cropping, splitting, and even converting. Easy, free, and powerful! ImageSplitter will be your good companion.
Step 1 Search and find Imagesplitter
Navigate to ImageSplitter web page with Google or any other browser on your computer.
Step 2 Unload a PNG file
Next, you are capable of adding a PNG image from your computer or a certain website. However, the maximum size is up to 20 MB per image.
Step 3 Choose the rectangular crop tool
After a couple of seconds, ImageSplitter will display the added PNG in a browser window, where you can split, resize, crop and convert the PNG image.

Step 4 Save the cropped PNG
Once you have tweaked your PNG picture to your liking, and tap on the "Crop Image" button to download the newly created PNG to your device.
This online image cropper also works as the GIF cropper to get rid of the unwanted parts of an animated mage.
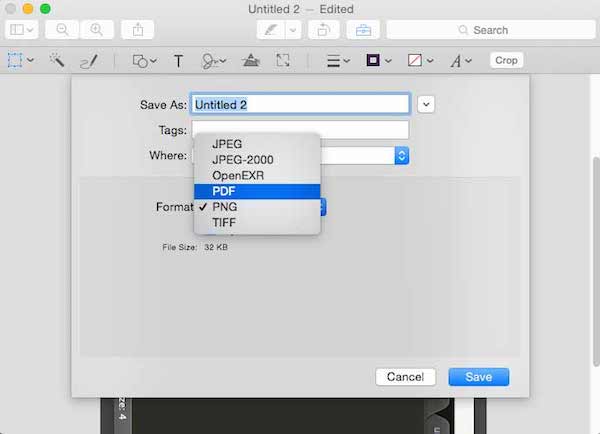
If you are a Mac user, it will be lucky that you do not need an external program to perform the PNG cropping, because the Mac built-in Preview tool enables you to crop your PNG image.
Step 1 Launch Preview on Mac
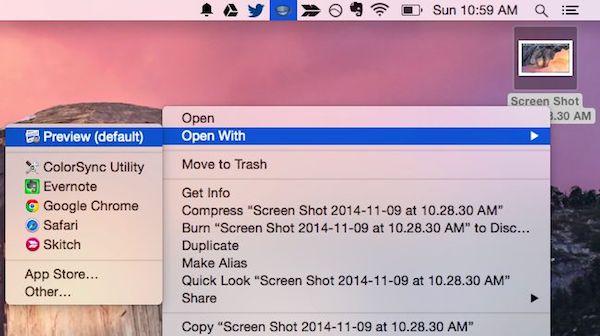
Find and locate a PNG image that you want to crop on Mac, and choose to open it with Preview.
Step 2 Crop the PNG image
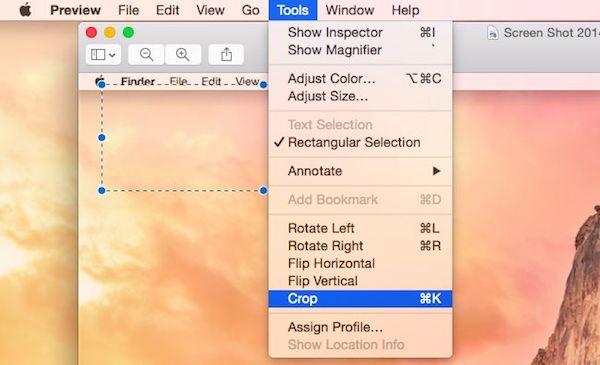
Then hit on the "Editor" button that looks like a pencil ion the right side of the image toolbar, and select the "Rectangular Selection" tool from the drop-down menu.
Step 3 Complete the cropping
On your desired PNG image, draw a crop area and tap on the "Crop" option. Hold down Command + K to complete the cropping process.
Step 4 Save the PNG file
Finally, turn to the "File" menu, and tap on "Save" option to save the cropped PNG file to local folder of your Mac.
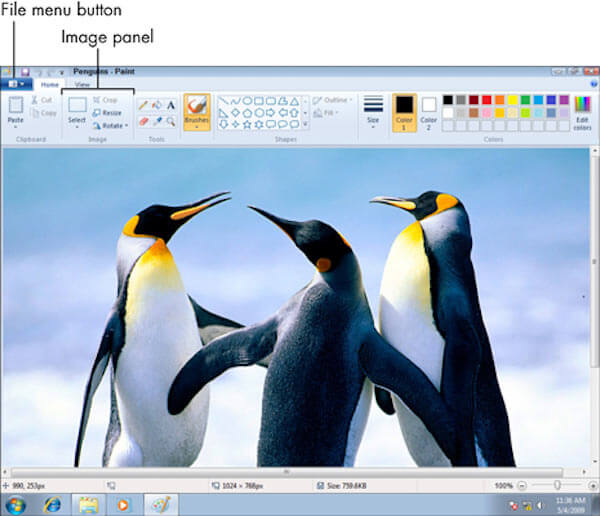
As for Windows users, you are also capable to use Windows Paint, the Windows 7's built-in drawing software, to edit, resize as well as crop your PNG files. It is easy to learn, as long as you follow the step-by-step guide below.
Step 1 Start Windows Paint
Launch Paint app from Windows Photo Viewer, and select the "File" option to add a PNG image.
Step 3 Select a crop area
To crop the PNG file, simply tap on the "Select" button in the Image panel. Here you are able to draw a rectangle on the image.
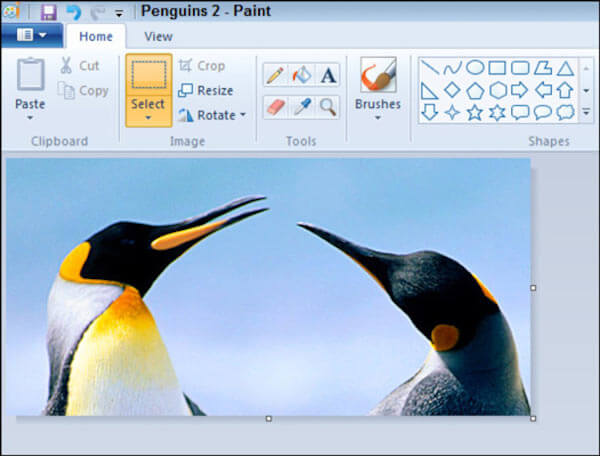
Step 4 Finish the cropping process
Once you tap on the "Crop" button, everything outside the rectangle will be removed, and you can save the new cropped PNG file by hitting on the 'Save" button.
Here 3 ways of cropping a PNG file can be done online or on Windows/Mac. Hope this post can help you exactly to crop the PNG file. If you think this post is helpful, do not hesitate to share it with your friends.

September 17, 2018 12:00 / Posted by Andrew Miller to Photo
 How to Crop PDF File
How to crop PDF file to remove unwanted border or merge into one PDF file? This page will show you four ways of cropping PDF file online or with cropping tool.
 [Best Guide] How to Convert JPEG to PNG
This post shows how to convert JPEG to PNG on Windows 10/8/8.1/7/XP and Mac OS using the simplest online and desktop jpeg to png converter applications.
 6 Best Ways to Convert TGA to PNG
Are you looking for best methods to help you transfer an image from TGA format PNG/JPG format? Read on this passage and learn how to achieve the goal.
