Video has increasingly become an important way to communicate with friends and customers. Google, Facebook and other technology giants have realize such trend and introduce platforms for people to sharing videos online. That in turn accelerates the prevalence of video.
However, it is not a simple task to make and edit high quality videos. Even more difficult is to export videos and make them looking as professional as possible.
In this tutorial, we are going to focus on how to export video from Premiere for presentation.

Export Video From Premiere
The last step of video editing in Premiere is to export your video, and anyone cannot avoid this step. The most troublesome is this step too, partly because the extensive custom options. Don't worry! We will explain it in detail.
Step 1 After editing the video, go to File -> Export -> Media. It will open the Export Settings window. You can press Ctrl + M on PC or Cmd + M on Mac as well.
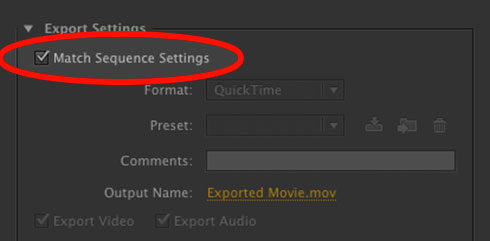
Step 2 Firstly, the match sequence settings option will render the video exactly based on your sequence settings and bypass the custom settings, so we do not recommend you to select it.
Step 3 Choosing the right video resolution is the most important thing when exporting videos from Premiere. The video resolutions available in Adobe Premiere include 240p, 360p, 480p, 720p, 1080p, 1440p, and 2160p. The higher the resolution is, the larger the video file size. You can pick up a proper one based on your situations.
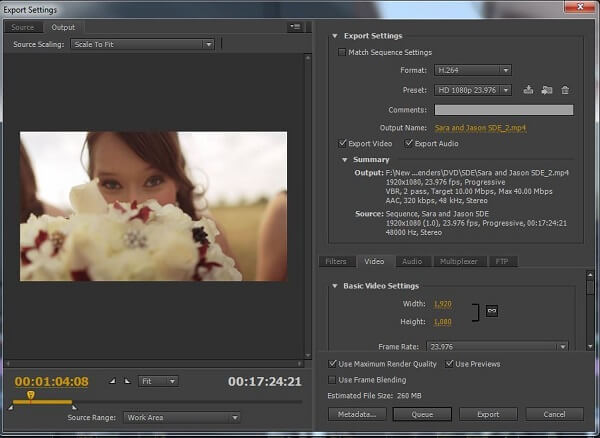
Step 4 Set an output name, and make sure to check both the Export video and the Export audio options.
Step 5 Next, you will face two export options in Premiere, Queue and Export. The former will process your video with the Media Encoder and the latter will output the video immediately. If you want to export multiple video clips, select Queue.
Adobe has integrated popular social media platforms into Premiere, like Ywitter and more. Now, you can export and post videos from Premiere to social media directly.
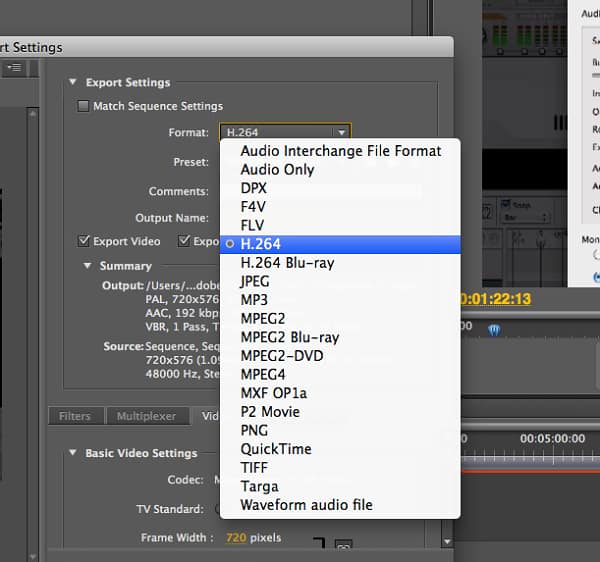
Step 1 Go to the Export Settings window in Premiere after you edit the video. It uses the 16:10 aspect ratio for most of the videos.
Step 2 Click and expand the Format dropdown menu and select H.264, which is the highest video quality. Then choose Match Source – High Bitrate from the Preset menu.
Step 3 Hit the link next to the Output Name label and set the destination and file name on the Save As dialog. Click the Save button to confirm it.
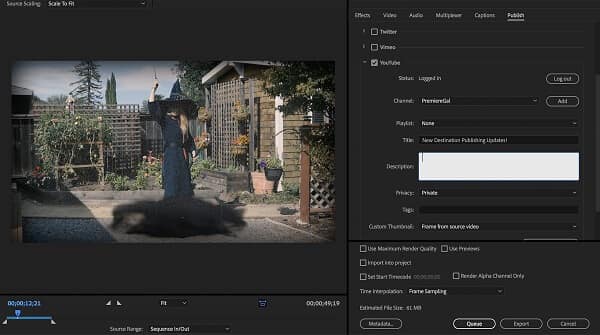
Step 4 Go to the Publish tab, check the box and log in your account.
Step 5 Enter other information, such as the Tags and the Description. Finally, click on the Export button to export the video from Premiere.
As you can see, exporting videos from Premiere is a bit complex for average people and any improper settings could damage your hard work. From this point, we recommend you to try the easiest alternative to Premiere, Aiseesoft Video Converter Ultimate.
In short, Video Converter Ultimate is the best way to replace Premiere to edit and export videos.
How to use the best alternative to Premiere
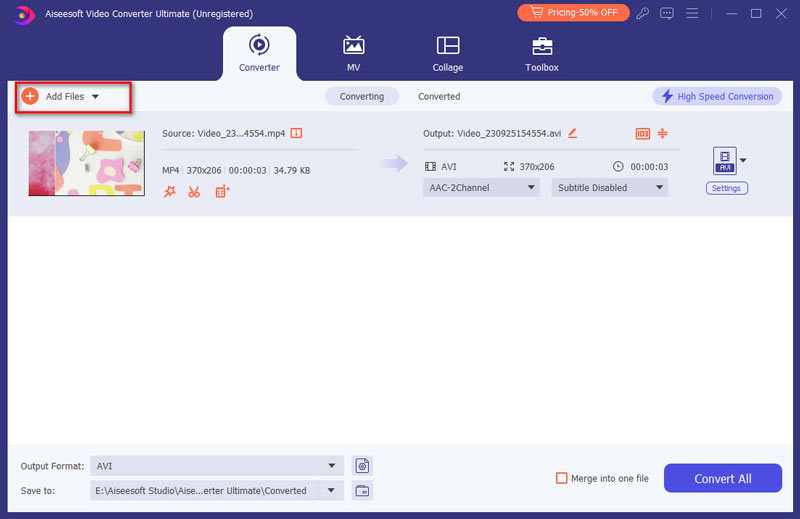
Step 1 Add videos into Video Converter Ultimate
Download and install Video Converter Ultimate on your PC. There is another version for Mac machines. Launch the video editor, and import the video from DVD by hitting the Load Disc menu or from hard drives by hitting the Add File menu.
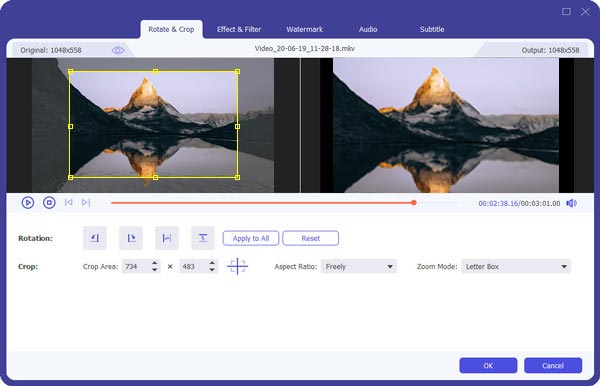
Step 2 Edit videos easily
Next, you can click the Edit menu and polish your videos in the Video Editor window, like remove unwanted parts using the Crop tool, rotate a video file by clicking "Rotate", etc.
Step 3 Export video without Premiere
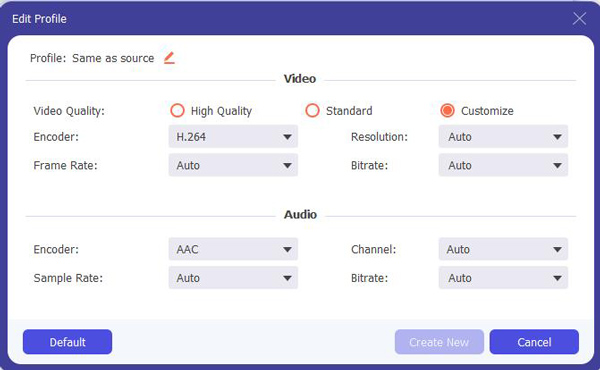
Finally, locate the bottom area, select a proper video format from the Profile dropdown list and drop a location to save the videos. To get more custom options, click the Settings button to activate the Profile Settings dialog. Once hit the Convert button, your videos will be exported according to your settings.
This article tells you how to export videos from Adobe Premiere Pro. There may be some differences between various versions of Premiere, but the procedures are similar. With our guides, you should understand how to complete the task quickly. On the other hand, we also shared an easier way to edit and export video without Premiere, Aiseesoft Video Converter Ultimate. We wish that our recommendations are helpful to you.

November 14, 2018 12:00 / Posted by Andrew Miller to Edit Video
 How to Sync Audio and Video in Premiere
How to Sync Audio and Video in Premiere? Read this article. Also, you can find Adobe Premiere here to merge audio and video clips together.
 Adobe Premiere Slow Motion - Slow Motion in Adobe Premiere
Want to use Adobe Premiere slow motion? Learn how to create slow motion in Adobe Premiere from this post.
 Final Cut Pro X vs Adobe Premiere, Which is Better
Final Cut Pro X vs Adobe Premiere, which is better for you to edit video clips? This article makes a comparison between Final Cut Pro X and Adobe Premiere.
