Video Converter Ultimate
 100% Secure. No Ads.
100% Secure. No Ads.
Has it ever happened to you that after recording a video, you discover that it looks grainy or that there is a lot of distracting noise? I experienced this problem several times, mostly when shooting in low-light environments. Even if the rest of the footage is great, noise can make a video look unprofessional and degrade the quality of the image.
Fortunately, you do not have to reshoot your footage every time. If you are a Final Cut Pro user, you have various options to clean up grainy clips and make them look better. Knowing how to denoise Final Cut Pro projects can change the result. This tutorial will show you the most efficient ways, step by step.
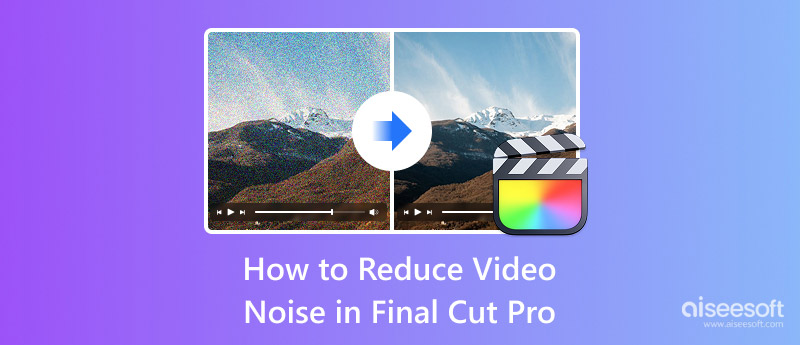
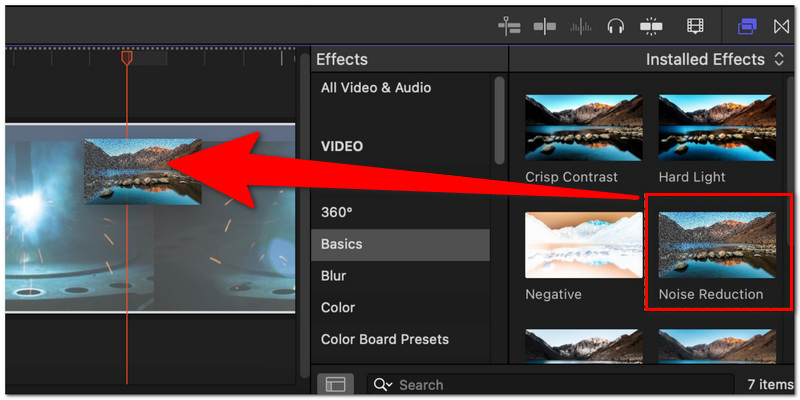
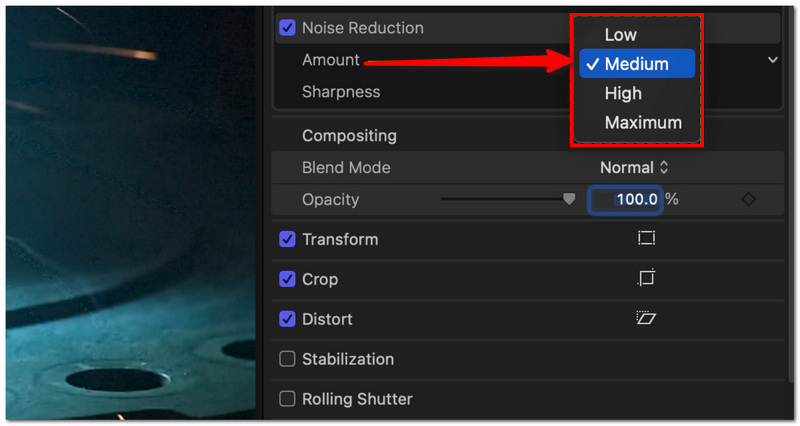
If your goal is a fast solution to eliminate graininess in video, Final Cut Pro offers a native Noise Removal feature that effectively diminishes the appearance of noise. Also, it does not force users to install third-party software. This is surely a good option for those video editors wanting to use Final Cut Pro X to reduce video noise without making their workflow more complicated and less productive.
Steps to Use Noise Removal in Final Cut Pro
Final Cut Pro's native Noise Removal effect is sufficient for simple cleanup, but some videos may need a more sophisticated touch. Some external plugins can offer improved noise diagnosis, more detailed tweaks, and better output quality, mostly when dealing with very noisy footage. If your keywords are how to reduce video noise in Final Cut Pro, below are the best plugins for professional-quality denoising.
Neat Video is, without a doubt, the leading software for video noise reduction. Its state-of-the-art noise profiling mechanism helps it recognize grain and undesired artifacts so that it can clean up the noise and at the same time keep the necessary details of the image intact. So, if you want a professional Final Cut Pro denoise plugin, you will find that Neat Video is the top pick most filmmakers and video editors go for.
Steps to Use Neat Video in Final Cut Pro
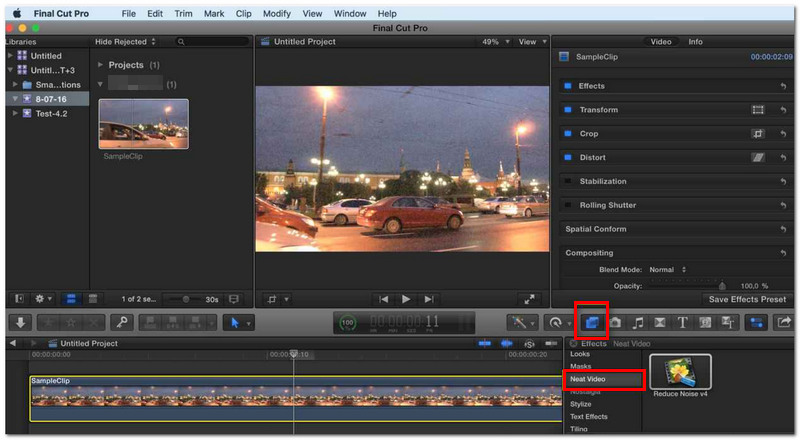
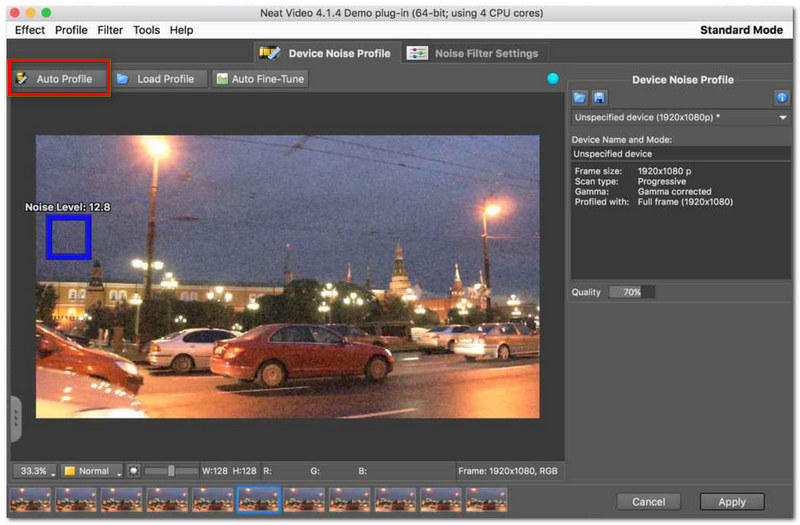
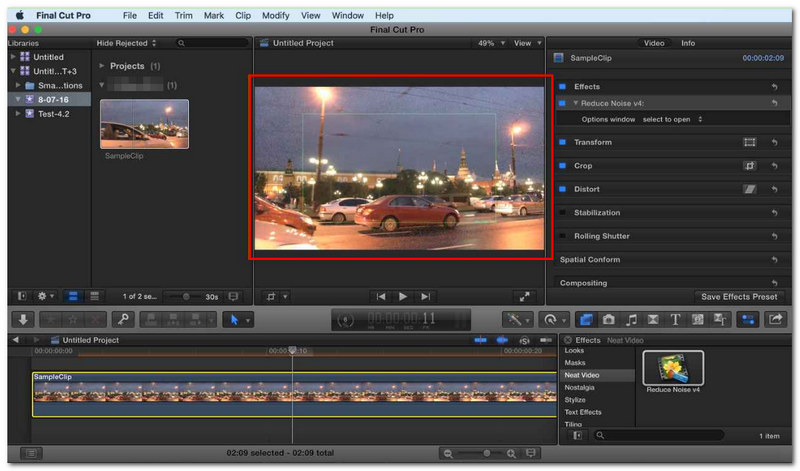
Red Giant's Denoiser III is an effective tool that can help you achieve cleaner shots by quite a bit, reducing the grain or noise in your video footage, all the while keeping your editing sessions running smoothly without hiccups. Instead of forcing users to wait through long rendering times for denoising effects to be applied, as is common with other software, Denoiser III aims to provide fast previews and facilitate efficient work processes so that it becomes a highly attractive option for editors who desire speedy outcomes without really compromising on the visual quality of their images.
Steps to Use Denoiser III in Final Cut Pro
Boris FX Continuum gives professional noise and grain removal effects and other strong and effective options. It is one of the most preferred video editing suites, mainly by editors who want more control over enhancing the quality of their video by removing unwanted particles as well as preserving the details of the image in their projects.
Steps to Use Boris FX Continuum in Final Cut Pro
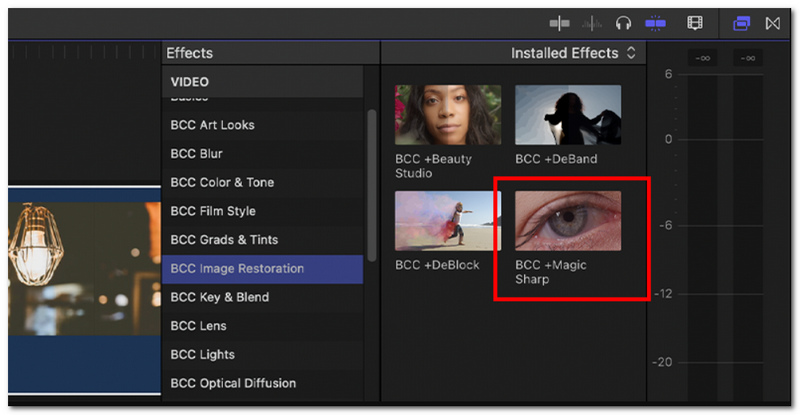
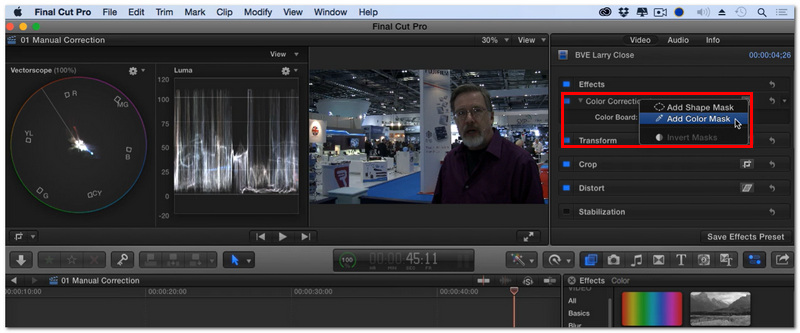
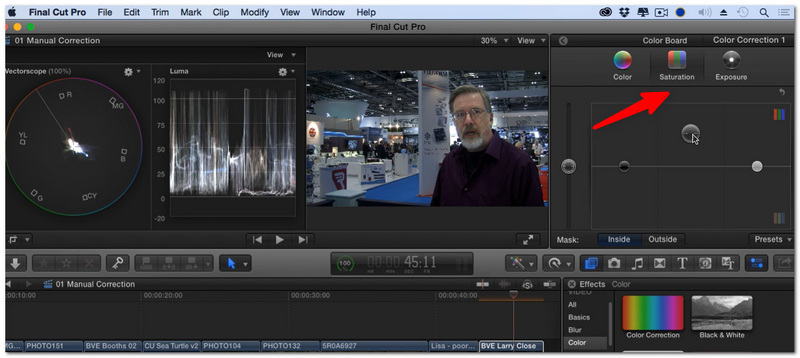
Quite often, aggressive noise reduction is not the best idea. You can effectively reduce the visual noise of the film by simply playing with the hues and shades, which will result in a clearer image. This trick will be very effective, particularly if you integrate it with a denoiser in a Final Cut Pro workflow and even manage to keep more details in comparison with strong noise removal.
Steps to Reduce Visible Noise with Color Grading
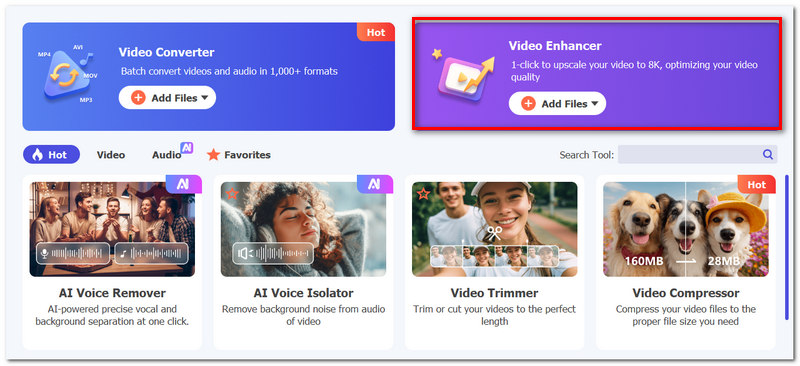
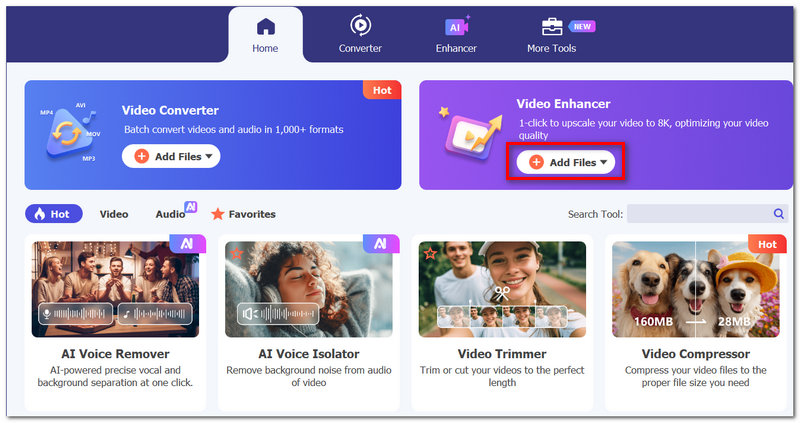
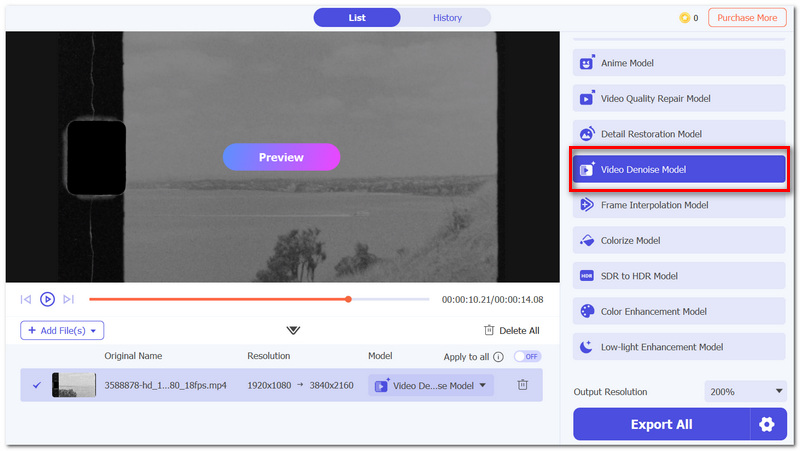
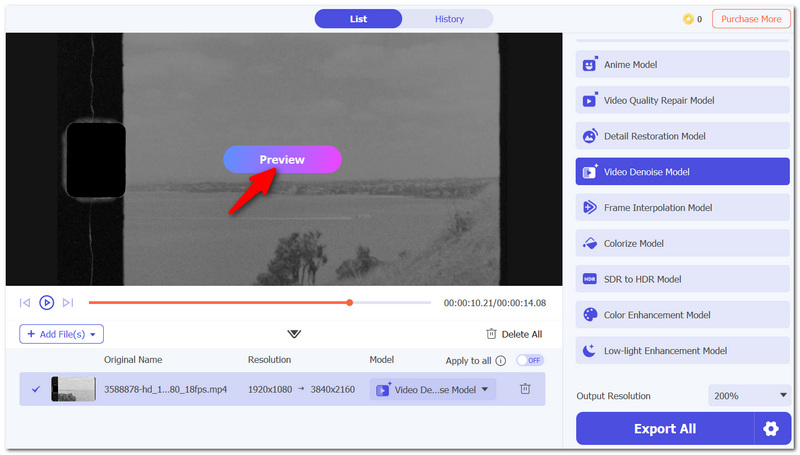
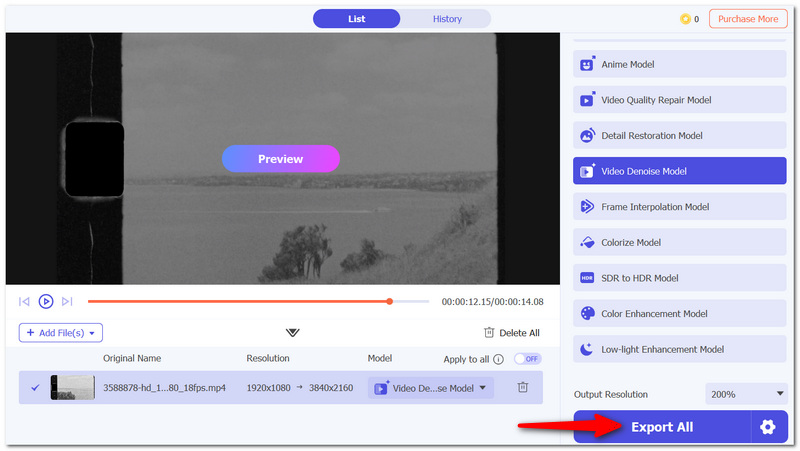
Looking for a less complicated method of cleaning up noisy footage besides Final Cut Pro plugins? Then you may want to consider Aiseesoft Video Converter Ultimate. It has AI-driven video enhancement features that can boost video quality, diminish visual flaws, and refine video with only a couple of clicks. The simple interface of the program also makes it an excellent choice for beginners and people who want to get fast results.

Downloads
100% Secure. No Ads.
100% Secure. No Ads.
Steps to Reduce Video Noise with Aiseesoft Video Converter Ultimate
Why can noise look different on my laptop screen compared to my external monitor?
Each display may have different brightness, contrast, and sharpness settings, so according to these factors, the visibility of noise can be increased or decreased.
Why do shadows usually have more visible noise than the highlights?
Sensors in cameras generally collect less data from darker areas, so this is why the appearance of noise is greater in the shadows and underexposed areas.
Will video noise reduction be able to make QR codes or text more readable that are captured in video?
Potentially. It's possible that some noise reduction would make the text and codes clearer to read, but if you overdo the denoising, then you may end up with the opposite effect.
Conclusion
Grainy footage shouldn't necessarily destroy an otherwise excellent video. No matter if you rely on Final Cut Pro's integrated functionalities, sophisticated plug-ins, or just basic color grading methods, there are numerous ways to Final Cut Pro X reduce video noise and enhance the image quality. The most effective approach will be determined by your video, workflow, and the extent to which you want to have control, but even minor changes might have a significant impact.
 Final Cut Pro vs. Davinci Resolve and Get the Best Editor
Which is better, DaVinci Resolve or Final Cut Pro? Do YouTubers use DaVinci Resolve? This post compares Final Cut Pro with Davinci Resolve in different aspects.
 Final Cut Pro - How to Do a Color Correction
Can I make a color correction in Final Cut Pro? This post provides a detailed guide to let you know how to do a color correction in Final Cut Pro.
 4 Vertical Video Editors Popularly Used by Professionals with Tutorials
Vertical video editors are much needed if you want to edit videos into a vertical format or a vertical video. Learn more here!
 Leave your comment and join our discussion
Video Converter Ultimate is excellent video converter, editor and enhancer to convert, enhance and edit videos and music in 1000 formats and more.
100% Secure. No Ads.
100% Secure. No Ads.

*Required field
*Please enter a valid email

