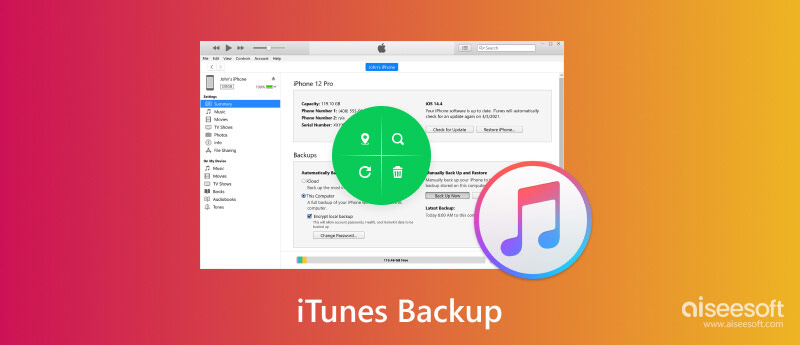
iTunes is an Apple software that lets you manage and sync your iOS devices like iPhone, iPad, and iPod. One of the essential features of iTunes is its ability to make backups of your iOS files. iTunes backup has long been popular for Apple users, offering a seamless way to protect various data. These backups can be useful in cases of device loss, damage or when you want to transfer your data to a new device.
This article will delve into everything you need to know about iTunes backup, its features, benefits, and how to effectively secure your valuable data.
iTunes backup is a feature provided by Apple that creates a copy of your iPhone, iPad, or iPod touch data and stores it securely on your computer. It includes important files like contacts, messages, photos, videos, app data, and settings.
iTunes backup ensures that your essential files are safeguarded in case of device damage, loss, or theft. You can easily retrieve your iPhone or iPad data from a backup if you switch to a new device or encounter data loss scenarios. iTunes backup allows you to update your device's software or restore it to a previous state if something goes wrong during an update.
If you don't already have iTunes installed on your Windows computer, download it from the Apple website and follow the installation instructions. Then follow the steps below to back up your iPhone or iPad data on iTunes.
Under the Backups section, you will find options for backups. By default, iTunes stores the backups within your user folder. To find out the exact iTunes backup location, go to the AppData folder, open the Local folder, then enter the MobileSync folder inside the Apple folder. This is where iTunes stores the backups.
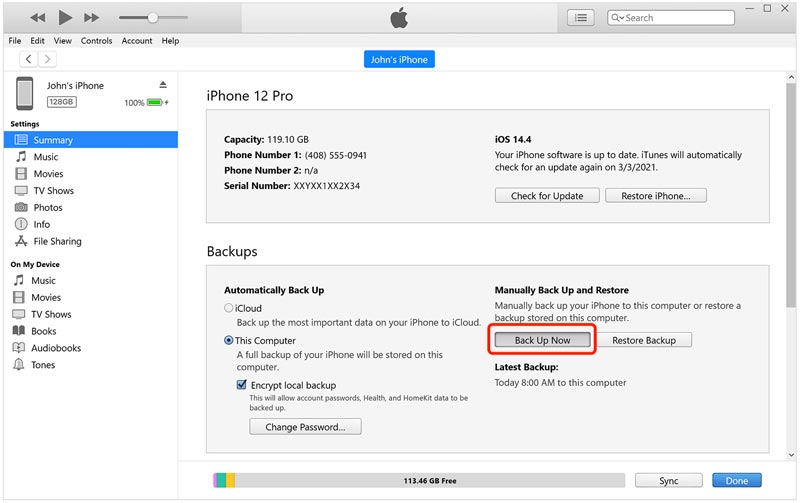
Depending on your iPhone's data size, the iTunes backup process may take some time. Ensure not to disconnect your iPhone or close iTunes until the backup is complete. After the backup process, you can check the backup by going to iTunes Preferences. Click the Devices tab to see your iPhone's backup listed there with the date and time.
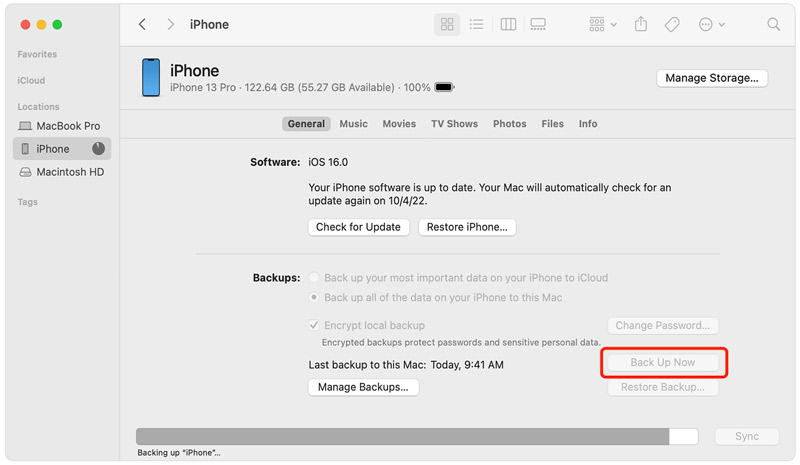
Depending on the macOS version, you can use iTunes or Finder to back up your iPhone or iPad data to a Mac. If you use macOS Catalina (10.15) or later, you can use Finder instead of iTunes.
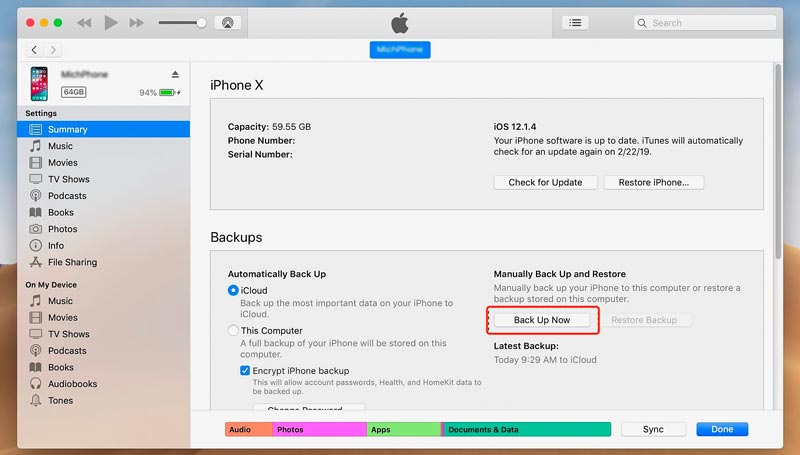
Depending on the amount of data on your iPhone, the backup process may take some time. You can track the progress of the iTunes backup at the top of the window. Once the backup is complete, you can verify its success under the Latest Backups section. Here you should see the date and time of the most recent backup.
Build the connection between your external drive and computer and ensure the drive is properly recognized. Open iTunes on your computer and ensure you have the latest version installed.
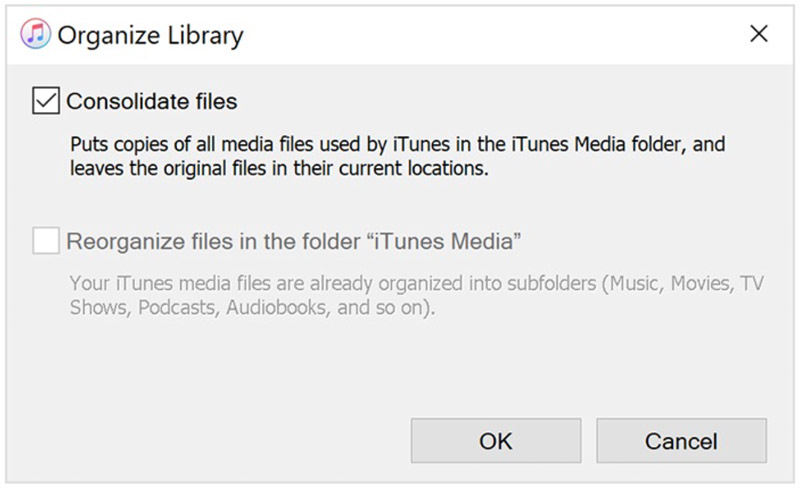
Go to the File tab of iTunes. From the dropdown menu, select Library and then click Organize Library.
In the Organize Library popup window, check the box next to Consolidate files and click OK. That will ensure all your media files are organized and included in the iTunes backup. Once the consolidation process is complete, close iTunes.
Locate your iTunes library folder on your computer. The default iTunes backup location depends on your operating system.
Windows: C:\Users\<username>\Music\iTunes\
macOS: /Users/<username>/Music/iTunes/
Copy the entire iTunes folder to your external drive. You can do this by dragging and dropping the folder or using the Copy and Paste commands. Once the iTunes folder is copied to the external drive, you have successfully backed up your iTunes library.
Restoring your iPhone or iPad from an iTunes backup can be useful for a few reasons. It can help you recover your iOS data. Restoring from an iTunes backup can be helpful when upgrading to a new iPhone. When you encounter software issues, you can revert your device to a known stable state by restoring it to a previous backup. This part tells how to restore your iPhone from an iTunes backup. You can use similar steps as an iPad user.
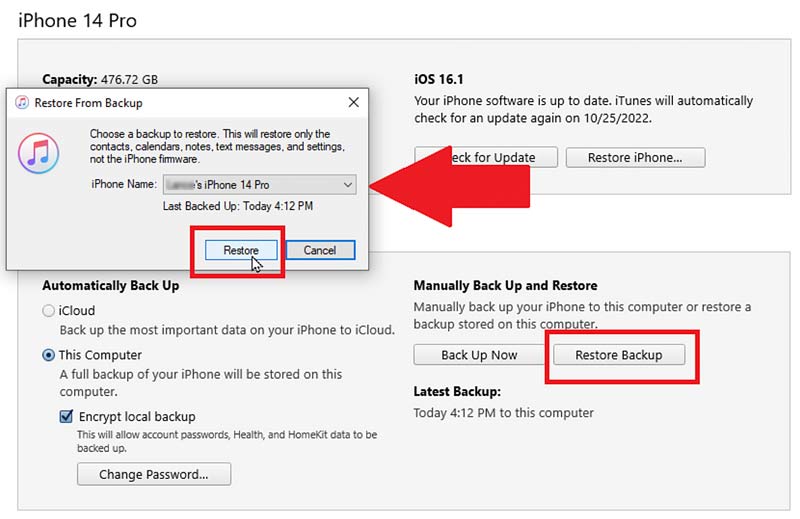
Once the restore process is finished, you can disconnect it from your computer. On your iPhone screen, follow the on-screen instructions to set it up.
If you want to back up your iPhone to your computer without iTunes, we recommend the powerful Aiseesoft iOS Data Backup & Restore. It gives a convenient and reliable way to back up and restore all your iPhone files.
![]() 100% Secure. No Ads.
100% Secure. No Ads.
![]() 100% Secure. No Ads.
100% Secure. No Ads.
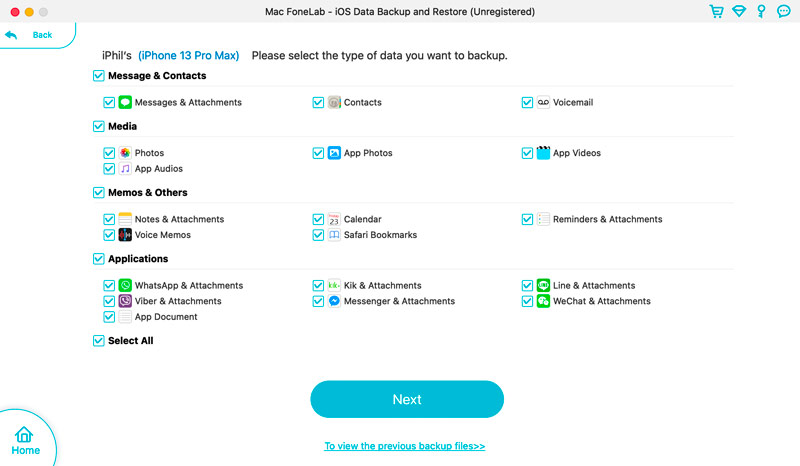

Using the iOS Data Backup & Restore software, you can back up your iPhone and iPad data to your computer without iTunes or iCloud. It gives you the flexibility to manage and restore your backup whenever needed.
How to select the iTunes backup location?
To select the iTunes backup location, open iTunes, click the top Edit or iTunes menu, then go to Preferences. Click the Devices tab when you reach the Preferences window. Find the Backup option and click the Change button next to it. A file browser window will pop up and let you select a new location for your iTunes backups.
How can I delete the iTunes backup?
To delete your iTunes backup, you should run iTunes on your computer first. Then select the Edit in the menu bar and click Preferences. Next, switch to the Devices window, select the backup you want to delete, and click the Delete Backup button.
Does iTunes backup everything on iPhone?
iTunes can back up most iOS data on your iPhone, including contacts, messages, photos, videos, apps, settings, and more. However, some exceptions exist, such as certain app data types that may not be included in the backup.
Conclusion
iTunes backup offers an excellent way to protect your iPhone and iPad data, enabling easy restoration of your devices. This post guides you to know associated information about iTunes backup. You can learn to create backups, restore them when needed, and manage your existing backups using iTunes on your computer. Regularly backing up your device ensures your data is safe and can be recovered whenever necessary.
 A Single Article to Help You Completely Understand iCloud Backup
Here is a comprehensive guide about iCloud backup for iPhone and iPad users to view, manage, delete, and download your data in your iCloud backups.
 How to Restore Deleted Messages on iTunes [2024]
Want to recover deleted messages from iTunes backup? This article gives detailed steps to retrieve iMessage, SMS/MMS on iTunes. Keep reading now.
 How to Remove the Protection of Encrypted iTunes Backups
You are able to remove the protection of encrypted iTunes backups for erasing data permanently from iPhone, iPad and iPod, even if you forgot the password.

Your best choice to back up data from iPhone/iPad/iPod to Windows/Mac and restore from iOS data backup to iOS device/computer safely and efficiently.
![]() 100% Secure. No Ads.
100% Secure. No Ads.
![]() 100% Secure. No Ads.
100% Secure. No Ads.
*Required field
*Please enter a valid email
