For those who always use email to work or contact with others, it is important to have a convenient setting on their devices to receive and sync emails. If you are an iPhone user, you may hear about Mail Days to Sync setting on Mail app. It is a setting which can help you sync mails which you received in the last three days. If you don't know this setting clearly, you can read this article to know more information about Mail Days to Sync. What's more, for those having a Hotmail account and wanting to have Hotmail email on their iPhone, this article also lists the way of how to sync Hotmail to iPhone. Just begin reading now.

Mail Days to Sync
Some iPhone users don't know what does Mail Days to Sync mean clearly. Generally speaking, iPhone is set at Mail Days to Sync by default. This setting means you can only access the mails you received in the last 3 days on your iPhone. If your iPhone is set by the setting, it also means that new emails will be pushed forward into your inbox, while there are no notifications triggered when some old emails moved into folders and sent to your iPhone automatically.
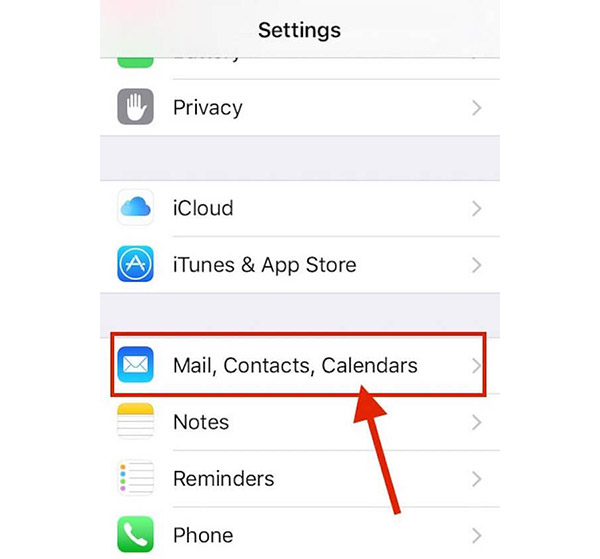
But you can still view your older emails by changing the Mail Days to Sync setting. If you want to increase or reduce the volume of mails displayed on your iOS device, you need to re-configure your iPhone mail settings. You can follow the next steps to change your mail folder sync settings easily.
Note: You need not pick No Limit to access certain messages. iOS Mail allows you to search across all folders, including messages that have not been synced and are not currently visible.
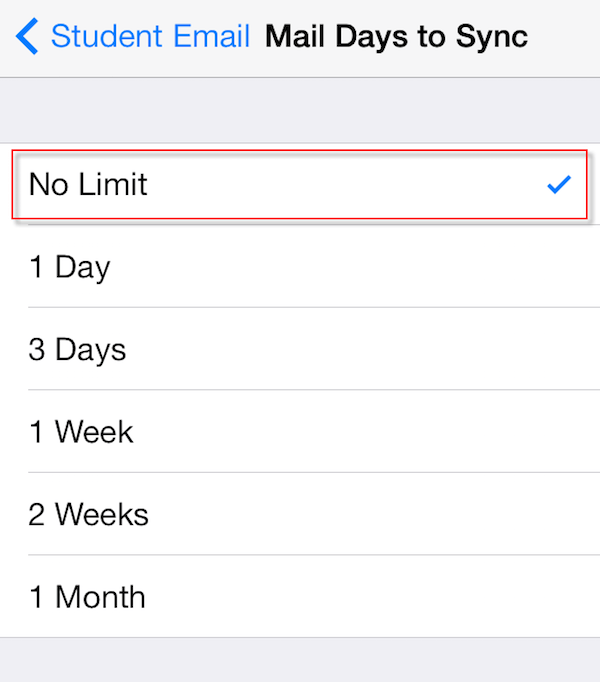
In versions of iOS Mail which are earlier than iOS 9, there is no way to see or search messages which are older than the synced limit. You can also choose Mail Folders to push button to pick the folders whose new mail you want to pushed to your device.
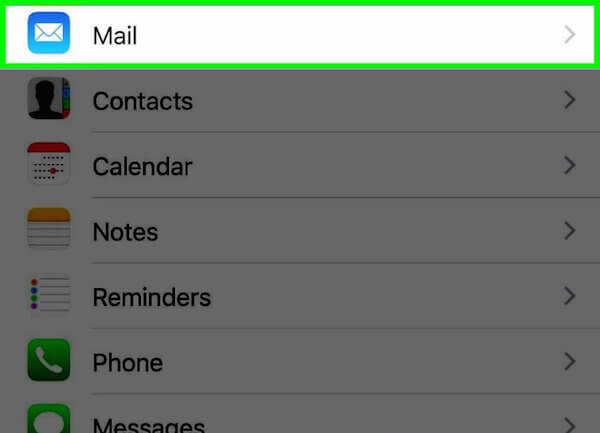
If you are Hotmail users, you can also sync your Hotmail emails to your iPhone and enjoy all features provided by iCloud. If you are interested in syncing Hotmail to iPhone but don't know how to do, you can read the next steps we list in detail for you.
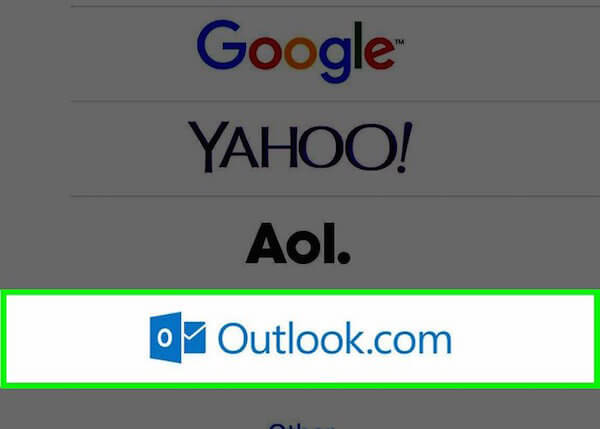
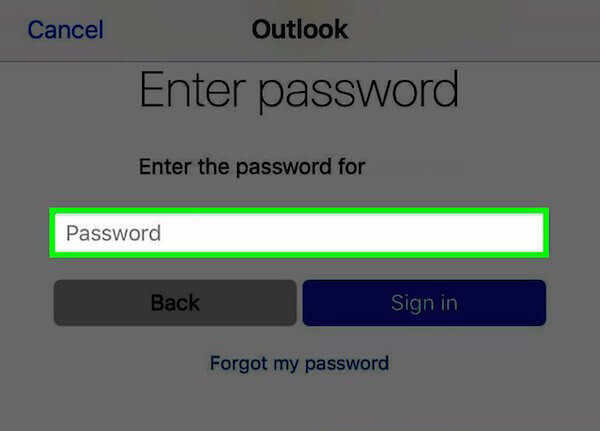
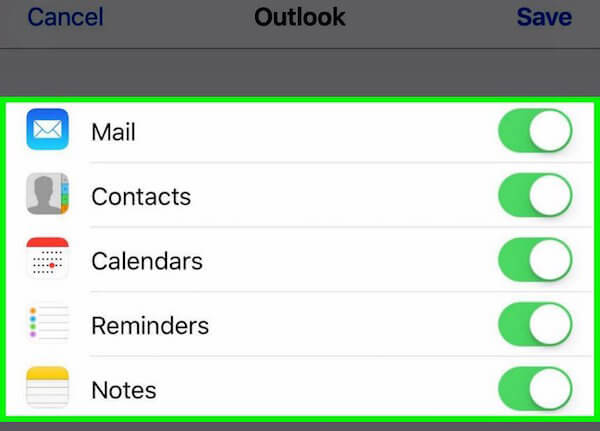
After these steps are done, you can see the Hotmail app or icon on your iPhone home screen immediately. If you want to view your mail box or emails, just tap on this icon. If you have more than one Hotmail account, you are able to link all of them to your iPhone. Just repeat these steps we show you above.
1. Why are my emails not syncing on iPhone?
You can go to Settings > Passwords & Accounts > Fetch New Data. And you can check if your email accounts are set to Push, Fetch, or Manual there. Then you can also adjust the frequency of data fetching.
2. Is syncing safe?
Yes, it is. All your emails are safe. A hacker who uses sniffing cannot fetch your email, even if you are connected to a public network.
3. How do I sync my emails to my iPad?
Just open the Settings app, choose Passwords & Accounts, and tap Add Account. Then choose the account you use.
In this article, we introduce Mail Days to Sync for you. For those who don't know what is Mail Days to Sync setting on iPhone, you can find the answer from this article. If you want to know how to sync email to iPhone, you can also get the detailed guide here. If you still have questions, just contact with us. Hope you can gain something useful from this article.
 How to Move iTunes Library to External Hard Drive on Mac/PC
Learn how to move iTunes library to an external hard drive on Mac or PC here. And the article presents a good way to transfer iDevice to external drive directly.
 How to Transfer Notes from iPhone to Android without Data Loss
This tutorial shows you top 5 methods to efficiently transfer notes from iPhone to Android smartphone or tablet along with other multimedia attachments.
 How to Add Music Files to iTunes on Computer 10/8/7
It is not a hard thing for you to add your favorite songs to computer. This article provides two simple ways for you to do that. After importing MP3 music, you can check and find them on your iTunes.
The best iOS Transfer software to manage and transfer iOS files from iPhone/iPad/iPod to your computer or reversely without running iTunes.
![]() 100% Secure. No Ads.
100% Secure. No Ads.
![]() 100% Secure. No Ads.
100% Secure. No Ads.
*Required field
*Please enter a valid email
