When it comes to export and render video clips, there are lots of programs that you can choose. If you have Photoshop on your computer, it may be a good option since Adobe has introduced basic video editing tools into the program. Moreover, you can find an entire dialog of video exporting.
The problem is that you will face too options and values to make the best decision. In this post, we are going to go through the process of exporting video from Photoshop, and do our best to explain the meaning of each option.
If you are ready, let's start the journey.

Export/Save Video in Photoshop
Photoshop is a professional image editor, so what video formats it can produce?
According to Adobe, Photoshop allows you to import videos in 3GP, AVI, AVC, F4V, FLV, MOV, MP4, MTS, MXF, TS, VOB, and R3D, and you can save video in Photoshop in MOV and MP4, and export video as GIF from Photoshop.
In another word, Photoshop is able to load commonly used video formats, but only output MP4 and QuickTime MOV video.
Once you are done editing and satisfied with your project, you can export the video from Photoshop. It means that Photoshop is going to combine the parts together and make a whole file.
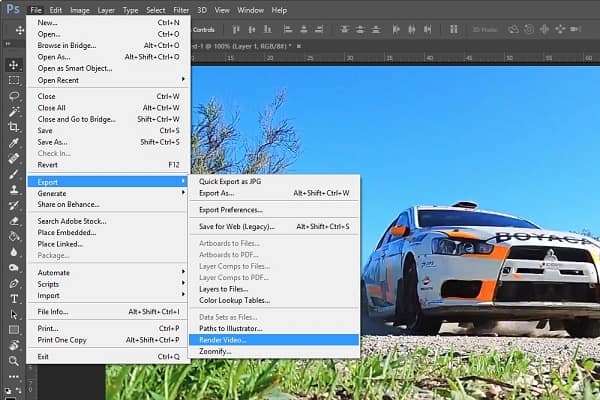
Step 1 Three methods can help you to open the Render Video dialog. Firstly, go to File -> Export and click Render Video. That is the most obvious way. The second method is to locate the right side of the Timeline area, press the menu icon, and choose Render Video. The small arrow icon at bottom left corner of the Timeline panel is able to activate the Render Video dialog too.
Step 2 Go to the Location section on the Render Video dialog, enter the name of your video, hit the Select Folder button and choose the destination to save video in Photoshop.
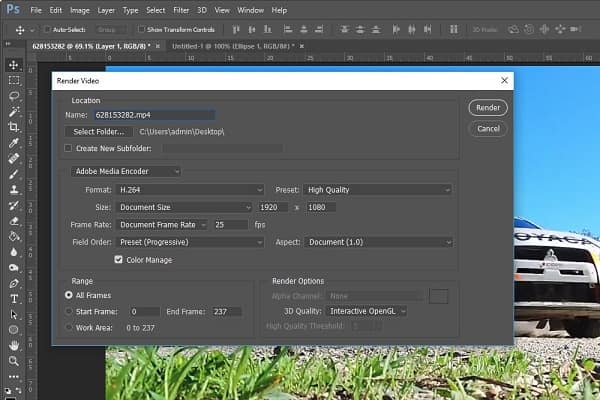
Step 3 Move to the next section, we suggest you to pick up Adobe Media Encoder from the dropdown list. Next, select the proper video format and quality from the Format and Preset options base on your needs. You can leave default values for other options in this section. Photoshop will optimize them based on video format and quality.
Step 4 The next section is Range. If you want to save the whole video, select All Frames. Otherwise, export a part of the video by setting Start Frame and End Frame. For example, you have over 200 frames in your video. Select Start Frame and End Frame, enter 100 and 150 into the boxes, Photoshop will output the frames between 100 and 150.
Step 5 Render Options is the last section on the dialog. If you are a casual editor, you won't need to change anything in this area. Finally, click on the Render button and wait for Photoshop to save the video according to your settings.
Note: It may take a while to completely render and export video from Photoshop depending on your machine and the length of the video.
Apparently, Photoshop is not the only way to edit and export videos on computer, and if you want to save your videos in AVI, MKV or other video formats, you have to look for an alternative to Photoshop.
From this point, we recommend Aiseesoft Video Converter Ultimate since it offers more benefits.
In short, it is the best alternative way of editing and saving video in Photoshop.
How to use the best alternative to Photoshop
Step 1 Install Video Converter Ultimate
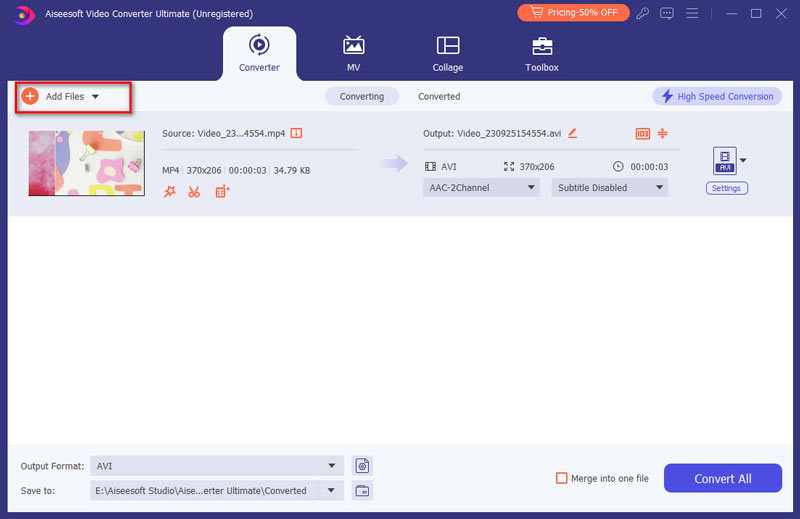
Download and install the best video editor on your computer, and launch it. There are two ways to import videos, add video files from your hard drive by clicking the Add File menu, and click the Load Disc menu to import videos from your DVD.
Step 2 Edit video with the video editor
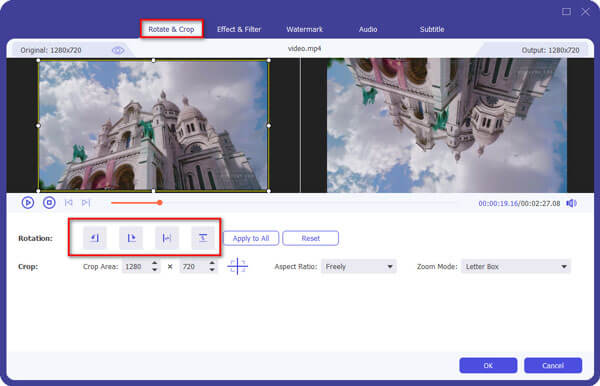
Next, select a video that you want to edit, and click the Edit menu to open it in the Video Editor window. Here you can use the Rotate, Crop, 3D, Effect, Watermark tools to polish your video. To trim the video, click the Clip menu in the main interface.
Step 3 Export multiple videos without Photoshop
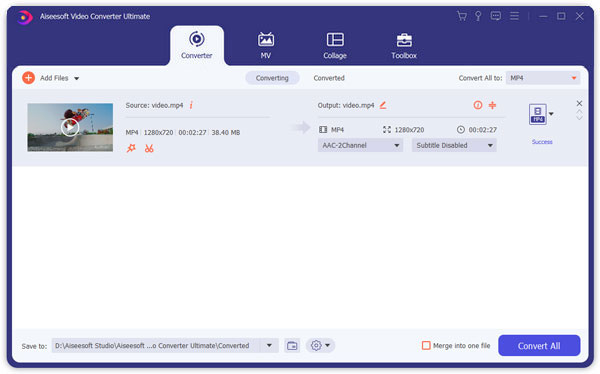
After editing your videos, select all of them in the media library area. Then locate the bottom area, choose the proper video format or target device from the Profile drop-down list. Then click the Browse button to select a location to save your videos.
Click the Settings button to open the Preferences dialog, then you can find other custom options, like bitrate and more.
Once you click on the Convert button, the video editor will start exporting your videos.
Note: According to our test, it only spent a few seconds to export a dozen of video clips.
Photoshop is the most professional image editor software, but many people keep away from it because of complexity. We concentrate on how to export video from Photoshop in this article, aiming to help you understand the entire process. As you can see, the extensive options on the Render Video dialog make saving videos in Photoshop complicated. We hope that our step-by-step guide is helpful to you.
Additionally, we also shared an alternative way to edit and export videos, Aiseesoft Video Converter Ultimate. It is not only easy to use but also able to export videos in plentiful formats. Now, you can feel free to edit your video and save it based on your needs.

October 23, 2018 08:00 / Posted by Andrew Miller to Edit Video
 Adobe Photoshop Autosave and How to Recover Photoshop PSD File
Is Adobe Photoshop have Autosave feature? Auto save or Auto recovery doesn't work on your Photoshop? Learn more about Auto-save and Auto-recovery in Photoshop CC 2015/2017, CS6, CS5, CS4, etc. and how to recover Photoshop PSD files from this post.
 How to Export iMovie Video or Project
How to export a video or project from iMovie? This post will show you four ways to export iMovie to MP4, MOV, AVI, FLV, etc. and share, iTunes, etc.
 [2018] Best 8 Video Editing Software for Windows 7/8/10 and Mac
This article shows you how to choose the best video editing software for Windows/Mac from the top 8 video editors (Windows Movie Maker, Free Video Editor, etc.)
