
Aiseesoft Video Converter Ultimate
![]() 100% Secure. No Ads.
100% Secure. No Ads.
![]() 100% Secure. No Ads.
100% Secure. No Ads.
Contents
Isolating vocals from a song is an essential technique for music producers who create remixes, mashups, karaoke tracks, or vocal edits. Many users search for how to isolate vocals in FL Studio because they want an efficient way to extract clean vocal stems using tools they already have. This article explains the built-in and third-party workflows available in FL Studio for vocal isolation. It covers the native AI stem-separation feature, manual phase-cancellation techniques, EQ cleanup methods, and external AI tools for more advanced extraction. Later on, readers will clearly understand which method suits their needs and how to achieve better vocal isolation results.
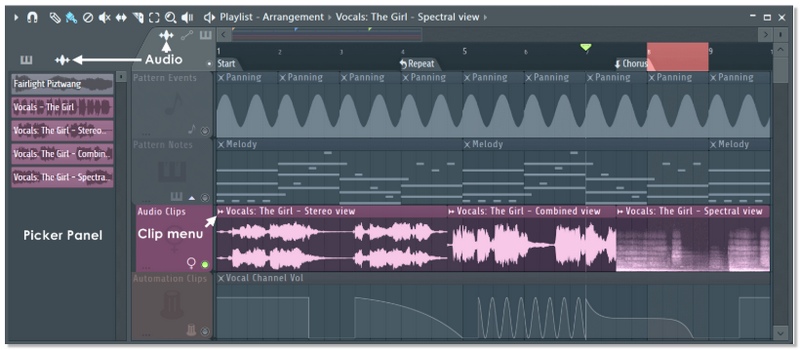
Starting with FL Studio 21.2, FL Studio introduced a built-in AI-powered stem separation tool. This feature allows producers to automatically split a full song into separate stems like vocals, drums, bass, and instrumentals. If you’re looking for how to isolate vocals from a song in FL Studio, this native feature is the fastest and easiest way, with no third-party plugins or audio editing software required.
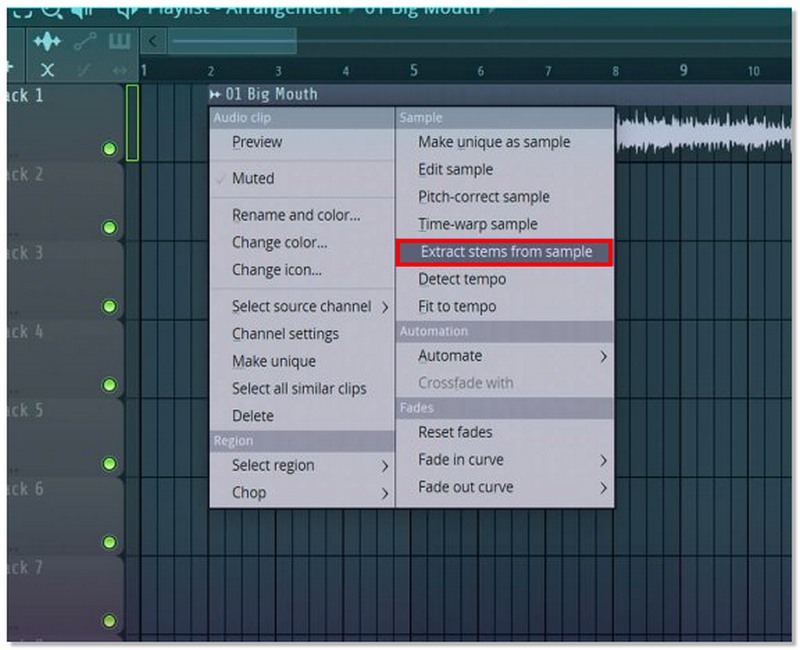
If you’re producing remixes or vocal edits, this built-in tool makes isolating vocals in FL Studio much simpler than older manual EQ or phase-cancellation methods.
Previously, producers would manually use phase cancellation to remove the vocals or isolate the instrumentals before AI stem separation became available. This method is most effective on stereo tracks where the vocals are in the center of the mix. If you are looking up how to isolate vocals in FL Studio, it is helpful to know this method as well, particularly if you want to learn some traditional audio engineering techniques.
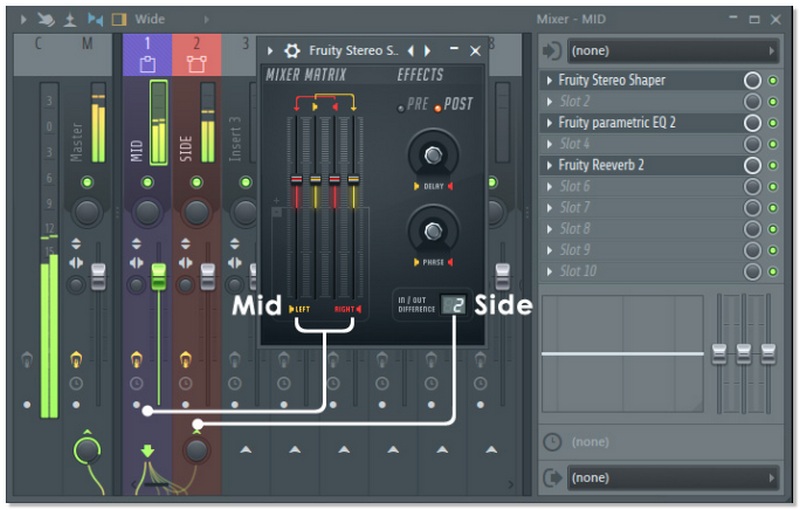
Note: This method often removes bass and other center-panned elements as well, not just vocals.
While this classic trick helps you understand how to isolate vocals in FL Studio, modern AI tools (like FL Studio 21.2’s stem separation) provide much cleaner and more professional results.
Newer versions of FL Studio are now equipped with an AI stem separation feature, but a lot of producers still prefer to use third-party plugins to get more precise and cleaner results. These plugins usually apply cutting-edge AI or spectral processing, thus they are perfect for professional remixing and acapella extraction. If you want to isolate vocals in FL Studio with higher accuracy and fewer artifacts, third-party VST plugins are often the best option.
Popular tools include:
Using external tools is one of the most effective ways to isolate vocals in FL Studio, especially when working on professional projects that require cleaner, more polished vocal tracks.
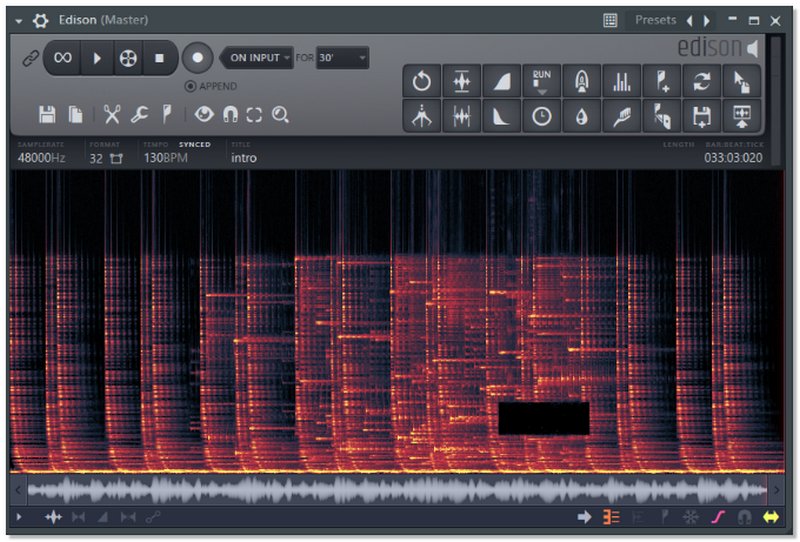
For producers who like to have full control and do it manually, a combination of Edison and EQ in your DAW is a great way to isolate vocals and make them clearer. Although this method doesn’t work like AI tools in that it automatically separates vocals, it does give you the freedom to get rid of the unnecessary frequencies and lessen the volume of the background instruments. If you’re learning how to isolate vocals on FL Studio, combining Edison’s editing tools with precise EQ adjustments gives you better control over the final sound.
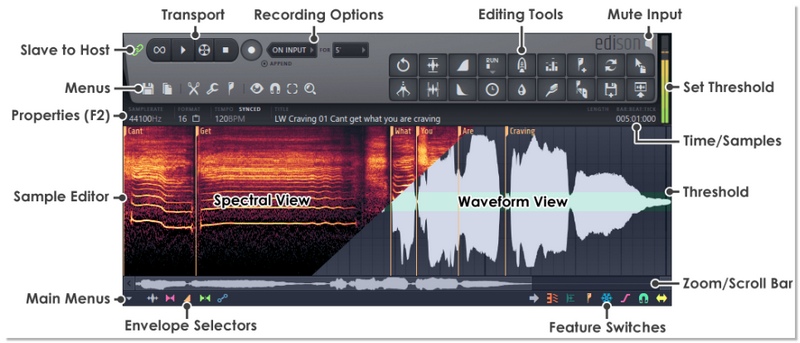
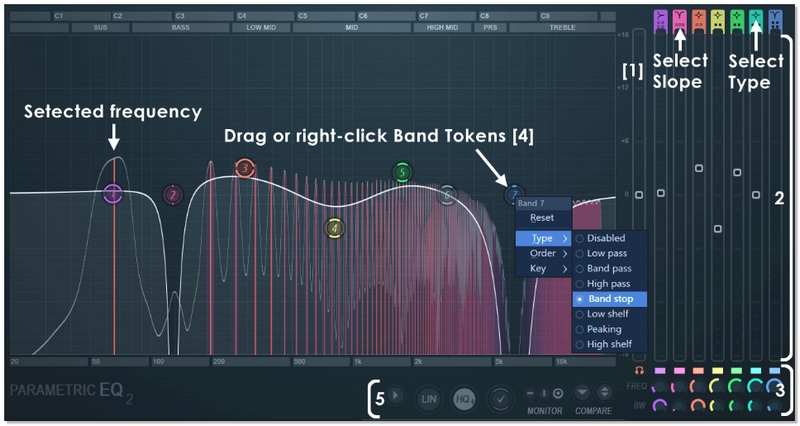
Apply these adjustments:
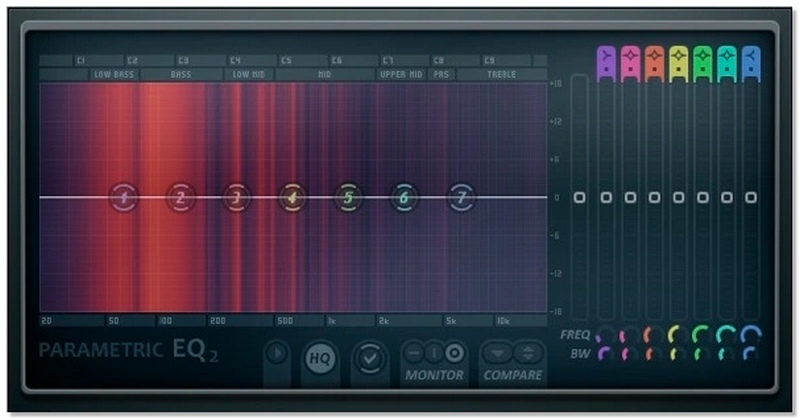
Important Note: This approach is primarily for the vocal enhancement and cleaning rather than the isolation of vocals from scratch. The method yields its best results when it is used together with AI, based on stem extraction or phase cancellation techniques. Moreover, to get a good grasp of frequency control and step up the accuracy of vocal isolation in FL Studio, it is very helpful and practical to utilize Edison and EQ.
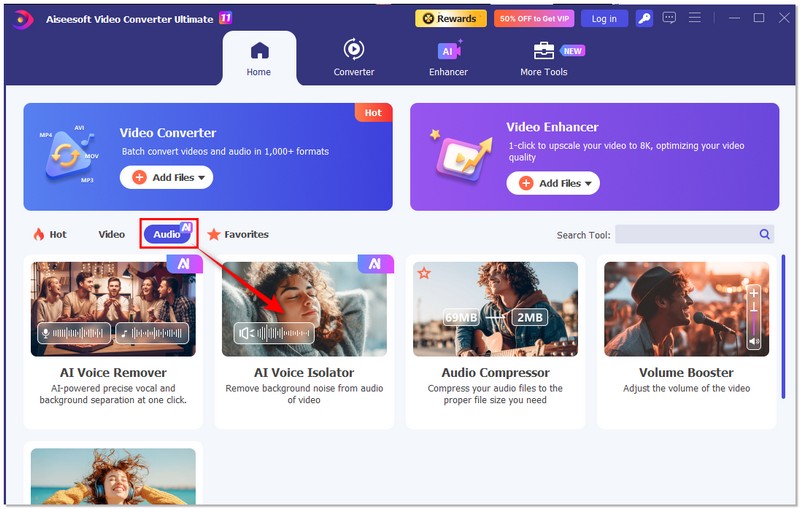
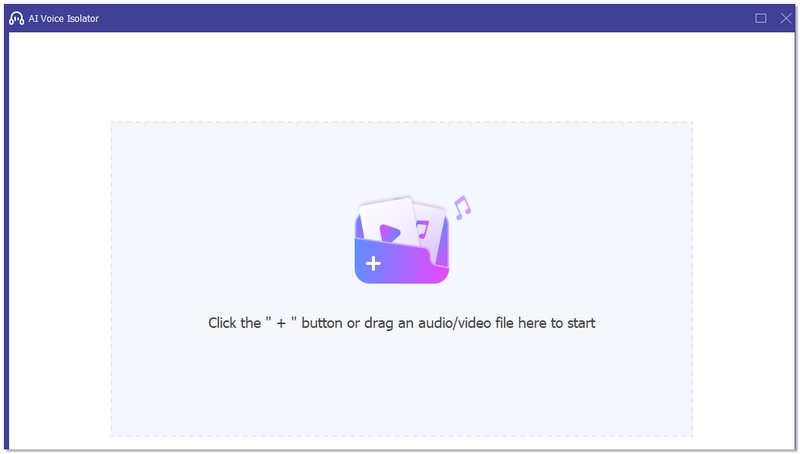
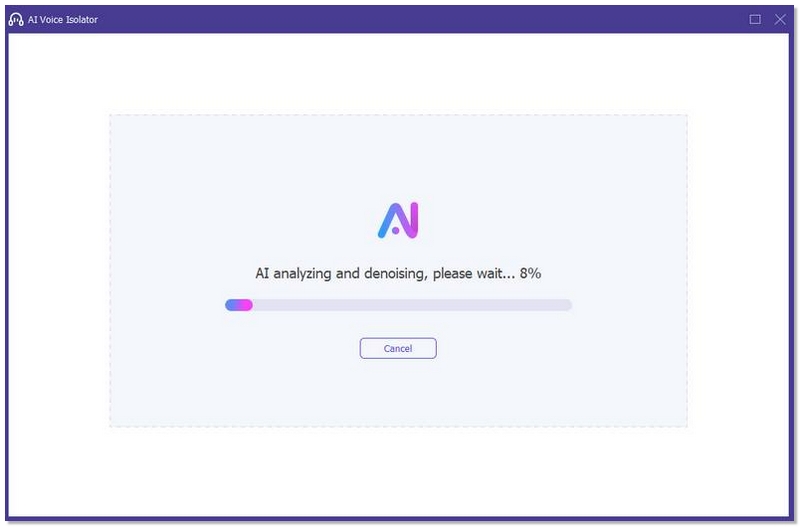
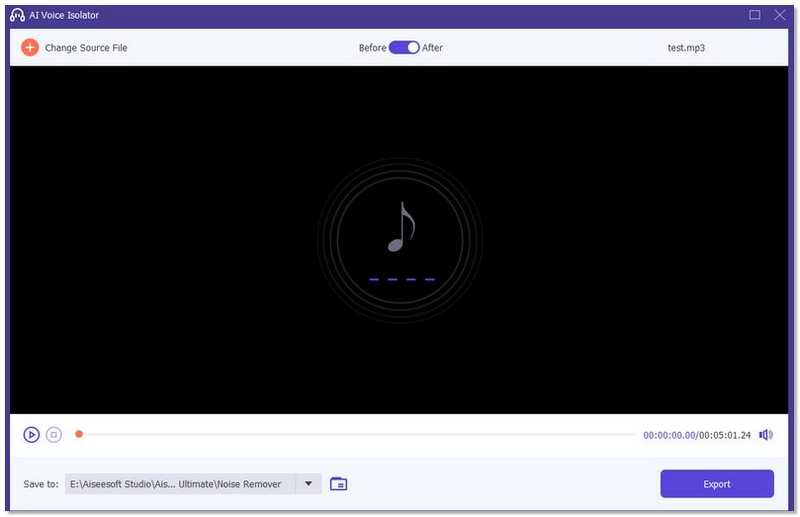
If you find it inconvenient to adjust EQs or route plugins inside FL Studio manually, you can separate vocals first before importing the file into your DAW. A very easy way is to utilize the AI Vocal Remover feature in Aiseesoft Video Converter Ultimate. This way is perfect for beginners, content creators, or remix producers who want quick and clean results without any complicated mixer routing.

Downloads
![]() 100% Secure. No Ads.
100% Secure. No Ads.
![]() 100% Secure. No Ads.
100% Secure. No Ads.
Why does vocal isolation sometimes sound robotic or distorted?
AI separation tools analyze frequencies and stereo placement. If the original mix is heavily compressed or mastered, the AI may struggle and consequently produce metallic or “watery” artifacts. Separation quality is also compromised when the source is a lower-bitrate MP3 file.
Why are bass and kick sometimes removed along with vocals?
Many commercial songs place vocals, bass, and kick drum in the center of the stereo field. When using techniques such as phase cancellation, centered elements may cancel each other out.
Does CPU performance affect stem separation speed?
Yes. AI processing depends on your CPU (and sometimes GPU). Faster processors reduce analysis time, especially for long tracks.
Conclusion
This guide illustrates various methods of isolating vocals with the use of internal and external tools. You have at your disposal viable alternatives that fit your requirements and level of expertise, be it AI stem separation, manual definition, or third-party plugins. After reading this, you should feel more confident about how to isolate vocals from a song in FL Studio and be ready to apply the method that works best for your project.
![]() 100% Secure. No Ads.
100% Secure. No Ads.
![]() 100% Secure. No Ads.
100% Secure. No Ads.
 [Top 5] Music Voice Recorder to Record Audio While Playing Music
What is the best music voice recorder? How can I record my voice over music? This post shows 5 great music voice recording software to help you capture your voice while playing music.
 Best Audio Player to Play Audio File on Android and More
Looking for an audio player to play any audio file on Android or on Windows or Mac? This article teaches you how to play audio file with the best audio player.
 Free Audio – Download Free Audio/Free Music/Free Audio Books
Want to find free audio? This article introduces the best free websites to download free audio, free audio books, and free music.

Video Converter Ultimate is excellent video converter, editor and enhancer to convert, enhance and edit videos and music in 1000 formats and more.
![]() 100% Secure. No Ads.
100% Secure. No Ads.
![]() 100% Secure. No Ads.
100% Secure. No Ads.
*Required field
*Please enter a valid email
