With the developing of the advanced smart devices, not only can apple play an important role in information age, so do other smart phone brands. Thus, ZTE, as the 4th biggest smart phone manufacturer in the world during the 3rd quarter of 2012, enjoys a great popularity among worldwide users. There is no doubt that ZTE is keeping abreast with the most professional companies, but there are still somethings awkward happening.
Facing this kind of issues, the most convenient way is to know how to jailbreak a ZT phone. However, maybe most of you are afraid of losing data while jailbreaking a ZTE phone, such as losing photos, videos, or contacts and so on. So before knowing how to jailbreak a ZTE phone, you should first know the methods to backup ZTE phone. This guide will help you out.
As we know, ZTE, one of the most well known brands, which have the most complete telecommunications product line in the world also enjoys a wide range of supportive users. Therefore, knowing how to backup ZTE phone before jailbreaking the device is a must to secure your various information also decrease the troubles of losing data.
How should we do to backup ZTE phone? First of all, you need to choose one of most efficient software to do you a favor, and Android Data Backup & Restore is highly-recommended to you. Android Data Backup & Restore is absolutely one of the most reliable software. With its helpful, handy and easy-to-use video backup features, it helps you to backup ZTE phone before jailbreaking. The steps below will show you how.
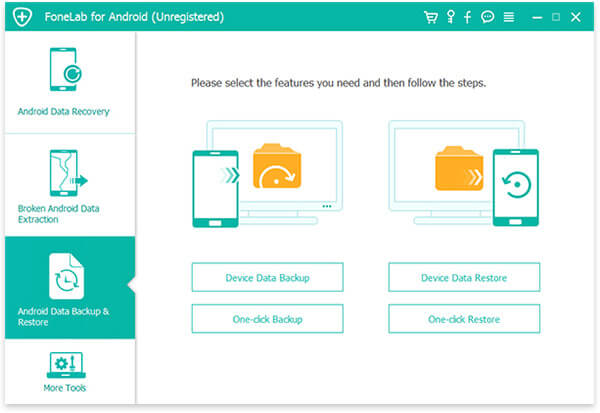
Step 1 Install and run the software
Don't have Android Data Backup & Restore in your computer? Do not worry. Android Data Backup & Restore is available in almost every software market. Just free download it with the download button below.
After a few clicks, the process of installment will be automatically proceeded and done. Android Data Backup & Restore, like any other software indeed, will immediately run itself automatically.
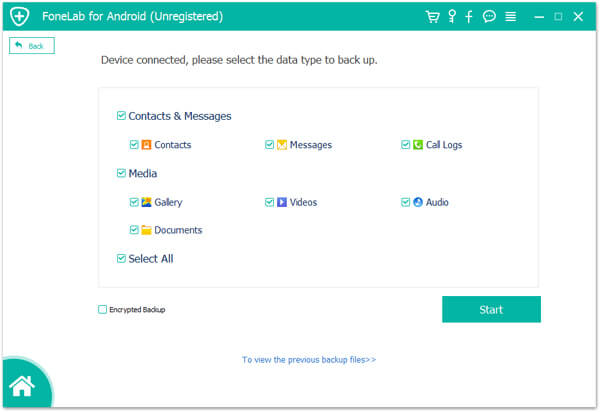
Step 2 Connect and Select the desired files
Secondly, connect ZTE phone to your personal computer with a normal USB cable so as to let the software detect your ZTE phone. Select all the contents you want by check all the boxes simultaneously by hand before them in the page of selecting the data type to backup, such as Videos, Contacts and so on. Wait for a minute, all the things in your ZTE phone which you wanted to back up will be showed in the pop-up.
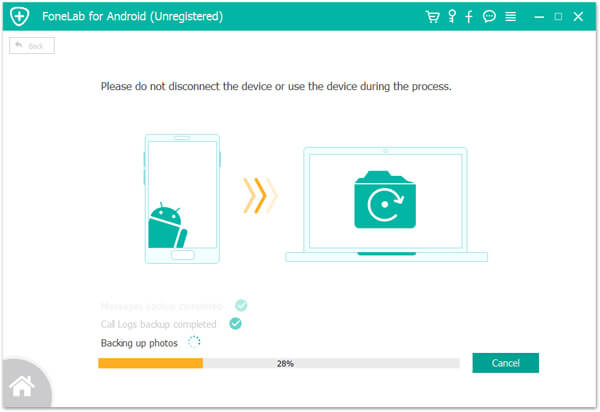
Step 3 Backing Up Video on Android
Now, all the things are waiting in the pop-up for you to choose and backup from ZTE phone to computer. All you need to do is preview them (if you like) and select the exactly wanted things one by one, and check them with some little marks in small boxes before them as usual.
Once they are chosen, the little marks will be lightened. Make sure all the things you want to back up from you ZTE are all selected and are ready for the final operation. Don't forget to click Start button at the lower-right of the page to choose specifically and continue the operation process. Finally, you can totally backup all your desired things from ZTE to your PC effortlessly.
After you successfully back up ZTE phone without any effort with Android Data Backup & Restore, you do not need to worry about any data loss which may occur in jailbreaking your ZTE phone, now you are free to learn how to jailbreak a ZTE phone also effortlessly. Check it by reading the rest of this article.
The key to make the "superuser" right a reality is definitely jailbreaking which enables you to access your ZTE Android phone with superior rights. After jailbreaking, you can easily get the utmost advantages on ZTE phone. For example, you can delete preinstalled apps to improve ZTE device's speed and keep the battery from draining too fast. Fortunately, the ZTE jailbreaking process is quite simple and the key to how to jailbreak Android phone is the steps below.
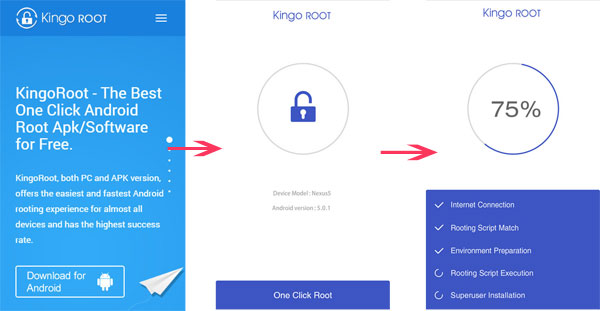
Absolutely, you should choose the effective and secure rooting tool first. KingoRoot is the one that you can totally rely on when you do not know how to jailbreak a ZTE phone. KingoRoot is a useful jailbreaking app that helps you to jailbreak a great deal of models of ZTE phones from a wide range of Android systems. It is available both on PC and ZTE phone. Now, let's take the app version as example.
Step 1 Download and install
Before jailbreaking ZTE device, you need to verify that the ZTE phone has at least 50% of battery. You may be faced with data loss that caused by insufficient power during the rooting process. Now, download KingoRoot APK to ZTE phone and follow the on-screen setup introduction to install it step by step.
Step 2 Launch the app and begin jailbreaking
The stable Internet source can ensure you with a stable and secure connection. So, do remember to check that your ZTE phone is well-connected with usable network. Launch the APK file of KingoRoot on ZTE device and then find and tap the One Click Root to begin the jailbreaking process without hesitation.
Step 3 Jailbreak your ZTE phone
As the app is jailbreaking your ZTE phone, the jailbreaking progress will be displayed on the screen very specifically. When you see an interface that shows Root Succeeded, that means your ZTE device is, of course, successfully jailbroke. Knowing how to jailbreak a ZTE phone, you can restart ZTE phone to begin your "superuser" life immediately.
Don't Miss: How to recover lost data after Android jailbreak
What should you do if you want to jailbreak a ZTE phone? It might not be as simple as you think. Just take the backup process into consideration when you jailbreak any Android phone. After that you can follow the process as the article to get the work done.
Click here to root your Samsung with PingPong Root on Windows.

May 22, 2018 10:00 / Posted by Iris Walker to Fix iOS Problems
 How to Restore Deleted Contacts on Android or iPhone
This article shows you how to restore iPhone contacts from iCloud or restore Android contacts from Gmail or Google.
 The Easiest Way to Recover Android Data after Factory Reset
You should not miss this post to recover Android data after factory reset.
 How to Transfer iTunes Music to Android
iTunes is not only for iOS devices. You could also transfer iTunes music to Android in this article.
