For different reasons, you choose to reformat your Mac. For instance, you plan to sell, give away, or trade-in your Mac, or you have to reformat Mac to fix some issues. Question is, do you know how to erase all data on a Mac and perform a factory reset?
This post gives you a detailed guide to reformat Mac. Whether you want to reformat a hard drive on Mac, or erase Mac and reinstall a clean version of the new macOS, you can keep reading and use the specific method to do that.
If you only mean to reformat a hard drive on Mac or quickly remove all your personal data from your Mac, you can use its Erase Assistant to reset your Mac to factory settings with ease. Before you reformat Mac, make sure you have backed up all useful Mac data.
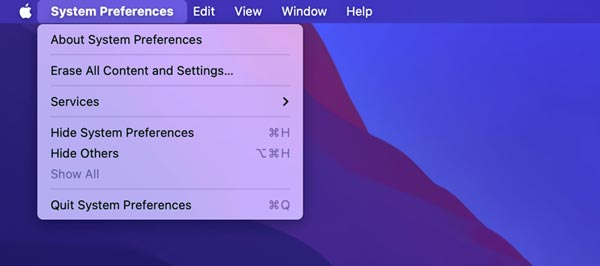
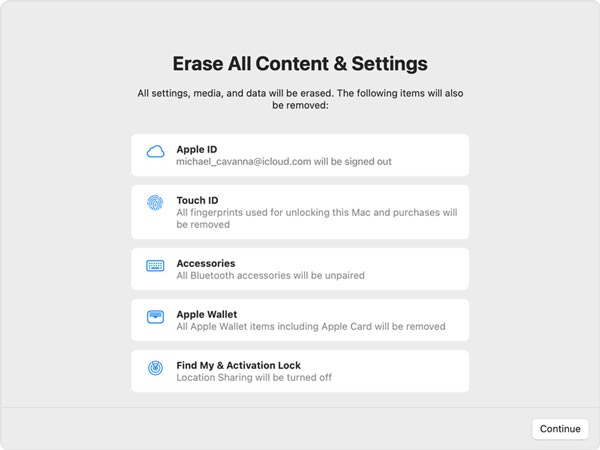
With this method, you can handily delete all your accounts and related data, sign you out of all Apple services, and turn off Find My and Activation Lock on the Mac.
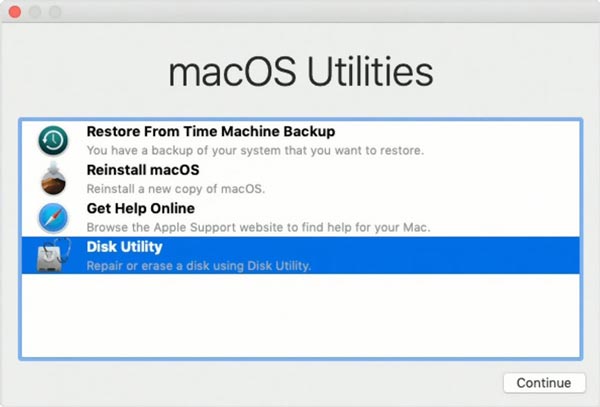
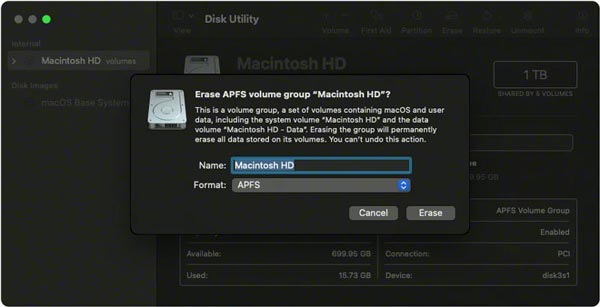
When you plan to wipe a Mac and return it to the factory settings, you can rely on Disk Utility. You can follow the steps below to reformat your Mac using it.
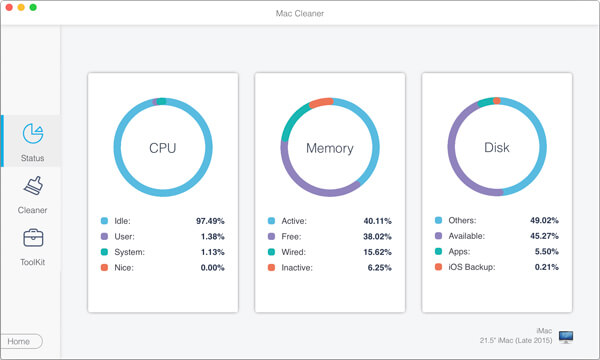
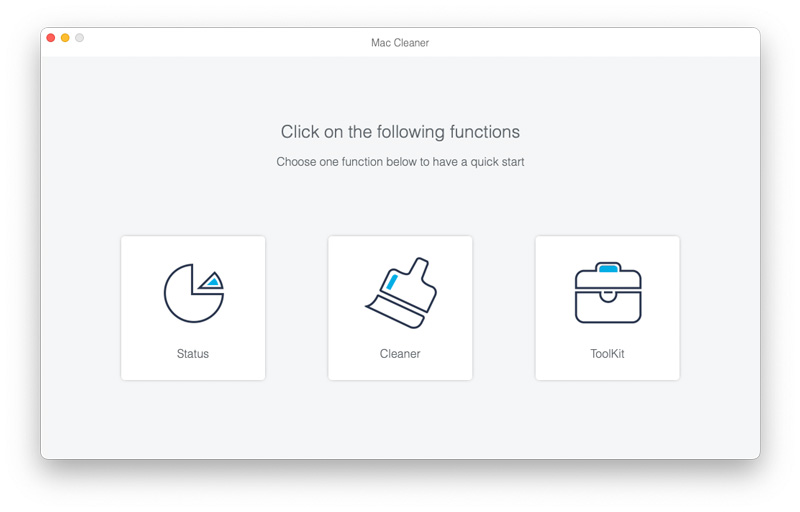
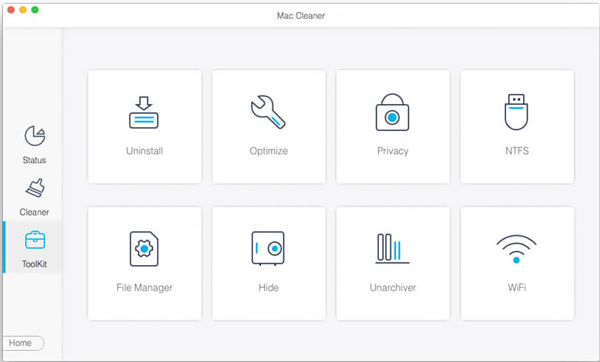
If you only want to uninstall some unused applications, remove useless data to free up Mac space, or protect your Mac from viruses, malware, adware, and others, you can use the all-featured Mac Cleaner. It provides you with a simple way to optimize Mac performance and keep it in good status.

154,940 Downloads
![]() 100% Secure. No Ads.
100% Secure. No Ads.
1. How can I reinstall macOS?
You can follow the steps above to boot your Mac into Recovery mode and open the macOS Utilities window. Here you can choose the Reinstall macOS option and follow the instructions to install a fresh macOS version.
2. How to restore data after I reformat my Mac?
If you have backed up your Mac data on an external drive, you should connect it to Mac. Click Finder on the Dock, click Applications on the left panel, and then choose Utilities. Click the Migration Assistant and then click on the Continue button. Now you can select the right way to restore your Mac data.
3. How can I quickly factory reset an iPhone?
iOS is designed with a built-in feature to bring an iPhone or iPad to its factory settings and erase all data on it. You can open the Settings app, tap on General and then scroll down to the bottom to locate the Reset option. Tap on it and then select the Erase all content and settings. Now you need to enter your password and tap on Erase iPhone again to confirm your operation. Then you can erase data on iPhone securely.
Conclusion
In some certain cases, you need to reformat Mac and wipe all data and settings on it. After reading this post, you can learn 2 effective methods to bring your Mac to the factory settings. Moreover, you are introduced to a great Mac data management and cleaning tool.
 OnyX for Mac Review - Know More about OnyX Mac Cleaner 2024
What is OnyX for Mac? Is OnyX safe for my Mac? This post gives you a detailed OnyX for Mac review and introduces you to a great OnyX Mac Cleaner alternative.
 3 Effective Ways to Delete Partition on Mac and Free Up Space
When you go for another partition for Mac, you can learn 3 ways to delete the previous partition on Mac completely and free up more storage space.
 2 100% Working Methods to Clear a SD Card on Windows and Mac
The quick way to clear an SD card is to format it. You can learn the workflow from this tutorial as well as more ways to delete files on your SD card.
Mac Cleaner is a professional Mac management tool to remove junk files, clutter, large/old files, delete duplicate files and monitor your Mac performance.
![]() 100% Secure. No Ads.
100% Secure. No Ads.
*Required field
*Please enter a valid email
