Aiseesoft Screen Recorder
![]() 100% Secure. No Ads.
100% Secure. No Ads.
![]() 100% Secure. No Ads.
100% Secure. No Ads.
Screenshots, or screen captures, are essential tools for anyone using a computer. They allow you to quickly grab an image of what's on your screen, whether it's an error message you need help with, a website design you want to save, or a funny moment in a game. This post will guide you through effective methods for taking screenshots on Windows, covering keyboard shortcuts, built-in tools, and third-party software.
| Hotkeys | Built-in Tool | Aiseesoft | Lightshot | Greenshot | Snagit | ShareX | |
| Speed | Instant | Moderate | Fast | Fast | Fast | Moderate | Fast |
| Capture Modes | Full screen or active window only. | Full screen, window, rectangular, or freeform. | Scrolling, Window, Region | Instant Region | Region, Window | Window | Extensive: Web, Polygon, etc. |
| Editing | None | Basic (Highlight, crop, and annotate) | Advanced & Intermediate: Real-time drawing | Basic (On-screen drawing) | Basic (Obfuscate/Blur) | Professional: Templates, Assets | Advanced: Effects, Watermarks |
| Storage | To Clipboard (requires manual save). | Prompt to save or auto-save to the "Screenshots" folder. | Customize the location & formats | Direct cloud link/Local | Office integration/Local | Cloud sync / Library management | Powerful: Auto-upload to Cloud/Imgur |
Need a quick snapshot of your screen on your Windows PC? In fact, Windows offers convenient ways to capture screenshots using keyboard shortcuts. This part will tell the specifics of using hotkeys for capturing different screen areas on Windows 11, 10, 8, and 7 PCs.
Whether you have Windows 11 or 10, or even Windows 8 or 7, pressing the PrtSc key will take a screenshot of the whole screen. The image is automatically sent to the clipboard, and you have to launch an application such as Paint or Photoshop, and press Ctrl+V.
Note: In some versions of Windows 11, pressing the PrtSc button will cause the Snipping Tool overlay to pop up.
Use the Alt + PrtSc to capture the active window that you have. This is ideal for capturing the screen without the background or taskbars. Similar to the full screen capture, it will save the captured image in your computer’s clipboard.
When you paste the captured image into an application and save it, the file is saved in the default location of the chosen application. The screenshot format depends on the application you use for saving. Most programs offer options like PNG, JPEG, or BMP.
These hotkeys work consistently across Windows versions. However, the default action of the PrtSc key on its own might differ depending on your laptop or keyboard model.
Some keyboards might have a dedicated Print Screen button that functions identically to the keyboard shortcut mentioned above. On some laptops, pressing the Fn key along with PrtSc might be necessary to capture the screen. You should check your keyboard layout or manufacturer's documentation to confirm the exact location and functionality of the Print Screen key on your specific device.
While hotkeys offer a quick way to capture entire screens or active windows, the built-in Snipping Tool in Windows provides more control and flexibility when capturing specific areas of your screen.
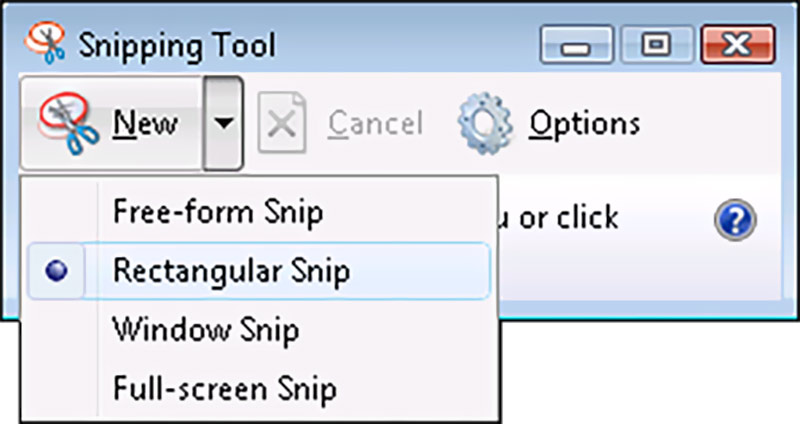
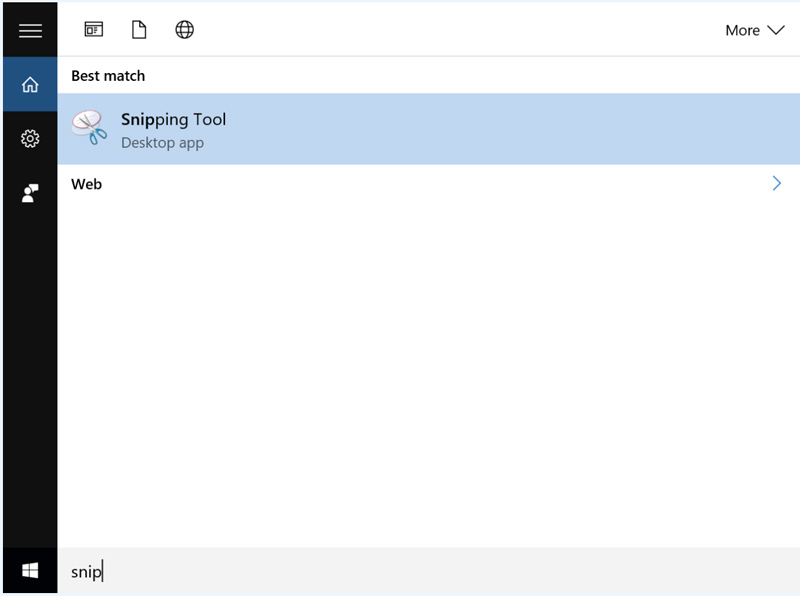
Click the Start menu and type Snipping Tool in the search bar. Click on the application that appears.
Once the Snipping Tool opens, you will see several options for capturing screenshots on Windows. Choose New to open a new snipping window and select the specific area you want to capture. Rectangular Snip enables you to select a rectangular area by clicking and dragging your mouse. Also, you can use the Window Snip, Full-screen Snip, or Freeform Snip to screenshot on your PC.
Once captured, the Snipping Tool window will appear with your screenshot. You get some basic editing tools to annotate your screenshots, such as a pen, highlighter, and eraser. You can save your screenshots as PNG, JPEG, or GIF as you like.
While Snipping Tool works consistently across Windows versions, some slight variations in the interface might exist between versions. The Snipping Tool doesn't offer advanced editing features like dedicated image editors.
While Windows offers built-in screenshot functionalities with keyboard shortcuts and the Snipping Tool, third-party tools provide more features and flexibility for capturing and managing screenshots. They allow you to capture, edit, and share screenshots with greater ease and efficiency. Here are five popular and highly rated options for Windows PCs.
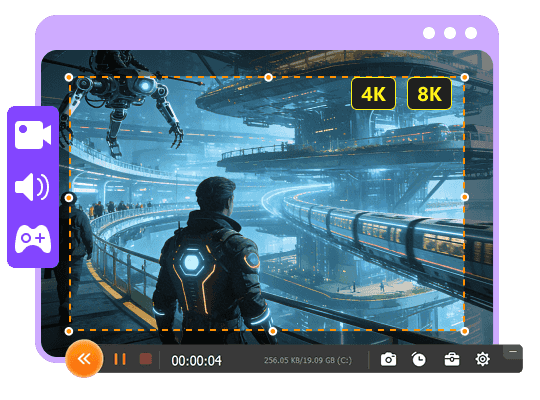
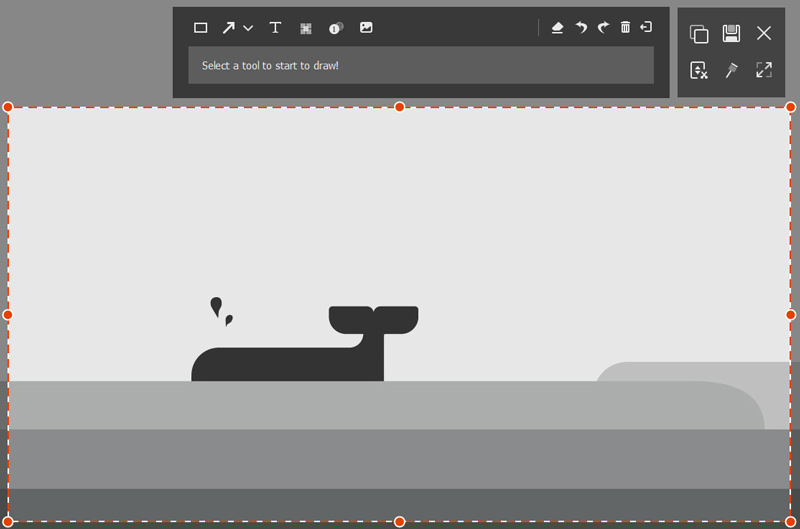
Aiseesoft Screen Recorder offers advanced features beyond basic screenshot capturing. It allows you to capture gameplay, video calls, webinars, and more, along with audio. As a screenshot capture tool, it lets you capture windows, specific areas, the entire screen, and the scrolling window. Compared with other software, it carries more editing functions. You can handily add annotations, text, shapes, watermarks, etc., to your screenshots. In addition, Aiseesoft allows you to save screenshots in various formats and adjust quality settings.
![]() 100% Secure. No Ads.
100% Secure. No Ads.
![]() 100% Secure. No Ads.
100% Secure. No Ads.
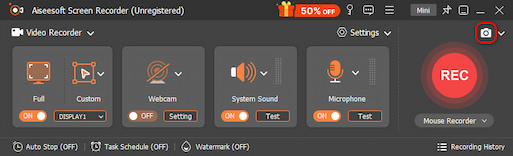
When you want to screenshot on a Windows PC, open it and select Snapshot in the main interface. Then, you can freely capture your computer screen. As mentioned above, you are allowed to edit the screenshot and add your preferred labels.
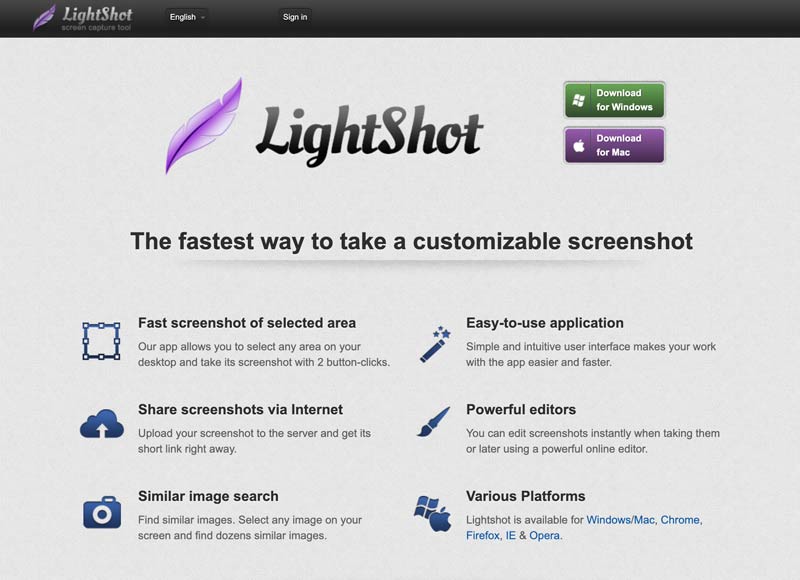
Lightshot is a free and lightweight application that doesn't require extensive installation or consume significant system resources. Unlike the Snipping Tool's options, Lightshot lets you capture specific rectangular or freehand-shaped areas of your screen. You can directly add annotations like arrows, text boxes, and shapes to your screenshot. Moreover, captured screenshots can be uploaded to the Lightshot cloud service with a single click, generating a shareable link for easy distribution.
Greenshot is specifically designed for Windows users. It goes beyond the basic functionalities of keyboard shortcuts and the Snipping Tool. It lets you easily capture the entire screen, active window, specific region, scrolling window, or even capture delays. You can annotate, highlight, or blur specific areas of the captured image directly within Greenshot.
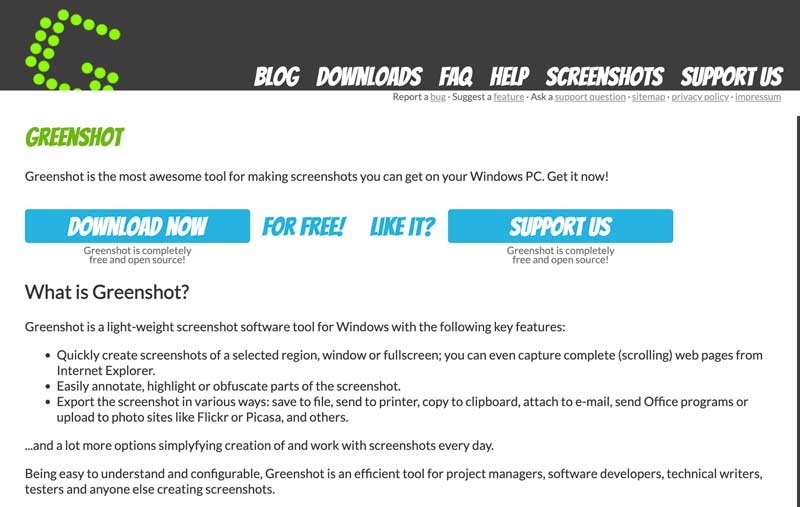
Greenshot enables you to set custom hotkeys, define output formats, and choose where to save screenshots. You can take screenshots on Windows and save them in various formats like PNG, JPEG, BMP, and TIFF.
Snagit is a paid screen capture and editing software that gives a simple way to capture screenshots on Windows. It can capture the full screen or selected regions. It enables you to edit and annotate your screenshots with various tools like arrows, text boxes, shapes, and callouts for clearer communication. Like the introduced Aiseesoft Screen Recorder, Snagit also helps to capture your screen activity with audio narration.

Snagit offers a convenient way to share your screenshots and recordings through various channels like email, social media, or cloud storage. It integrates seamlessly with popular productivity applications like Microsoft Office and Google Drive. Moreover, Snagit allows you to create custom presets for frequently used capture and editing settings for faster workflows.
ShareX emerges as a powerful and recommended option for taking screenshots on Windows. Goes beyond capturing the entire screen or active window. It allows you to capture specific regions, scroll windows and web pages, and even record your screen as a video. You can set up hotkeys for different capture methods, define custom regions, and choose from various file formats for saving screenshots.
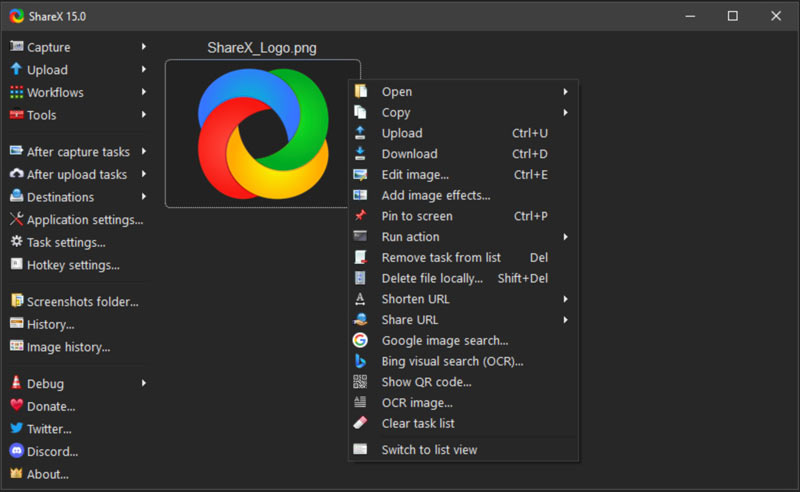
ShareX is open-source and completely free to use. It has a large community of developers ensuring ongoing updates and improvements. ShareX offers basic image editing tools like cropping, resizing, adding text and arrows, applying filters, and more. It supports uploading your screenshots to over 80 online services like Dropbox, Imgur, and Google Drive, allowing you to easily share them with others. Compared to some feature-heavy image editing software, ShareX is relatively compact and can be run as a portable application without requiring installation.
What is the fastest way to take a screenshot?
The fastest way to take a screenshot on Windows depends on what you want to capture. Pressing PrtSc is the absolute quickest way to capture the entire screen. However, the screenshot requires pasting and saving manually, which adds an extra step compared to the Snipping Tool or third-party tools that might allow direct saving options.
Can you snip while scrolling?
Several third-party screenshot tools offer scrolling capture functionality, which allows you to capture the entire content of a scrollable window, webpage, or document, even if it extends beyond the screen's visible area. Popular options include Greenshot, Snagit, and ShareX.
Can you take a scrolling screenshot on Windows?
Yes, you can take a scrolling screenshot on Windows, but not using the built-in options like hotkeys or the Snipping Tool. Instead, you can use a third-party app or web browser extension to capture scrolling content.
Conclusion
Taking screenshots on a Windows PC is a valuable skill for anyone using Windows. With the various methods available, including keyboard shortcuts, the built-in Snipping Tool, and third-party tools, you can easily capture what is on your screen for diverse needs. Choose one practical tool in this article and try it now!
 How to Take a Long Screenshot on Any Devices Easily [2024 Updated]
Learning to take a long screenshot is essential, especially if you want to capture comprehensive information or conversation. Click this to learn more!
 [Quick Steps] How to Take a Screenshot on Xbox and Xbox One
Capture the peak moment in your gameplay by learning how to take screenshots on the Xbox Series. See the full details here.
 How to Edit a Screenshot: Most Useful Tips That You Need
Learning how to edit a screenshot isn't as difficult as you may think. Here, we have listed the most effective way to perform it instantly.

Aiseesoft Screen Recorder is the best screen recording software to capture any activity like online videos, webcam calls, game on Windows/Mac.
![]() 100% Secure. No Ads.
100% Secure. No Ads.
![]() 100% Secure. No Ads.
100% Secure. No Ads.
*Required field
*Please enter a valid email
