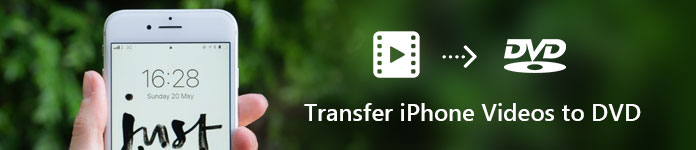
More and more people are used to making videos with iPhone to record daily life, because the increasing improved iPhone camera enables them to take videos in high quality. However, since most of iPhone users are always struggling with the storage problem, transferring iPhone videos to DVD will be a good idea to create more space on your handset. What's more, you can burn your iPhone videos to DVD and watch them on TV in order to share your memorable moments with your family and friends. So here we will introduce two best methods to you to transfer iPhone videos to DVD.
Transfer iPhone Videos To Dvd
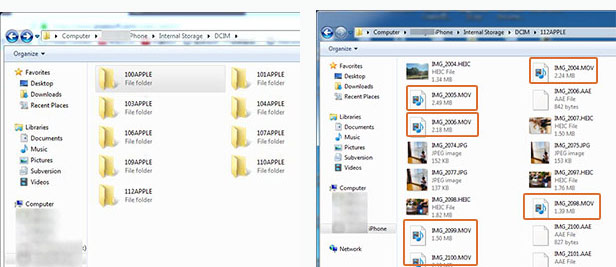
To burn iPhone videos to DVD Disc, firstly you need to transfer your iPhone videos to your computer or Mac. You can directly transfer the videos you want to burn to DVD by importing them to your computer with a USB cable. But it will take you a long time to find out the exact videos you want to transfer, because there's no specific video folder shown on your computer. All photos and videos are sorted into folders together. Just as shown below.
To transfer iPhone videos to your PC more easily and quickly, you can use Aiseesoft FoneTrans to do you a favor. With this iPhone transfer tool, you quickly find what you want and import specific videos to your computer with just one click.
Aiseesoft Burnova is a professional DVD burner. It allows you to burn local videos from computer to DVD or Blu-raydisc/ISO/folder.
1. Burn videos to DVD disc/folder/ISO file easily
Burnova can work as a DVD maker to help you make iPhone videos to various DVD types, like DVD-R, DVD+R, DVD-RW, DVD+RW, DVD+R DL, DVD-R DL, DVD-5, DVD-9, etc. and play them on any player.
2. Create video to Blu-ray disc/folder/ISO file
Burnova is also a good Blu-ray burner that can burn your videos to Blu-ray-25 and Blu-ray-50, so you can play it on your PS3, Sony, LG, Samsung, Philips Blu-ray player.
3. Burn DVD/Blu-ray with various menu templates
Burnova provides you with various menu templates (holiday, family, travel, wedding and more styles) to specify your different type of iPhone videos. You are also able to customize your own background to tell your own story of the videos.
4. Edit videos before burning to DVD/Blu-ray
You can edit your videos with the built-in editing tools before burning them to a DVD/Blu-ray disc. The special video effects such as blur, sharpen, gray, sketch, canvas, mirror, sculpture, emboss and pixelate effects, will make your videos more creative and unique. Powerfully, Burnova is able to save the DVD project for further burning as well.
5. Make DVD/Blu-ray from various video formats
Burnova supports almost all video formats for DVD/Blu-ray making. You are allowed to import videos from MP4, AVI, WMV, MKV, M4V, MOV, M2TS/MTS, 3GP, VOB, FLV, MPEG, MPG, DV, RMVB, TOD, ASF, etc., even HD MPEG2, HD MPEG4, HD WMV, HD TS, HD MTS, HD TRP, and HD TP video files. It also allows you to add external audio track from MP3, AAC, AIFF, FLAC, WAV, WMA, OGG, AC3, MPA, MP2, etc. to make your video more perfect.
After learning the features of Aiseesoft Burnova, you will know that it's not only a simple DVD maker. It's more powerful, more than transfer iPhone videos to DVD. So how to use Burnova to burn iPhone videos to DVD disc, check the complete guide as below.
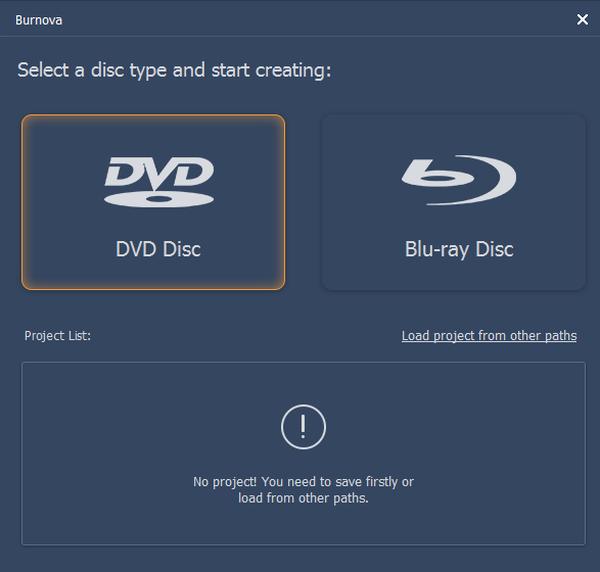
Step 1 Download and run Aiseesoft Burnova on your computer. It will pop up a window to let you select a disc type, select DVD Disc.
Step 2 Insert a blank DVD to the DVD drive in your computer.
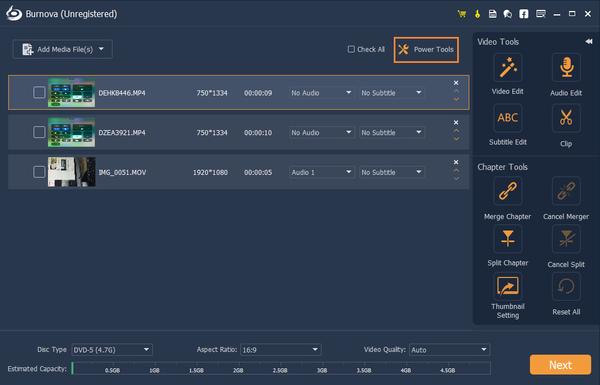
Step 4 On Burnova interface, click "Add Media File(s)" to find the iPhone videos you have imported to your computer in Part 1 and add them to Burnova.
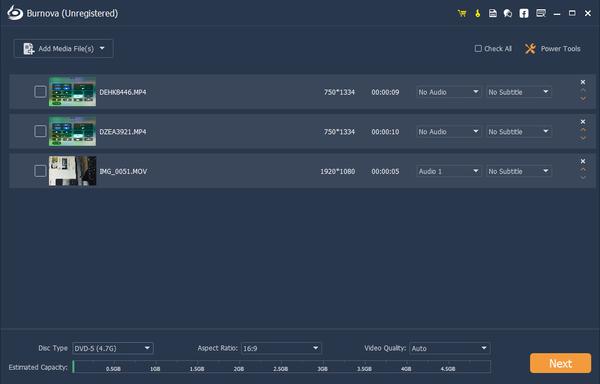
Step 4 You can also make some basic settings in this page, such as making sure what type of DVD disc you want to burn video into, setting aspect ratio and video quality as you like.

Step 5 Select a video and click Power Tools to open the editing toolbar if you want to edit your iPhone videos before burning them to DVD.
Step 6 After you finished editing your videos, click Next to edit DVD menu.
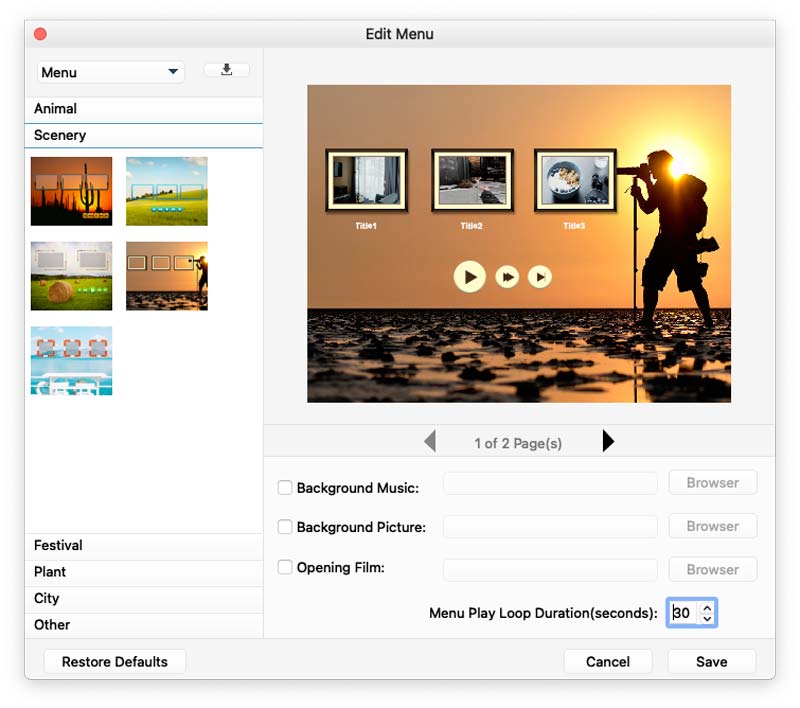
There are different types of Menu Templates for you to choose, you can pick one according to your video style. You are also able to customize a template with your own picture. You can add background music, change background, add opening film to your videos in this interface as well.
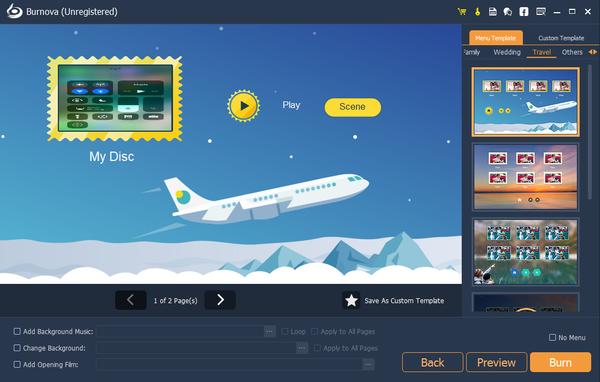
Please note that you are able to preview all the effects you added to your videos before burning them to DVD.
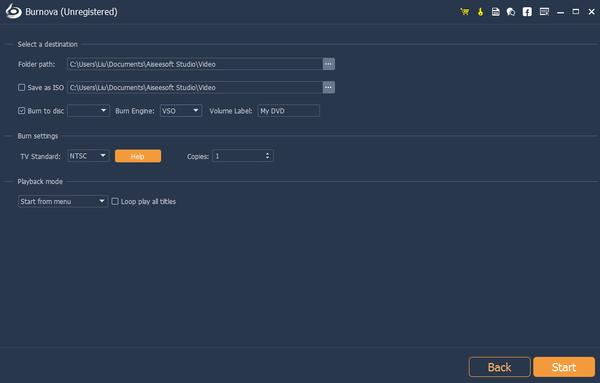
Step 7 Click the Burn button to make the burning settings.
Step 8 After you make all settings well, click the Start button to burn your iPhone videos to DVD.
We have introduced Aiseesoft Burnova above, which is a powerful DVD maker. However, its biggest disadvantage lies in that, there is no Mac version available for now, which means that if you only have a Mac, you cannot use Burnova to transfer iPhone videos to DVD, at least for now.
In this case, you can use Aiseesoft DVD Creator to achieve the purpose, which is available in both Windows version and Mac version.
Aiseesoft DVD Creator is professional in burning videos, audio and images to DVD discs/folders and ISO files with super high quality. Moreover, with DVD Creator, customizable menus and powerful editing features are also available for you to create a better DVD at ease.
Without much nonsense, let's check how to transfer and burn iPhone videos to DVD with this powerful DVD Creator. In this part we will take example with the Mac version.
Step 1 Download and install DVD Creator for Mac on your Mac.
Step 2 Insert a blank DVD disc to the DVD drive.
Tips: If your Mac does not have a DVD drive, you need to connect a third party DVD drive via USB plugin.
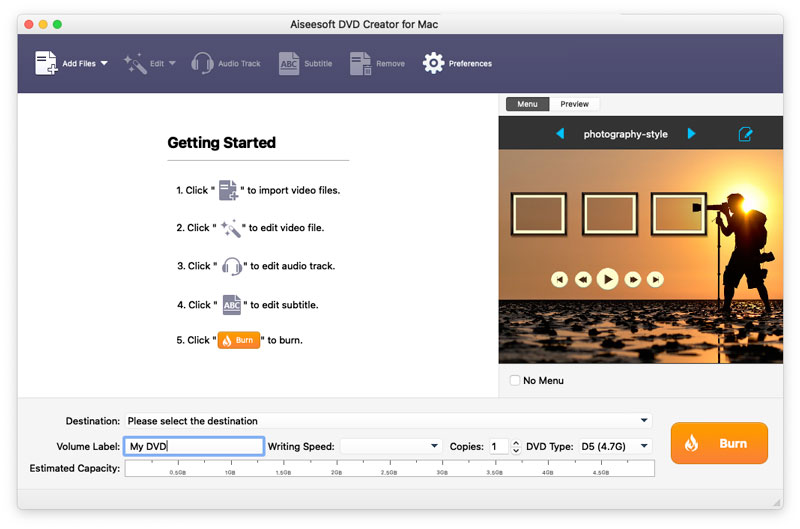
Step 3 Click "Add Files" button to import the iPhone videos you have transferred to your Mac in Part 1.
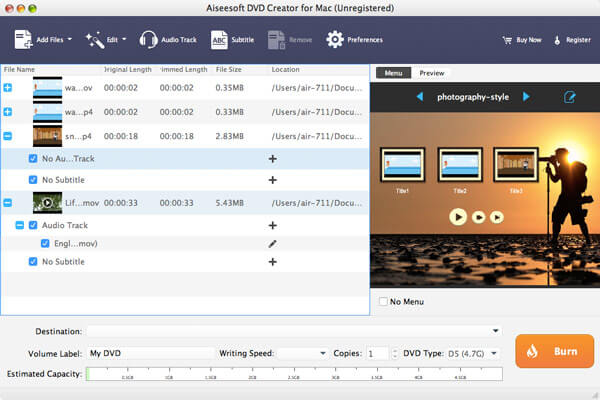
Step 4 Select the target DVD disc from the "Destination" drop-down list.
Step 5 Select a Menu for your DVD, you can choose the menu type as you like on the right part of the application by tapping the right or left arrow. You can also click "Edit menu" button to do some further editing on the menu, like menu style, frame, button, background music/picture, and so on.
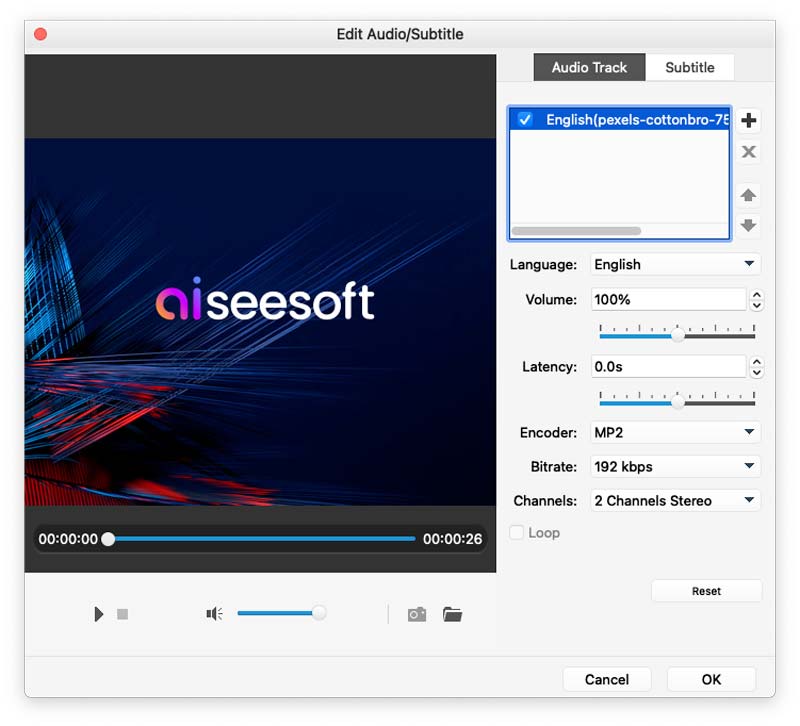
Step 6 You are allowed to add audio track and subtitle to the DVD or edit your videos before burning them. Just click the correlative buttons on the top of the main page.
Please note that you are able to preview all the effects you added to your videos before burning them to DVD.
Step 7 Click the Burn button to burn your iPhone videos to DVD.
To be honest, the two applications mentioned above are both powerful enough for you to transfer iPhone videos to DVD easily and quickly. And Burnova is more powerful in its abundant functions which are not only limited in burning DVD. So pick any one of them according to your demands.

November 06, 2018 10:00 / Posted by Andrew Miller to Create DVD
 How to Burn a DVD on Windows 10/8/7
Want to know how to burn a DVD disc? This article introduces the best DVD creator to help you burn DVD on Windows.
 How to Add Subtitle and Audio Track to DVD
When burning DVD, do you want to add subtitle and audio track? Here I recommend you a easy-to-use software - Aiseesoft DVD Creator. With this software you can add subtitle and audio track from your local file to the video you want to burn into DVD.
 Convert and Burn FLV Video Files to DVD
If you want to convert and burn FLV to DVD, Aiseesoft DVD Creator is a good choice. It's the best FLV to DVD converting application that you can have a free trial.
