Contents
Switching to a new Android phone is exciting, but moving thousands of photos from your old device to the new one can be frustrating. Your photos often contain important memories, travel moments, and personal files that you don’t want to lose.
Fortunately, there are several ways to transfer photos from Android to Android, including wireless transfer tools, cloud services, USB connections, and professional phone transfer software.
In this guide, we will show you 7 reliable methods to transfer photos from Android to Android, explain the advantages and limitations of each method, and help you choose the best solution based on your needs.
| Method | Speed | Internet Required | Best For |
| Aiseesoft FoneEase | ⭐⭐⭐⭐⭐ | No | Transfer all photos quickly and safely |
| Quick Share | ⭐⭐⭐⭐ | No | Wireless transfer between nearby Android phones |
| Google Photos | ⭐⭐⭐ | Yes | Cloud backup and photo syncing |
| Samsung Smart Switch | ⭐⭐⭐⭐⭐ | No | Switching to a Samsung Galaxy phone |
| USB Cable and PC | ⭐⭐⭐⭐ | No | Large photo libraries and offline transfer |
| Google Drive | ⭐⭐⭐ | Yes | Photo backup and storage |
| Bluetooth | ⭐⭐ | No | Sending a small number of photos |
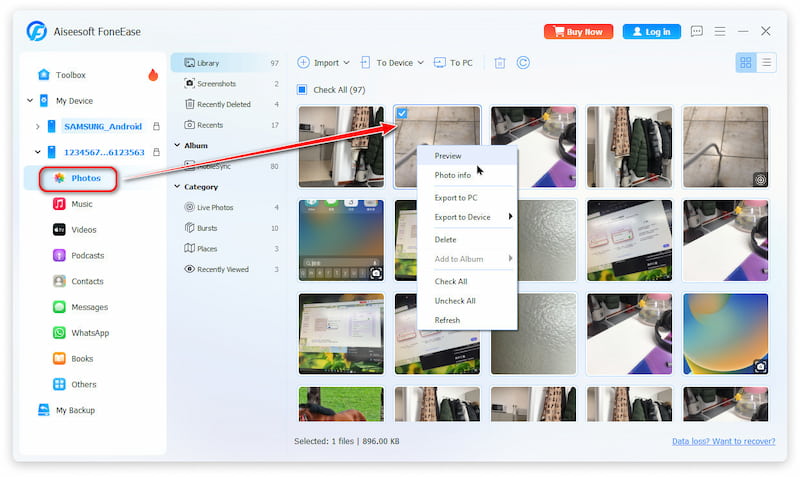
If you want to transfer hundreds or thousands of photos from one Android phone to another without complicated steps, Aiseesoft FoneEase is one of the easiest solutions.
Unlike cloud-based methods, FoneEase transfers photos directly between devices, meaning you don’t need to upload your pictures first or worry about limited cloud storage.
It supports transferring photos, videos, contacts, messages, music, and other important phone data. Whether you are moving data from an old Android phone to a new Android device or switching between different Android brands, FoneEase can help complete the transfer with just a few clicks.
Why Choose Aiseesoft FoneEase?
 100% Secure. No Ads.
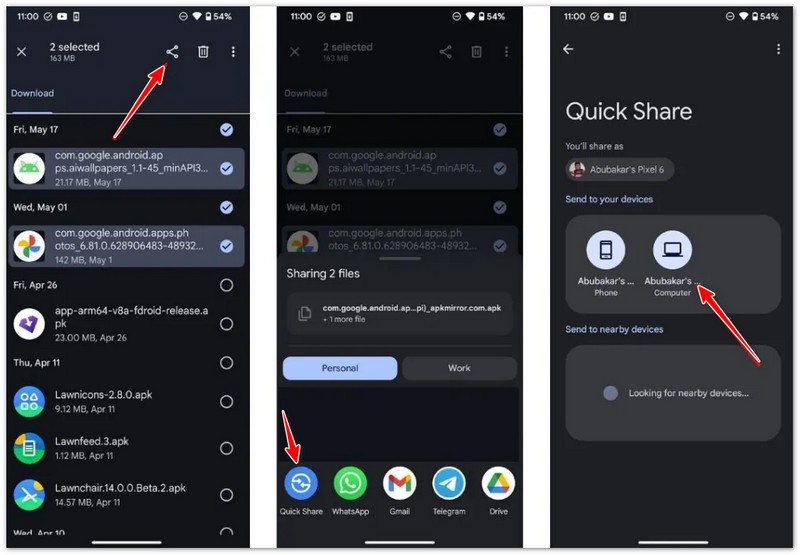
Quick Share is Google's built-in sharing feature that allows Android users to transfer files wirelessly between nearby devices.
It uses Bluetooth to discover devices and Wi-Fi Direct for faster file transfers.
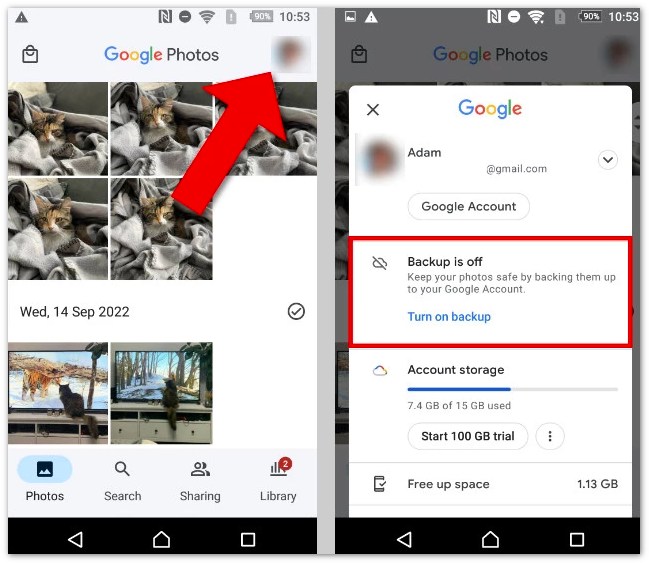
Google Photos is a convenient way to move photos between Android devices by backing them up to your Google account.
Once your photos are uploaded, you can access them from any device signed into the same account.
Samsung Smart Switch is a built-in migration tool designed for users who are switching to a new Samsung Galaxy phone. It allows you to transfer photos, videos, contacts, messages, apps, and other important data from an old Android device to a new Samsung phone.
You can transfer data wirelessly or use a USB cable for a faster and more stable connection, especially when moving a large photo library.
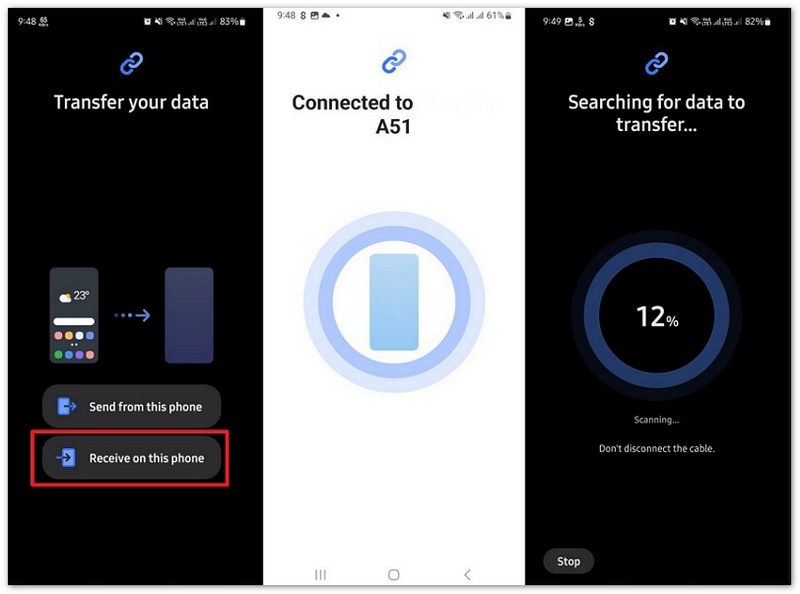
Using a computer as a middle step is a traditional way to transfer photos.
You can copy photos from your old Android phone to your computer, then move them to your new Android device.
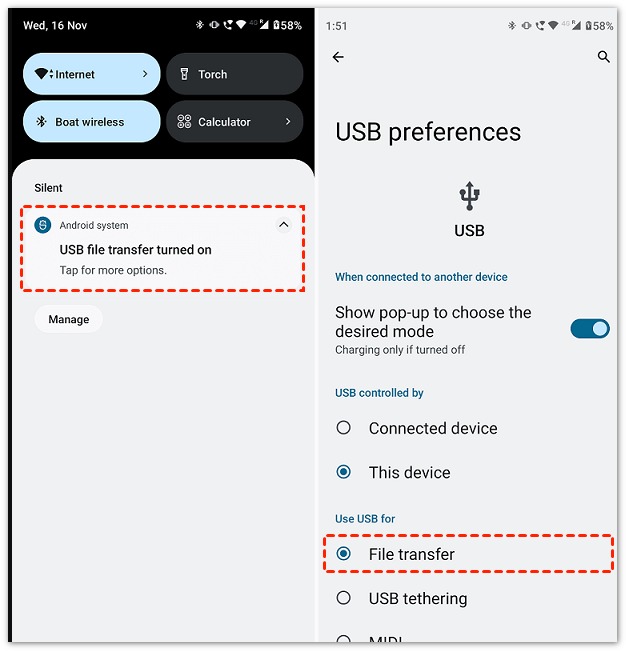
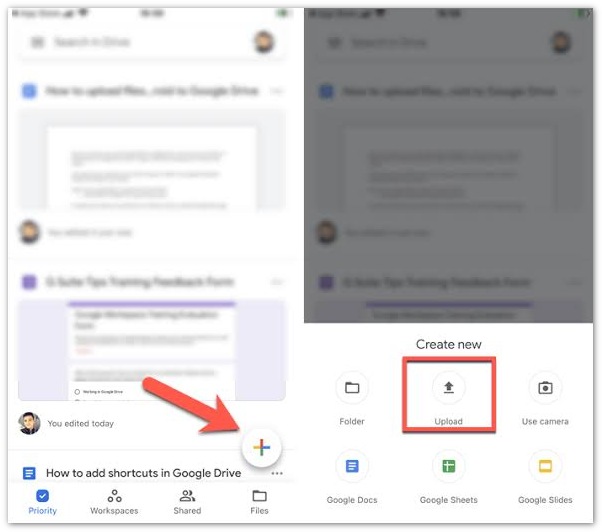
Google Drive can also be used to transfer photos between Android phones. You can upload photos from your old device and download them on your new phone.
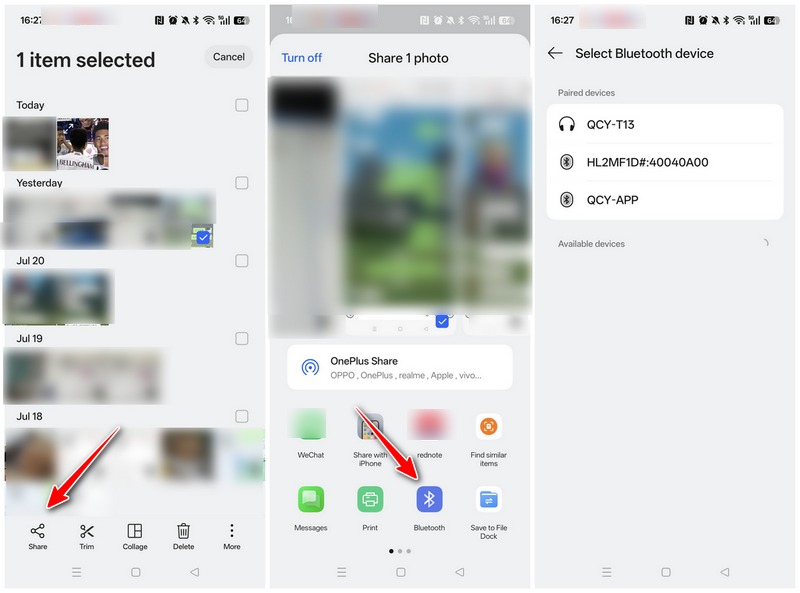
Bluetooth is one of the oldest ways to share files between phones.
It works without internet, but it is better suited for transferring a small number of photos.
How do I transfer thousands of photos from Android to Android?
For thousands of photos, a direct phone transfer tool like Aiseesoft FoneEase is usually the fastest option because it avoids uploading and downloading large photo libraries through the internet.
What is the fastest way to transfer photos from Android to Android?
The fastest methods are direct phone transfer tools, USB cable transfers, and Quick Share. The best choice depends on your devices and the amount of data.
Can I transfer photos from Android to Android without WiFi?
Yes. You can use Aiseesoft FoneEase, USB cable and PC, Bluetooth, or Smart Switch without WiFi.
How do I transfer photos from an old Android phone to a new Android phone?
You can use Quick Share, Google Photos, Smart Switch, or a professional transfer tool like Aiseesoft FoneEase to move photos from your old Android phone to your new device.
Conclusion
Transferring photos from Android to Android does not have to be complicated. While wireless methods like Quick Share and Google Photos work well for some users, they may become inconvenient when moving large photo collections.
For users who want a faster, safer, and easier way to transfer photos, Aiseesoft FoneEase provides a simple solution to move photos and other important data directly between Android devices.
100% Secure. No Ads.
Whether you are upgrading your phone or switching to a different Android brand, choosing the right transfer method ensures your precious memories stay safe.
 How to Get Gorgeous Photo Gallery – 10 Best Gallery APP for Android
Choose from following 10 best gallery app for Android, to enjoy well designed and fastness experience, of sorting out and manage all your Android pictures.
 8 Best Android Photo Recovery Tools to Recover Deleted Images in 2025
Here are the top 8 best Android photo recovery apps for you to recover deleted photos from the Android phone gallery or SD card.
 7 Easy Methods to Change the Resolution of Android Pictures
This guide will tell you how to change the resolution of a picture on your Android phone/tablet quickly and easily without losing quality.
 Leave your comment and join our discussion
Aiseesoft FoneEase is a data transfer and management tool that lets you seamlessly move, back up, and manage various data between iOS, Android, and computers without resetting your phone or relying on iTunes.
100% Secure. No Ads.

*Required field
*Please enter a valid email

