
Aiseesoft Video Converter Ultimate
![]() 100% Secure. No Ads.
100% Secure. No Ads.
![]() 100% Secure. No Ads.
100% Secure. No Ads.
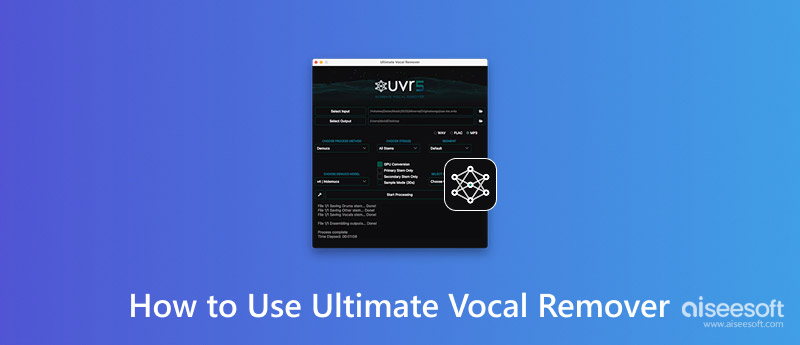
If at any point while trying to strip vocals from a track, you ended up in a maze of unfamiliar technical terms like MDX, VR, or Ensemble, feeling totally lost, I understand you perfectly! I have experienced it too. I therefore made this easy, step-by-step tutorial to assist you. I’ll share with you everything: downloading and installing the software, the optimal UVR5 settings to extract vocals without background noise, and even a couple of super-easy alternatives if you want a simpler way. Once you are done reading this article, you will be able to know how to use Ultimate Vocal Remover and obtain the desired vocal tracks.
Before you can start separating vocals, you need to properly install the software and make sure FFmpeg is set up correctly. Don’t worry! I’ll walk you through the entire process so you won’t get stuck.
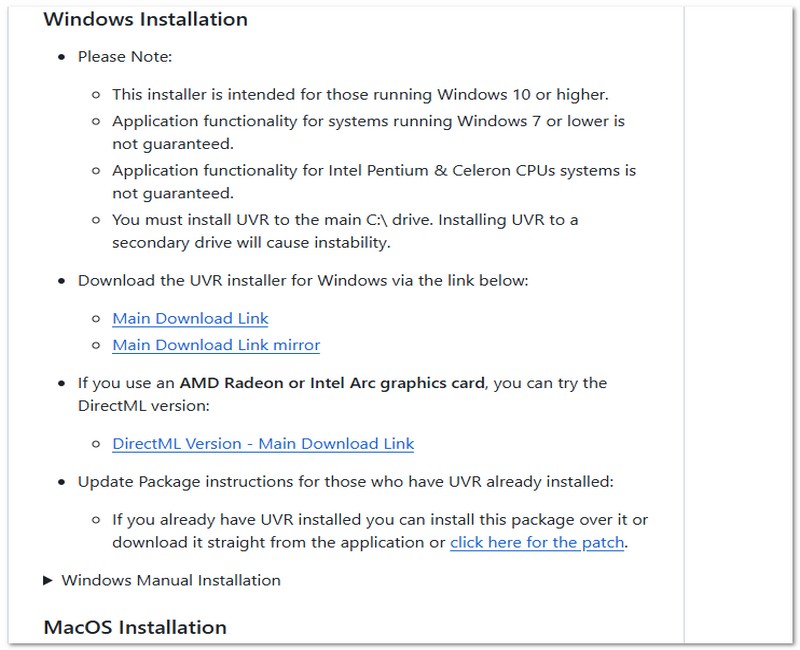
Option 1: Automatic FFmpeg Installation (Recommended)
Some UVR versions automatically prompt you to install FFmpeg. If you see this option:
Option 2: Manual FFmpeg Installation
Final Check Before Using UVR
After installation:
If everything works smoothly, you’re ready to start separating vocals from song. This step is essential in any complete ultimate vocal remover guide, because even the best settings won’t help if the software isn’t installed correctly.
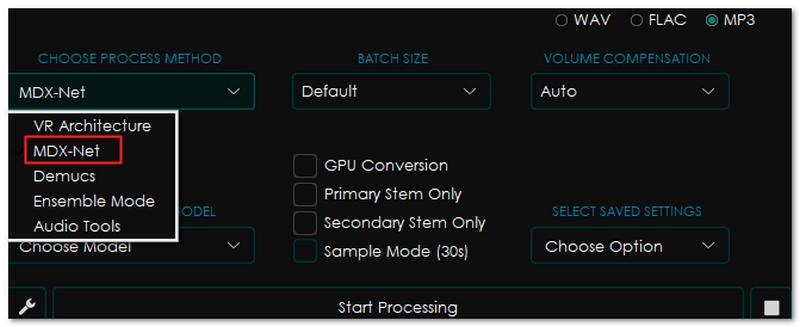
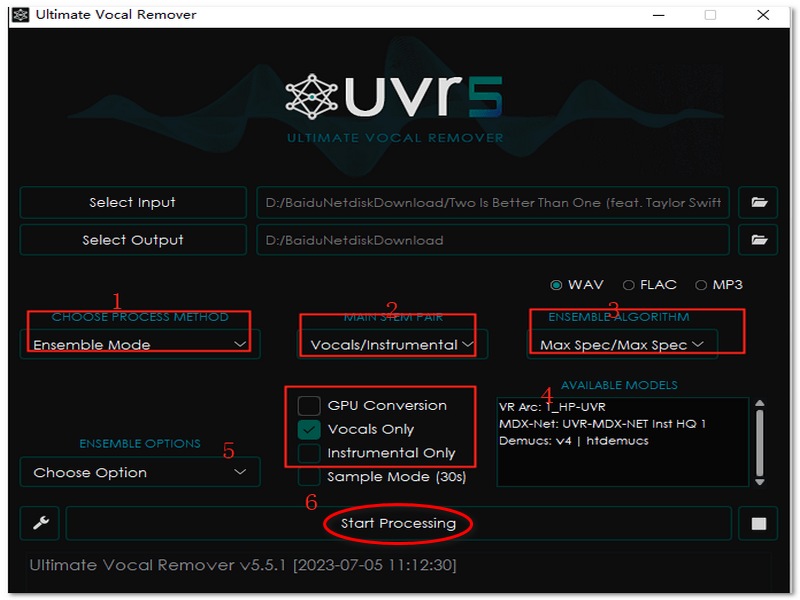
Now that everything is properly installed, I’ll walk you through the exact steps I follow to extract clean vocals using UVR5. If you’ve been confused by all the options like MDX, VR, or Ensemble, don’t worry! I’ll keep this simple and practical.
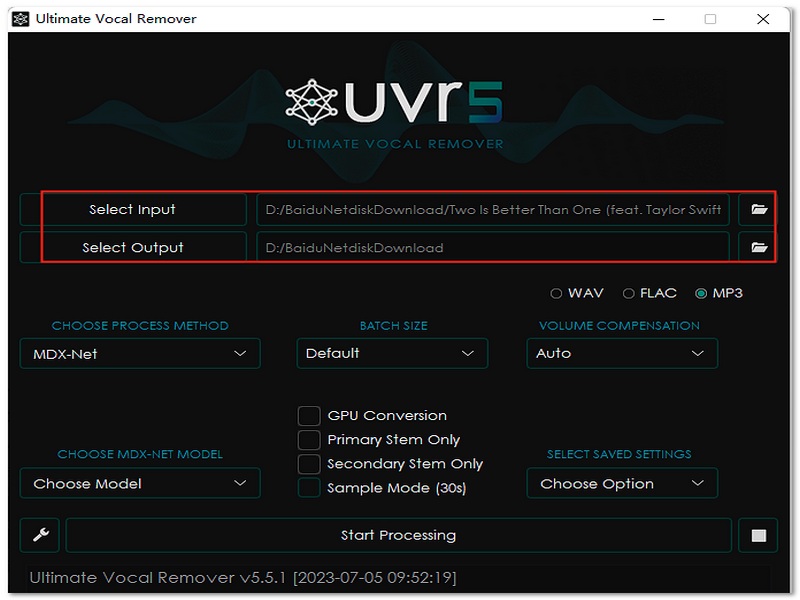
If you’re aiming for cleaner, studio-like vocal tracks, I usually recommend starting with an MDX model.
If you want the cleanest results possible, understanding and experimenting with the ultimate vocal remover's best settings will make a huge difference.
If you want cleaner vocals with fewer artifacts and better separation quality, the settings you choose in UVR5 really matter. I’ve tested different combinations, and the adjustments below usually give me the most consistent results.
1. Sample Rate
The sample rate determines the audio resolution when processing.
Recommended Setting:
• Keep the sample rate of your original audio file, which is normally 44.1 kHz or 48 kHz.
Why this works:
In general, 44.1 kHz is safe for the majority of musical tracks.
2. Segment Size
It controls the amount of audio that is processed at one time.
Recommended Settings:
Basically, if you have 16GB RAM or more, 512 will normally give you cleaner results.
3. GPU Acceleration
If your computer has a compatible NVIDIA GPU, enabling GPU acceleration can dramatically speed up processing.
Recommended Setting:
There is no GPU in your system. UVR5 still functions on a CPU, only that it will take more time.
4. Model Selection (Very Important)
Settings are not only about numbers, but also the choice of model.
For clean vocal extraction:
Whenever I need perfect clarity for remix or acapella making, I generally combine an MDX model with a bigger segment size.
5. Overlap & Aggression Settings (Optional Tweaks)
If available in your version:
If you want the output to sound professional, these are basically the best settings for UVR5 that I would suggest using as your initial point. After that, you can adjust according to your computer specifications and the genre of music you’re working with.
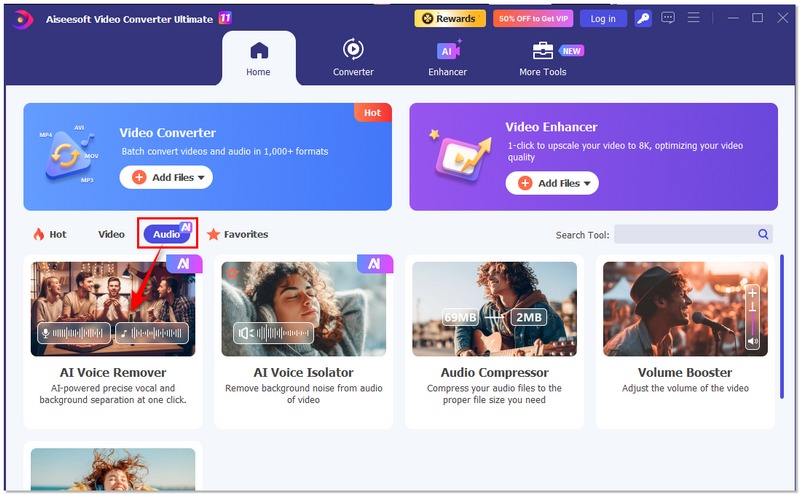
If you’re new to audio separation or find Ultimate Vocal Remover too technical, there’s a much simpler alternative that gets the job done with minimal setup. Aiseesoft Video Converter Ultimate (VCU) includes an AI Vocal Remover tool that uses smart AI to separate vocals and background music automatically. It’s designed to be intuitive even if you’ve never used vocal removal software before. This alternative is perfect for beginners who want simple results without worrying about complex settings like the best settings for UVR5.

Downloads
![]() 100% Secure. No Ads.
100% Secure. No Ads.
![]() 100% Secure. No Ads.
100% Secure. No Ads.
Here’s the exact workflow I follow when I want a quick and clean vocal extraction:
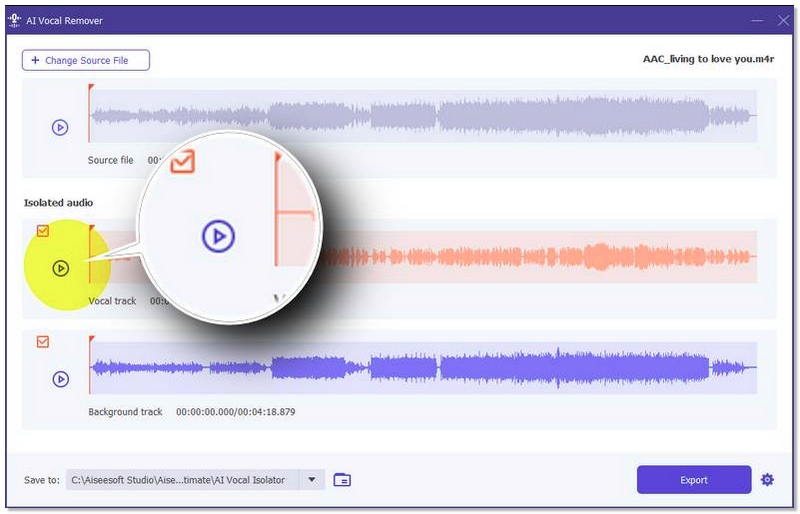
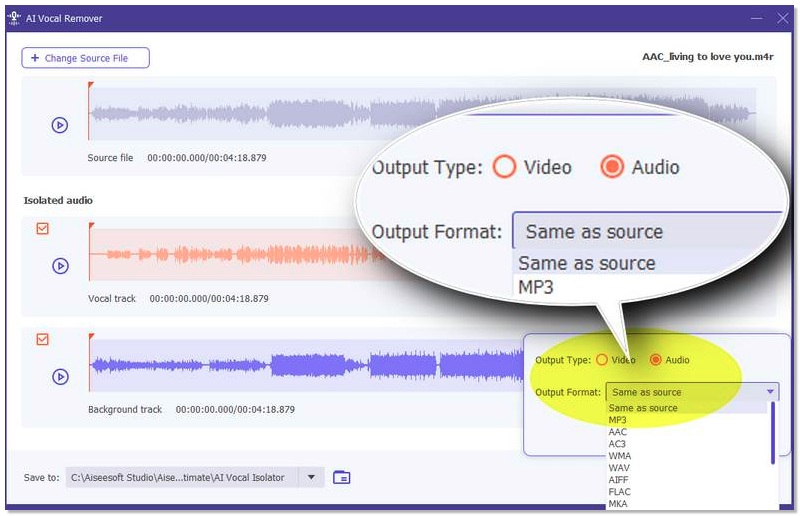
That’s it! no complicated model downloads, no deep technical tweaks, and no confusing settings. This makes Aiseesoft VCU one of the most accessible and best AI vocal remover alternatives to Ultimate Vocal Remover tools available today, especially for beginners and creators who want results fast.
What audio formats work best with UVR5?
WAV files generally provide the cleanest output because they are uncompressed. However, high-quality MP3 files (320kbps) also work well. Lower bitrate files may produce more artifacts.
Why is UVR5 not detecting my GPU?
This usually happens if: CUDA drivers are not installed properly. Your GPU is not compatible. You’re using an outdated version of UVR. Updating drivers and reinstalling dependencies typically solves the issue.
Does song genre affect separation quality?
Certainly, tracks with distinct voice placement, for instance, pop or acoustic songs, usually have better vocal separation. One might find more artifacts in songs that have vocal effects, EDM, or heavy metal vocals.
Conclusion
You should no longer be intimidated by technical settings while using Ultimate Vocal Remover after reading this article. From installation to optimizing models and performance options, you now have a clear understanding of how everything works together. Most importantly, you now know how to get clean vocals from UVR5 and achieve better vocal separation results for your projects.
![]() 100% Secure. No Ads.
100% Secure. No Ads.
![]() 100% Secure. No Ads.
100% Secure. No Ads.
 Best AI Audio Fixers in 2026: Restore Clarity Instantly
Here are the most efficient AI audio fixing tools to repair poor audio, remove background noise, and enhance vocal clarity for professional or personal projects.
 Top 10 Voice Recorders for Windows 11/10 in 2026 [Free & Paid]
Does Windows has built-in voice recorders? Which voice recording software can record both system and microphone sound? This article shows top 10 Windows voice recorders for you.
 Voice Changer-Voice Changer App for PC/Mac/Skype/Online/Android/iOS
Need voice changer? We list top 10 best voice changer apps for PC/Mac/Skype/Online/Android/iOS in this post.

Video Converter Ultimate is excellent video converter, editor and enhancer to convert, enhance and edit videos and music in 1000 formats and more.
![]() 100% Secure. No Ads.
100% Secure. No Ads.
![]() 100% Secure. No Ads.
100% Secure. No Ads.
*Required field
*Please enter a valid email
