If you want to create some highly creative videos, then using Sony Vegas green screen effects will be a good choice. This feature allows users to get more possibilities in video creations. Instead of using green screen footage, you can run Sony Vegas chroma key to achieve this effect easily. As a result, you can take a Hollywood style at home without too much effort.
Some people may wonder if it is difficult to use green screen in Sony Vegas. Well, it does not matter too much. This article offers a complete Sony Vegas green screen tutorial. What's more, it is also a good way to bypass all kinds of green screen errors in Sony Vegas software.
Step 1 Import green screen footage and its replacement
Run Sony Vegas Pro on your Windows PC. Import the green screen footage. So you can see the video clip in the timeline track 1. Later, you need to add the video or image file to replace into Sony Vegas track 2. Well, you can adjust the same duration for both two tracks. Thus, things will be easier when you start to replace green screen in Sony Vegas.
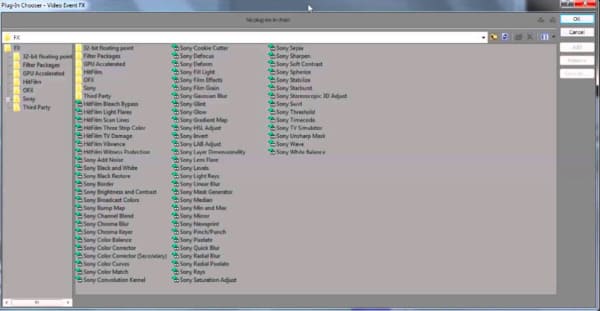
Step 2 Trigger Sony Vegas Event FX
Now you need to find and click "Event FX…" icon on the bottom right of the timeline. This option allows users to add effects or an event or edit event effects. Actually, you can hover your mouse over the icon to see its name. Later, a new window pops up with lots of effects and plugins.
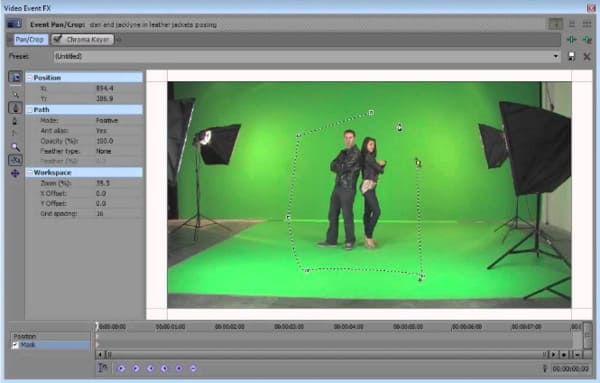
Step 3 Adjust Sony Vegas Chroma Key
Scroll down and choose "Sony Chroma Keyer" option. You can turn on "Split Screen View" above the preview video. Then set it to FX bypassed to clip the object with Chroma key. After that, you can open the Chroma Keyer settings to adjust the related video effects including color, low thread, high threshold, blur amount and mask.
Step 4 Set Sony Vegas background transparent screen
You can select the color you want to remove from the video preview window with an eyedropper from track 1. Later, merge the left object with track 2 through the background transparent. As a result, you can make Sony Vegas green screen transparent successfully.

Note: It does not mean you have to select "Green" from the "Color" menu. You can choose other colors to apply Sony Vegas green screen effect as well.
Step 5 Use green screen in Sony Vegas with Chroma Key
After the customization, click the red "x" option on the top of the screen to exit the window. Sooner, you can see the video with all adjustments you made. If you are not satisfied with the certain object, you can go back to take benefit from Chroma Keyer again. Well, choose "Save" option to apply your new change.
After that, you can export this video or share it to the social media directly. And you can also apply new effects to perfect the Sony Vegas green screen video.
Moreover, you can run Aiseesoft Video converter Ultimate to enable 3D settings and apply other powerful effects easily. This is a powerful video editor with a user-friendly interface. Thus, you can achieve all video and audio customizations within few clicks.
What's more, this Sony Vegas alternative software also allows users to enhance video quality by one click. So if you want to stabilize wobbly video and make it visually energetic, then you can come here to solve the problem.
Main Features of This Sony Vegas Pro Alternative
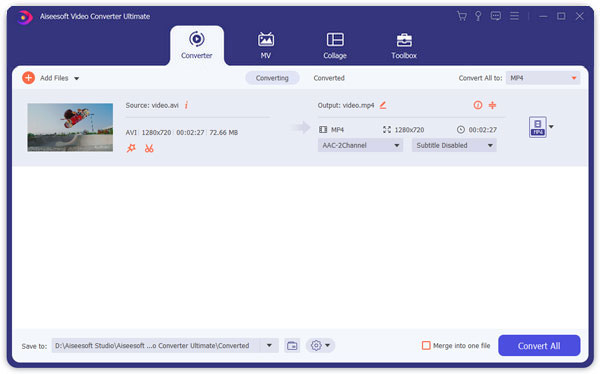
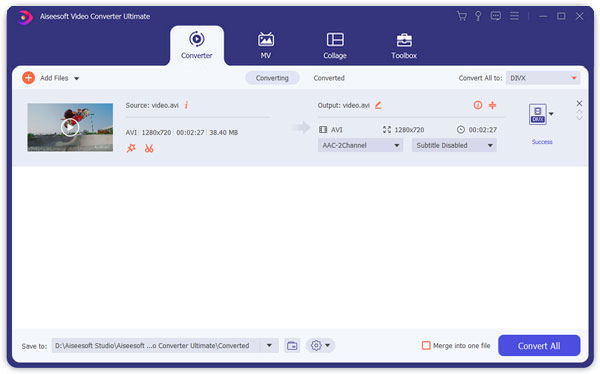
Step 1 Import video to Video Converter Ultimate
Free download and install Video Converter Ultimate on your Windows or Mac computer. Then launch this program and choose "Add File" on the top. Choose your target video from the popping-up window, and then click "Open" to confirm your change.
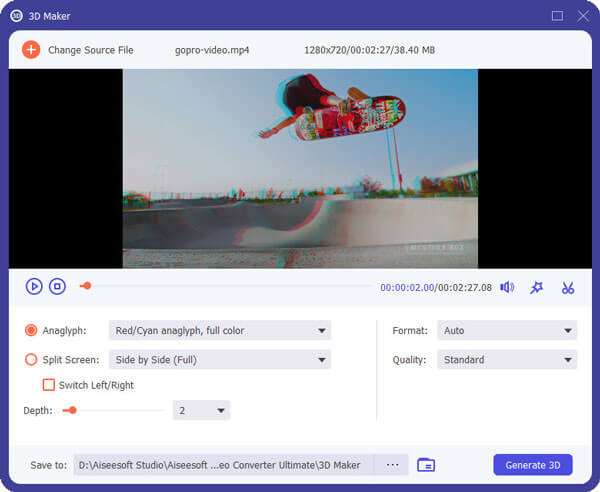
Step 2 Enable 3D settings
Click "3D" on the top toolbar. And you can also choose "Edit" and then click "3D" to enter into the same page. Tick the small box before "Enable 3D Settings". Later, you can adjust the 3D effect with many easy-to-use filters. Click "Apply" to save your change.
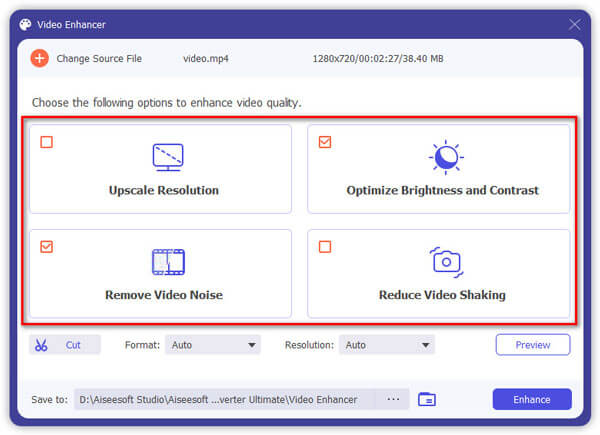
Step 3 Enhance video quality
Choose "Enhance" in the "Edit" window. Now you can get 4 different choices to improve the output video quality by one click. Moreover, you can click "Apply to All" to improve video quality in batch easily.
Note: You can choose "Rotate", "Crop", "Effect" and "Watermark" on the top to customize the video in different aspects. Well, no matter which editing you make, you can always get a real-time preview window to monitor every small change instantly.
Step 4 Export the edited video in high quality
If you want to output the video to certain portable device, then you can click "Profile" at the bottom. There are various preset profiles you can get. In addition, choose "Settings" besides to adjust the output video quality and other profile settings. At last, click "Convert" to export your video.
Though Sony Vegas Pro allows users to get more space to customize with video and audio files, it is not always the best choice for all people, not only because its high price but also its hassle-to-use interface. So if you want to achieve video and audio customizations easily, then Video Converter Ultimate may be more proper for you. Well, that's all for how to create Sony Vegas green screen and enable 3D effects. Hope you enjoy this article.

May 31, 2018 11:45 / Updated by Jenny Ryan to Edit Video
 How to Convert FLV Video to MP3 Music
Want to convert FLV video to MP3 for audio file? Learn from this post to make it with FLV to MP3 Converter.
 The Best Way to Free Convert FLV to MP4
How do you convert FLV to MP4? This guide will tell you how to free convert FLV to MP4.
 The Complete Guide to Add/Edit/Remove Sony Vegas Transitions
This article contains frequently asked questions about Sony Vegas transitions. So just read this tutorial and get the information you need.
