Clear history on your phone to keep your data private. The search history tracks the recently visited websites, which others can easily see. But another reason for deleting your history is to boost the device's performance. Cache and cookies can create a slower surfing speed or consume too much storage space when piled up. If you wish to quickly clear your history, read further and see the best methods for Android or iPhone.
Google processes a vast amount of information to provide quick answers, but it also stores your search queries, signed-in accounts, and activity. While this helps with future logins and personalized results, clearing this data is essential for privacy and device performance.
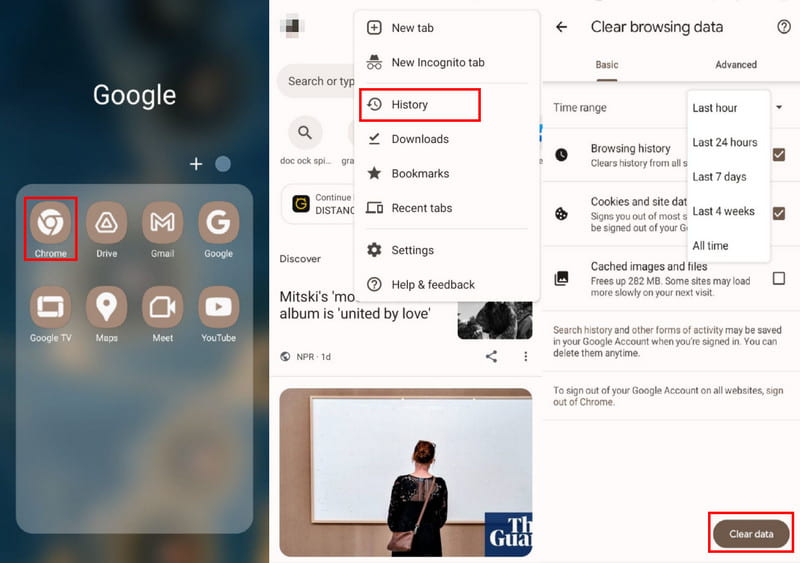
If you use the dedicated Google app for quick searches, follow these steps to manage your history (Find more detailed steps to clear Google history here):
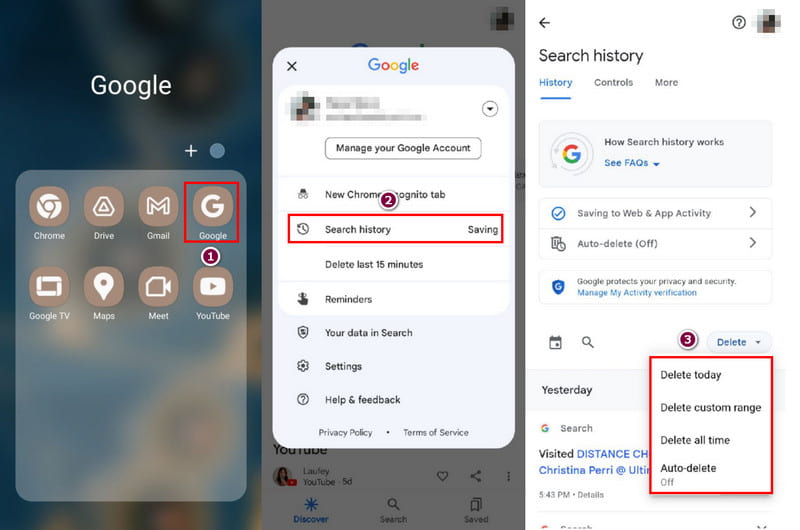
You can enable the "Auto-delete" feature on this page to automatically remove history older than a set period (e.g., 3, 18, or 36 months).
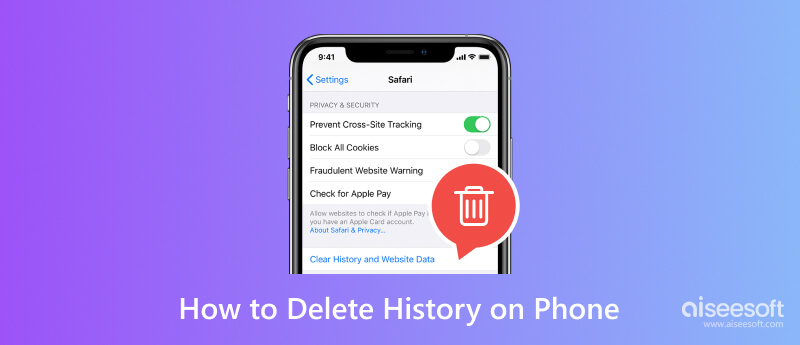
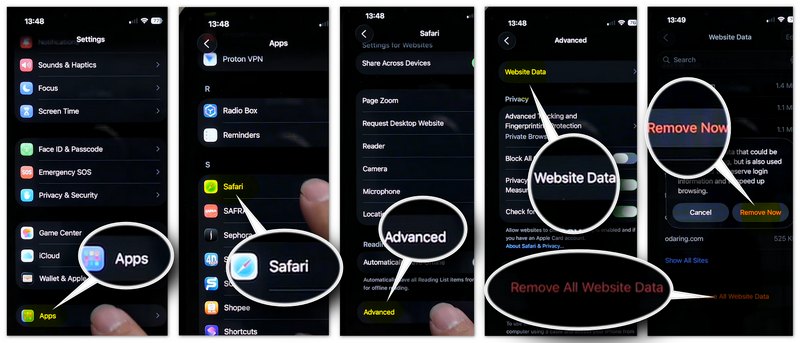
If you primarily use Safari on your iPhone, you won't find the clear history option within the app's internal menus. Instead, you need to access your device's system settings. Clearing Safari data will remove your history, cookies, and other browsing data from all devices signed into your iCloud account.
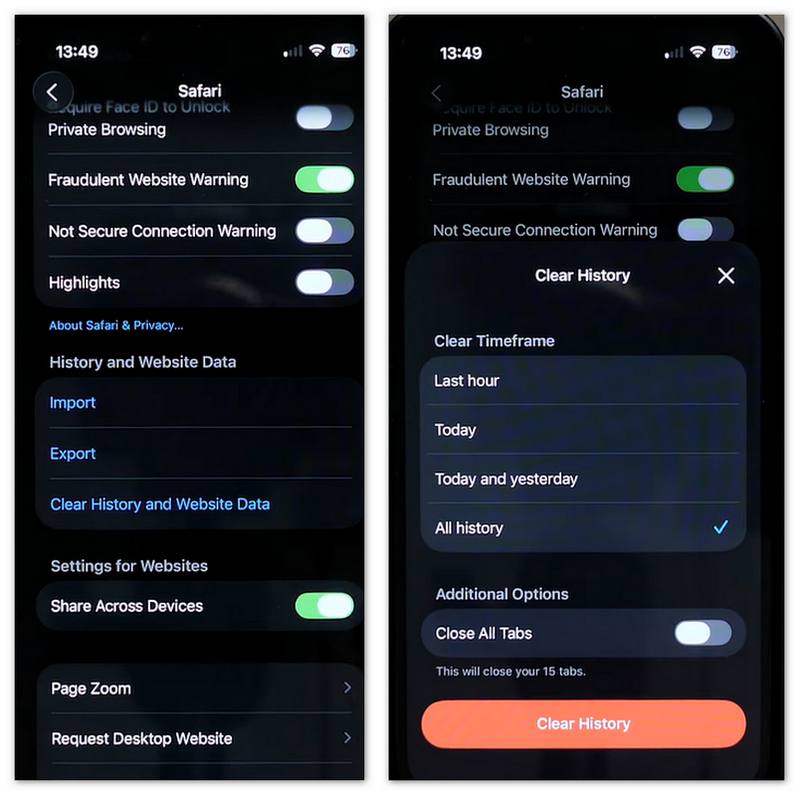
If you want to browse without saving any history in the first place, open Safari, tap the "Tabs" icon (two overlapping squares), select the "Tab Groups" center button, and choose "Private" to enter Private Browsing Mode.
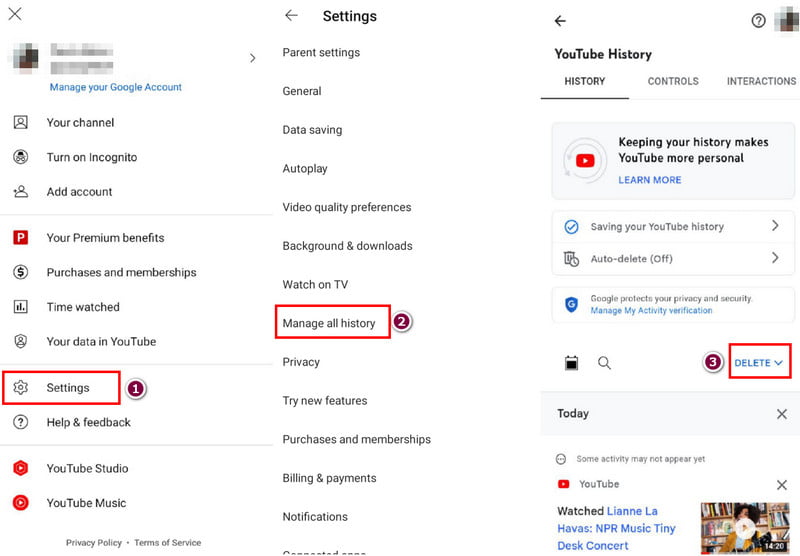
YouTube is your go-to platform to watch music videos, tutorials, and short clips for entertainment. Considering clicking many videos in a day, the app will also recommend videos similar to the recent one you have watched. And since YouTube is part of Google, it is guaranteed that it will keep your history, which you have to delete for device or privacy purposes. With that said, here’s how to clear your YouTube history:
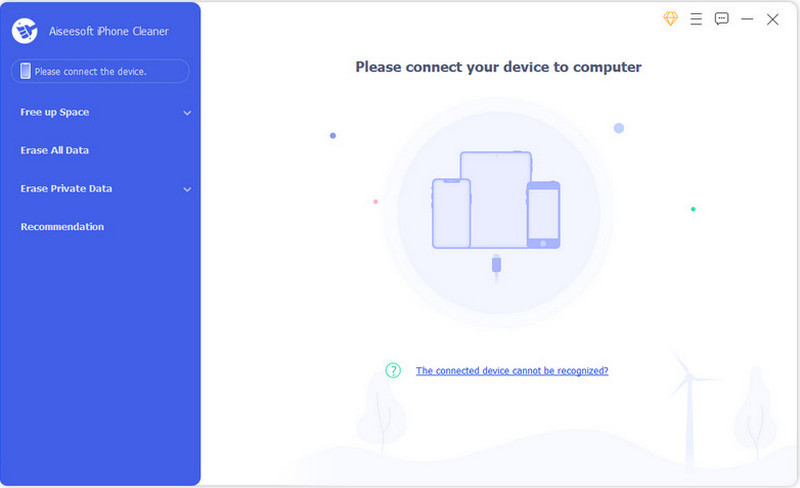
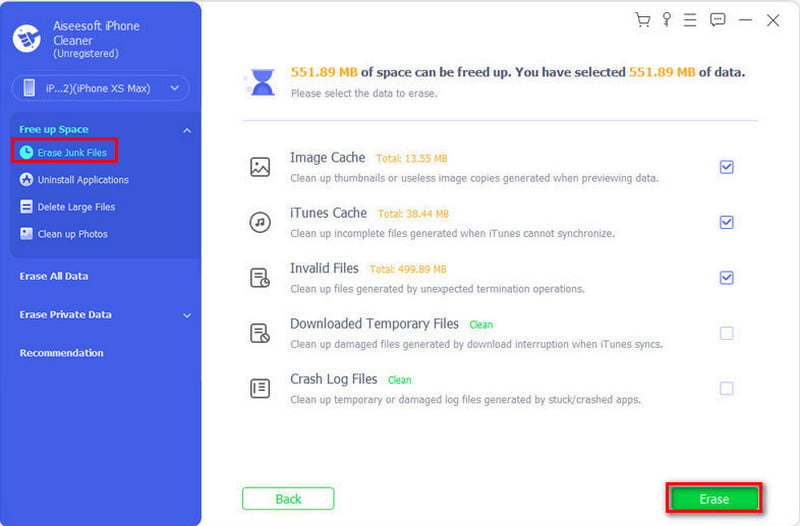
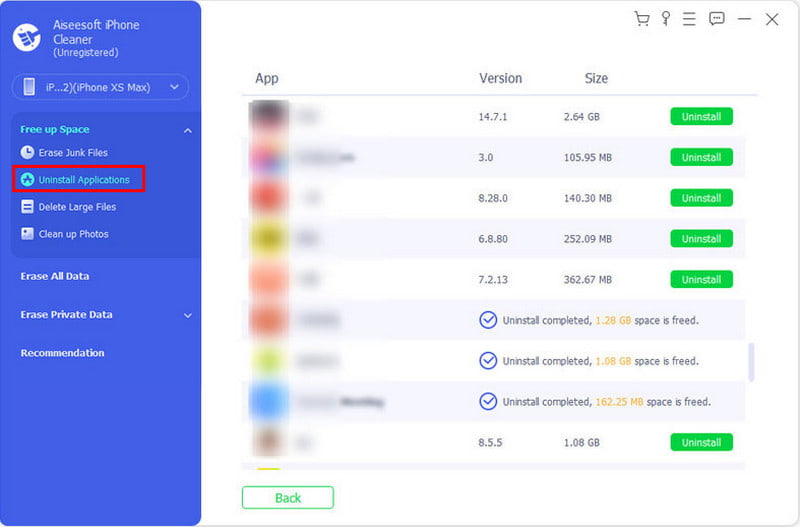
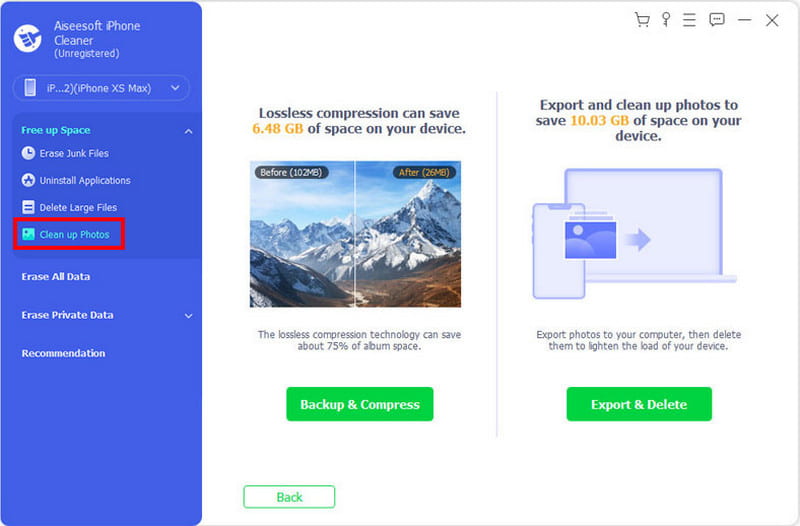
Aside from cleaning your phone history, other files might cause a slow process on your device. If you are unsure which data to delete, Aiseesoft iPhone Cleaner is the suggested tool for file management. Its Quick Scan gathers all useless files and takes too much space, allowing the device to speed up once deleted. It scans the duplicates, while you can pick the photos, videos, messages, and data to keep. Of course, it also takes care of the pictures by providing a built-in compressor for lossless compression or export photos to your PC to free more space on your iPhone. Indeed, this is the solution you are looking for.
Downloads
![]() 100% Secure. No Ads.
100% Secure. No Ads.
![]() 100% Secure. No Ads.
100% Secure. No Ads.

How do you delete incognito history on the phone?
Open the Google Chrome app and enter chrome://net-internals/#dns in the search bar. Tap the Clear Host Cache button to remove the DNS cache. Afterward, close the app and open it again. Your incognito browsing history is clean.
How to check deleted history on a cell phone?
Open the Settings app on your phone and go to the Google menu. Choose the Manage Your Google Account option. Scroll down from the Data & Personalization section and tap the My Activity button. View the search history.
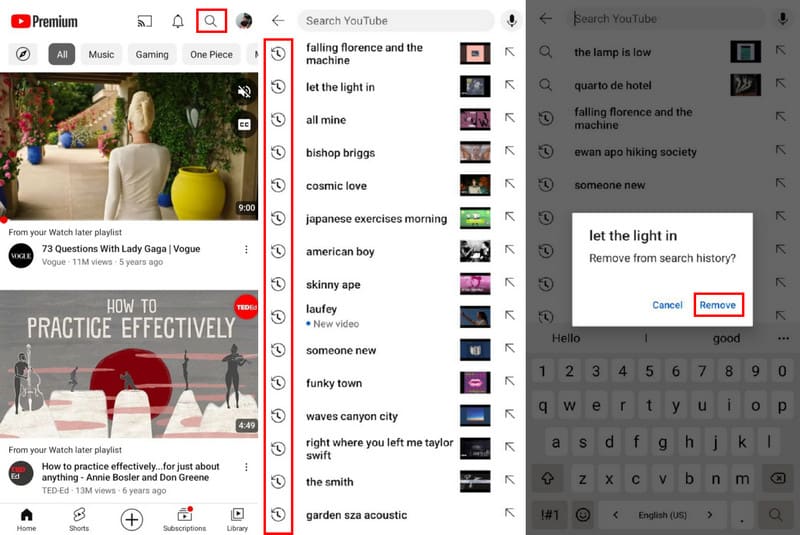
How do I remove something from search results?
You can do this when you tap the search bar from any web browser and app. The list will reveal all the recent searches, then just long-press the item and Remove button or OK button. Ensure the search has the clock icon to delete it from the list.
How often do I need to clean my phone history?
Delete history, cache, and cookies at least once a month. But if you sometimes experience slower speed or crashes when using a web browser or phone, you may need to do this frequently.
What happens when I clear my search history on my phone?
It will boost the browsing speed and protect you from potential harm like hackers or unwanted viruses. Deleting your history also logs you out from the sites you signed in to, and recent activities will not show up from the list.
Conclusion
Digital footprints accumulate quickly, often slowing down your browser and compromising your personal privacy. Whether you are using Chrome on Android or Safari on an iPhone, regularly clearing your phone history, cookies, and cache is the most effective way to keep your device running smoothly and your data secure.
For users who want to go beyond basic browser cleaning, professional tools like "Aiseesoft iPhone Cleaner" offer a deeper solution by removing system junk and managing large files that manual clearing might miss. By making these simple steps a part of your digital routine, you can enjoy a faster, safer, and more private mobile experience.
![]() 100% Secure. No Ads.
100% Secure. No Ads.
![]() 100% Secure. No Ads.
100% Secure. No Ads.
 How to Send GIFs on an iPhone & Android - A Step-by-Step Guide
How to easily send GIFs on an iPhone or Android? Follow our step-by-step guide to add fun and expressive animation to your text messages.
 How to Clear History on iPhone to Boost Browsing Speed and Performance
You must clear the history on your iPhone if you experience slower online surfing speed. Here’s how to erase Safari and Chrome history.
 How to Find Deleted Search and Browsing History on iPhone
How can you find and see deleted search history on iPhone? How to find deleted browsing history on Safari? Learn 3 easy ways to find deleted history on iPhone.
iPhone Cleaner can clean up useless data on your device selectively. You can also use it to wipe your private data and keep your iPhone/iPad/iPod Touch fast and safe.
![]() 100% Secure. No Ads.
100% Secure. No Ads.
![]() 100% Secure. No Ads.
100% Secure. No Ads.
*Required field
*Please enter a valid email
