At some point, you will have to clear the browsing history on your iPhone, and there are many reasons why it is important. First, all accumulated cookies from browsing activities can impact the system and slow the browsing speed. So, deleting them not only boosts browsing efficiency but also enhances the device’s overall performance. Second, cleaning your browsing history prevents cyber threats caused by prying eyes and protects your digital privacy from hackers. Overall, these are the best reasons to use this post as your guide to clean browsing history on your mobile device.
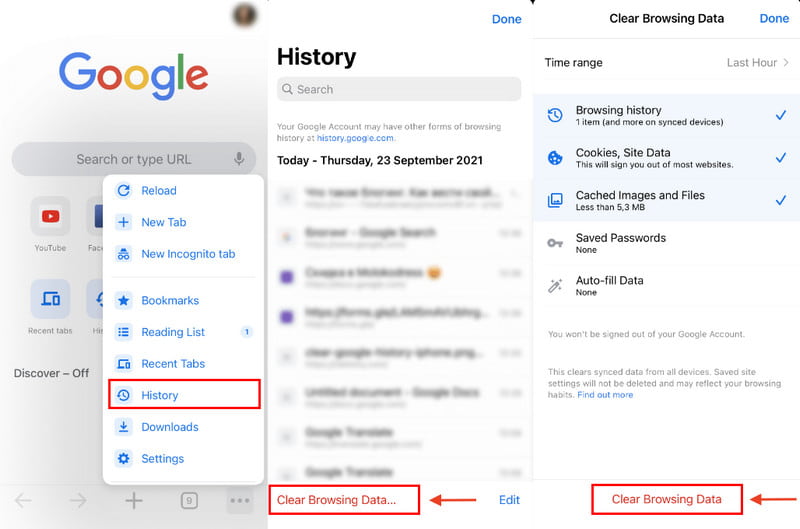
Aside from Safari, Google Chrome is a popular web browser for iOS devices. While it stores information anonymously, the web browser gathers information from your account, like shopping habits, commutes, and more. Furthermore, it will likely promote similar ads to your interests or hobbies. This can be frustrating, so the only thing to do is to delete cookies and online activity history. Remember, removing the search history will also manifest on other devices if you use the Google account on them.
If you want more tips related to Google Chrome, find more solutions below to help you out.
Extended Reading:
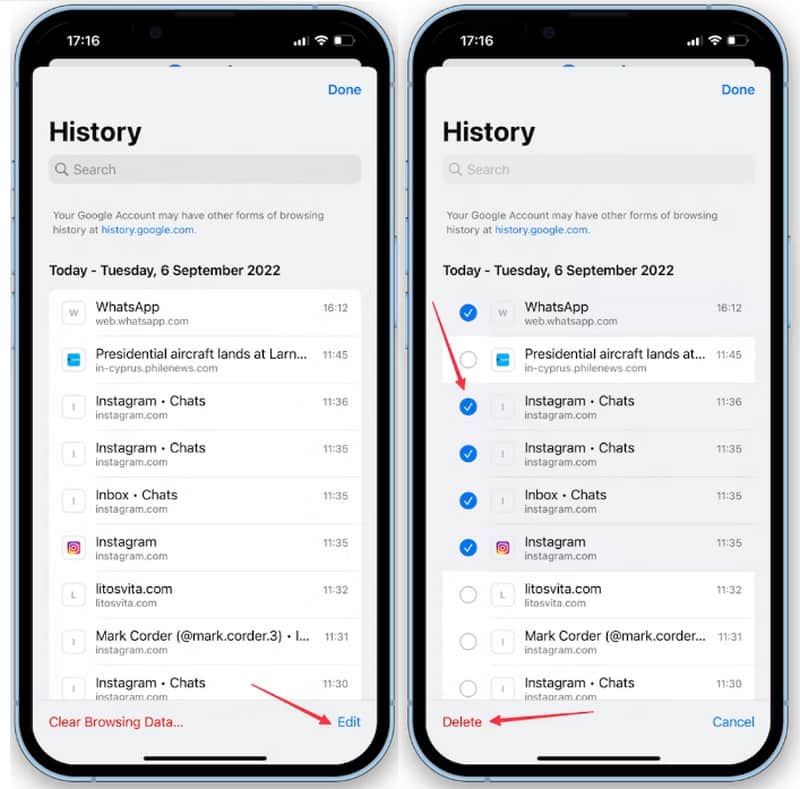
Do you want to erase one website from your search history on Google? Well, it is an accessible option from the history. Here’s how to do it:
Alternatively, you can clear your websites, cookies, and caches within a specified period. This will allow you to keep important sites and information while boosting overall performance. Follow the steps below.
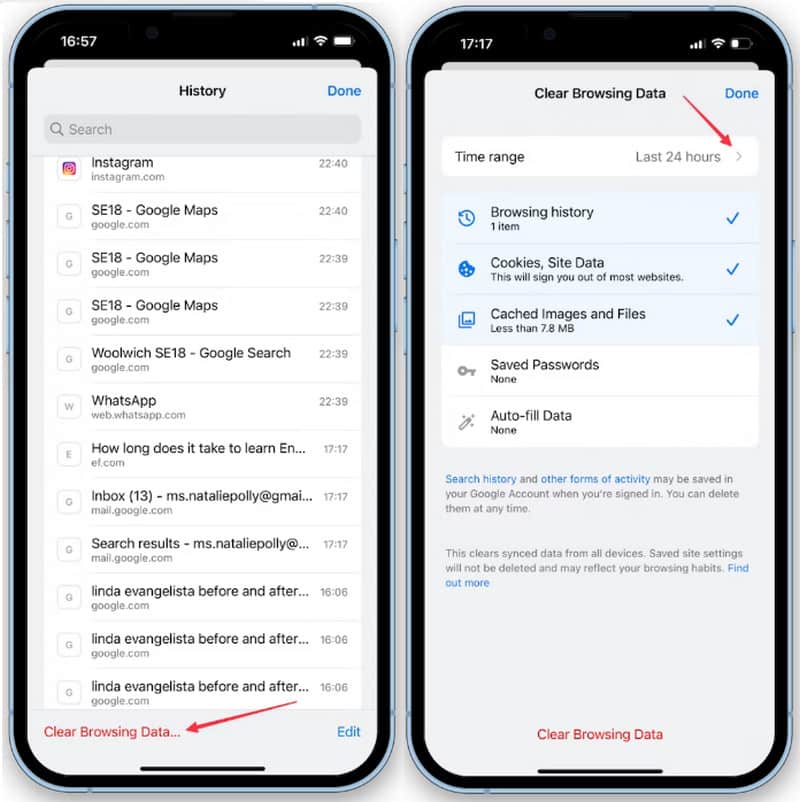
Note: All active websites included in the chosen period will get deleted. This includes sites with your accounts and passwords.
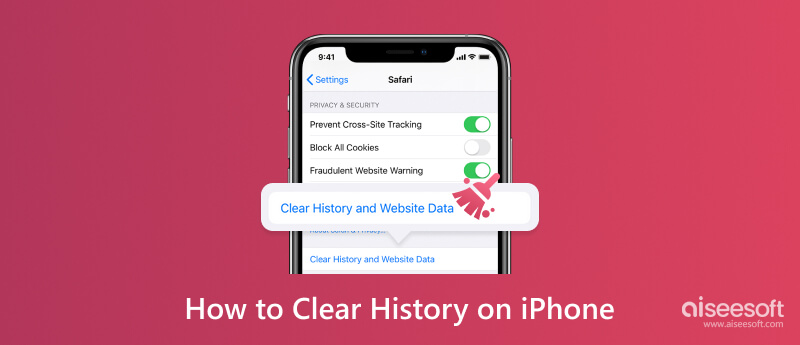
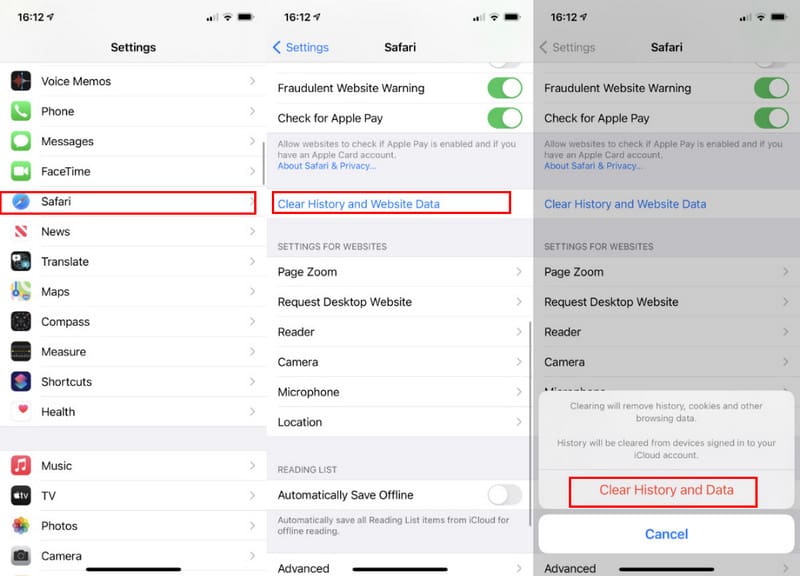
Safari is the default web browser for Apple gadgets, including iPhone, iPad, and Mac. Like Google Chrome, it can keep information from browsed web pages, online shops, and accounts that need a username and password. Even with increased performance, there is a chance Safari will slow down with all the cookies and caches. Clearing this app’s cache on iPhone or clearing other data is important to experience a better browsing experience. To do so, here are the steps you need:
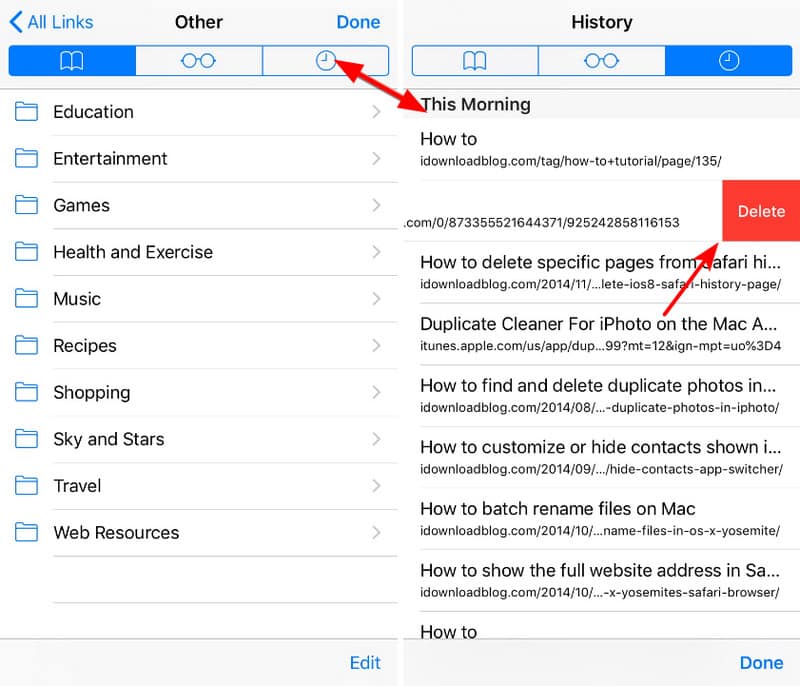
Is it possible to remove one site from your search history on Safari? Definitely, yes. It is an ideal method to help you keep some websites on your search history for future usage. Without further ado, see how to clean one website on Safari:
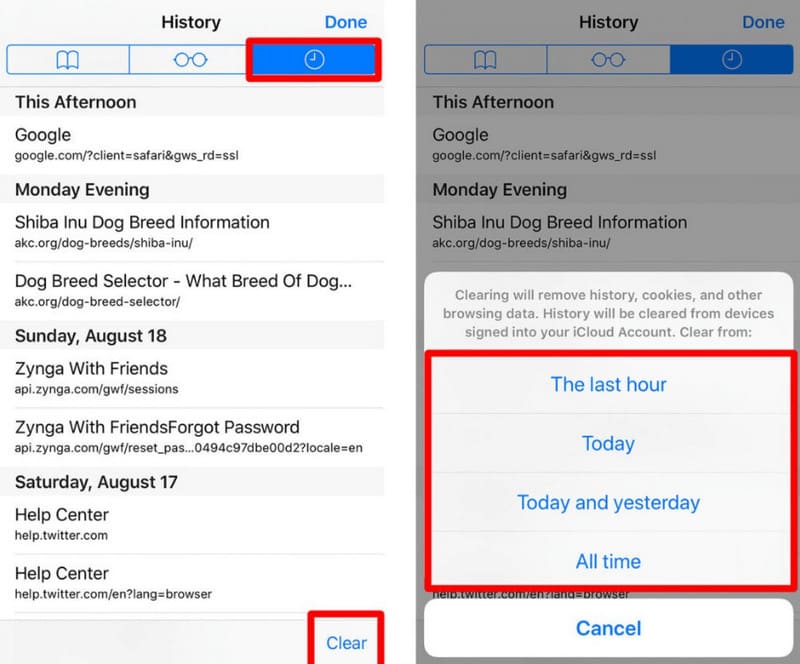
Safari allows you to delete accessed websites from a specific time. This means only the specified time is removed while keeping the rest of the information unbothered. Moreover, Safari is more specific with time than Google Chrome’s. With that said, what you need to do is:
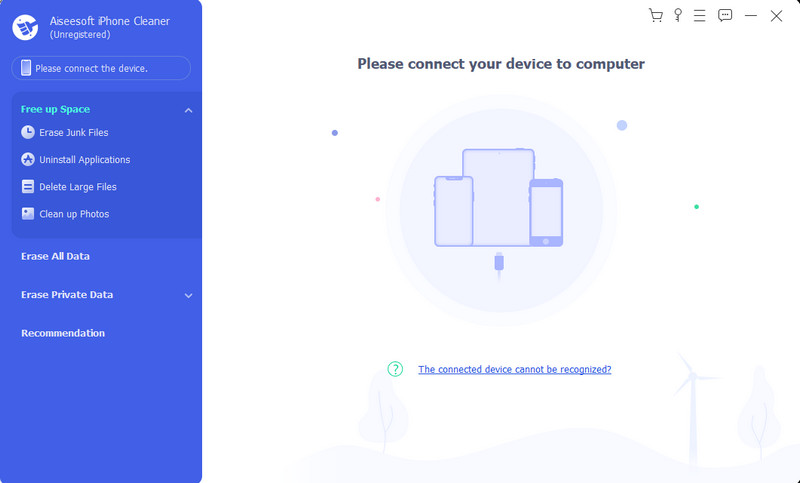
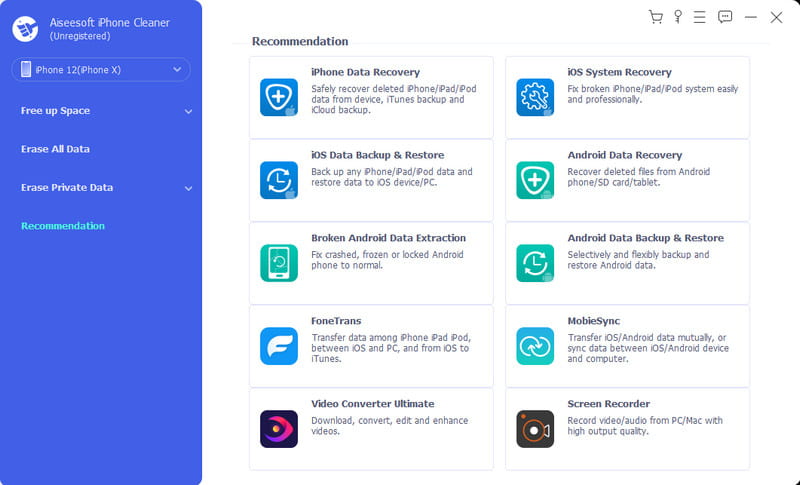
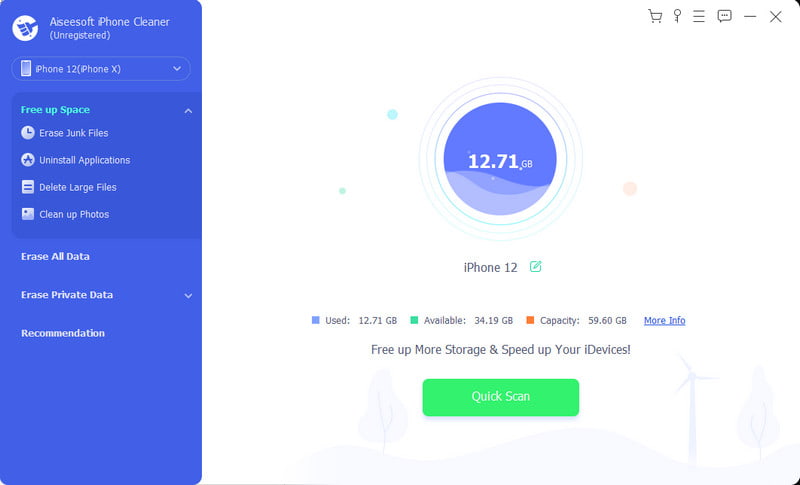
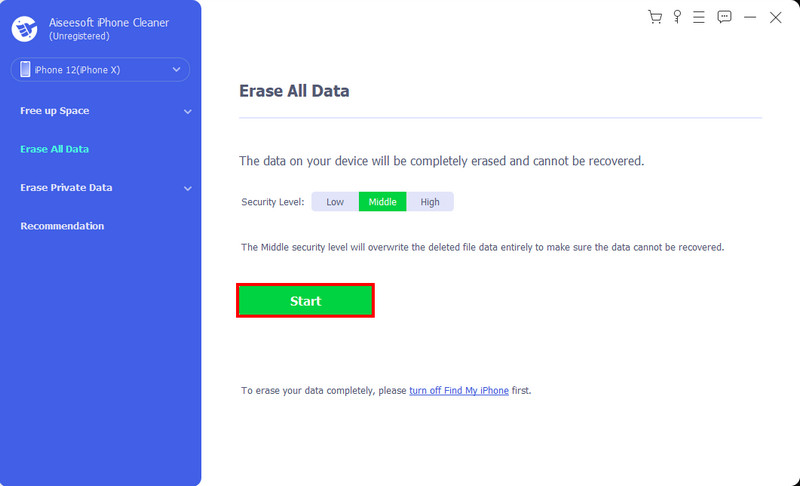
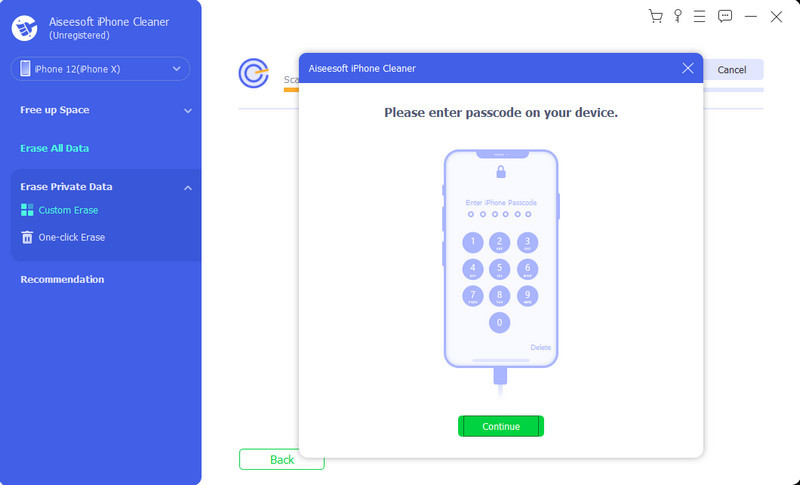
Use Aiseesoft iPhone Cleaner to delete all Google Chrome and Safari search history. The AI tool has a cleaning algorithm to erase private data prone to hackers and malicious sites. It can clean up junk with one tap, freeing up more space and increasing performance. Meanwhile, you can connect iOS with a compatible USB cable and perform cleaning on Windows or Mac. The iPhone Cleaner supports removing duplicated files while the user can choose a safety level for wiping data on iOS. Try for free and clean the search history on your iPhone effectively.
Downloads
Aiseesoft iPhone Cleaner – Delete Photos from iPhone
![]() 100% Secure. No Ads.
100% Secure. No Ads.
![]() 100% Secure. No Ads.
100% Secure. No Ads.


Is it possible to erase the personal data and all settings of an iPhone that is not around? If the device is stolen or lost, you can still erase all information using the Find My feature on iCloud. Its main purpose is to locate the device, but it can also erase data, especially when you know you will never get it back. However, many requirements exist to use the Find My feature. First, the function is already enabled on the device with an Apple ID. Next, the phone must be turned on and connected to an internet connection. Once you are prepared, follow the instructions below:


Why can't I clear my history on Safari iPhone?
It can be the Content & Privacy Restrictions option, which is used for age limits. You can turn it off by going to Screen Time on the settings. Tap the Content & Privacy Restrictions and enter the passcode. Tap the Unrestricted Access button and try cleaning the history on your iPhone.
How do you delete YouTube search history on the phone?
Open YouTube on your device and go to settings. Tap the Manage All History button to open the window. Tap Delete, and it will open a submenu. Choose the time range to delete search history. Then, it will automatically process the deletion.
How to clear Cash app history on iPhone?
Launch the app and tap the profile icon from the top right corner. Choose the Support option from the Something Else menu. Navigate to the Account Settings and tap the Delete Your Personal Information button. All data on the Cash app will be deleted immediately.
Is it possible to block cookies on my iPhone?
Yes. You can block the website cookies by going to the Settings app. Head to the Safari page and tap the Block All Cookies button. Confirm the action by tapping the Block All button when a prompt appears.
Should I always clear my search history on my iPhone?
It is up to you. Unless you want to keep your search history private, it is recommended to delete it often. In contrast, removing cookies and history will avoid slow browsing speed, and if that bothers you, clear them regularly.
Conclusion
Truly, it is easy to clear the history on an iPhone. This article guided you on how to remove cookies, caches, and history on Safari and Google Chrome. More options are also specified here to delete individual websites, selected time periods, and all data. Also, Aiseesoft iPhone Cleaner is an additional program that can help you erase data from your iPhone with a single click. Visit the official website to see more exciting features!
 4 Proven Ways to Clear App/Safari Cache on iPad to Make It Faster
Want to make your iPad run faster? This post shares 4 effective ways to clear cache and cookies from App/Safari/Chrome/Facebook on iPad Pro/Air 2/mini 4 in iOS 18/17/16/15/14/13.
 Professional Methods on How to Mass Delete Contacts on iPhone
With a long contact list, you want to remove the inactive ones. What can you do to shorten contacts? Here’s how to delete contacts on your iPhone.
 The Ultimate Guide on How to Free Space on an iPhone Quickly
How to free up space on your iPhone 5/4S/6/7? This article is going to show you some tips and tracks for you to clear up space on iPhone.
Clear iPhone/iPad
1.1 Clear App Cache on iPhone 1.2 Clear History on iPhone 1.3 Clear History/Cookies on iPad 1.4 Clear Cache on iPad 1.5 Clear Memory on iPad
iPhone Cleaner can clean up useless data on your device selectively. You can also use it to wipe your private data and keep your iPhone/iPad/iPod Touch fast and safe.
![]() 100% Secure. No Ads.
100% Secure. No Ads.
![]() 100% Secure. No Ads.
100% Secure. No Ads.
*Required field
*Please enter a valid email
