The audio size always depends on the duration and the bitrate rate of an audio file. We all want to maximize the songs we store on our devices to listen to them anytime and anywhere. Despite having the best songs on our devices, one of the enemies we have in common is the file size of our songs. With different variations in size, we can see that the only solution we must do to save some space and store more pieces entirely is by compressing them into a smaller size. If you are a Mac user, the best solution to compress the file is by using the iTunes pre-installed on your device. So, if you want to learn how to compress audio files in iTunes without degrading the original high-fidelity of the audio, then this article will teach you how.
If we are talking about compressing the audio, you can count on the best built-in application you find on your Mac device: iTunes. With this app, you can easily change the bitrate of the audio file; you have to make the file a little less prominent than the original. You can expect the audio file to compress quickly by changing the bitrate. Although the higher the bitrate, the better the quality, we cannot hide that the file size will still be bigger. To help you on your quest on how to compress audio files in iTunes, you can follow the instruction we add below to complete it easily.
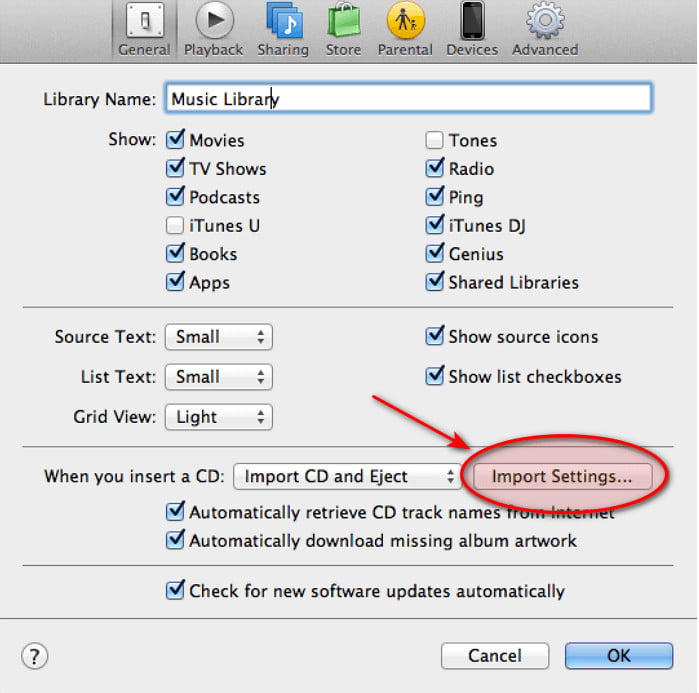
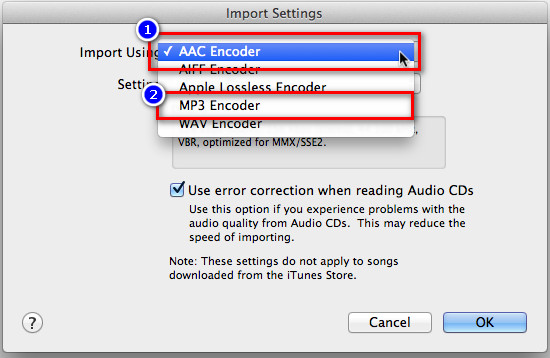
Optional: But if the bitrate on the suggestion is too high for you, you can customize a bitrate by clicking Custom. And a new mini tab will show on your screen; under the Stereo Bitrate, select the bitrate you want and click OK to apply the bitrate change you did.
PROS
CONS
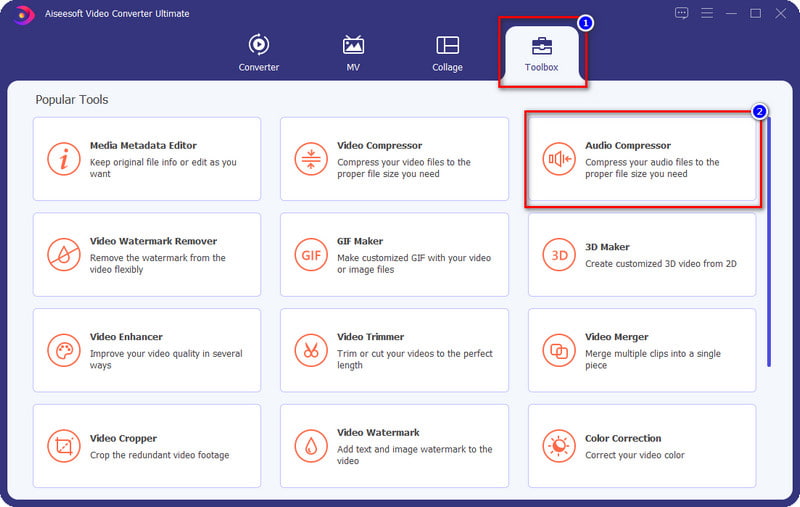
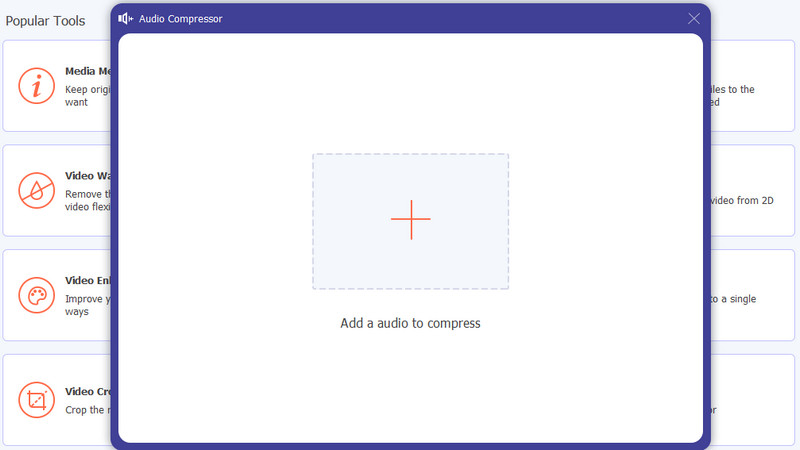
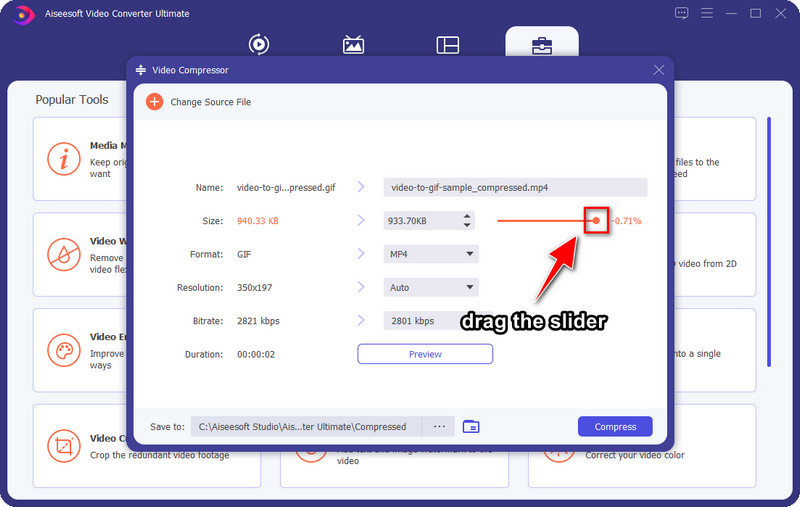
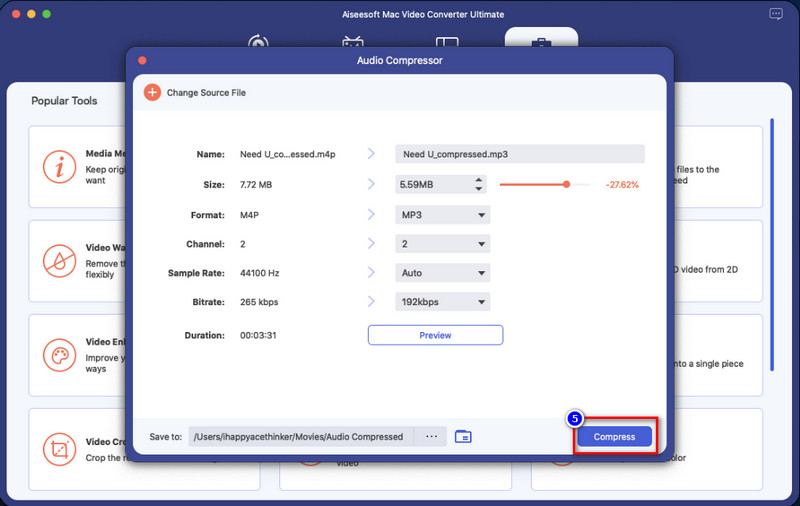
Even though iTunes can help you compress the audio file, there are still limitations. If you change the bitrate of the audio, you will lose the quality of the original audio file, and the compression it provides isn't that much. But with Aiseesoft Video Converter Ultimate, you can easily squeeze the audio file size without degrading the audio quality. It won't change the bitrate of the audio if you don't want to, so the high-quality audio will remain. Also, this software supports additional features and functions that you must have on your desktop to fix any correlated video and audio problems. To know the features you can get once you've downloaded it, you must read the following information below.

Downloads
![]() 100% Secure. No Ads.
100% Secure. No Ads.
![]() 100% Secure. No Ads.
100% Secure. No Ads.
To test this software, kindly read the following details to know how to compress audio files in iTunes best alternative by downloading it on your Mac and Windows. Then install it promptly and launch it to proceed to the next step below.
Do I need to change the bitrate on iTunes to be compressed?
If we are talking about the default app, iTunes, then there is no other way to compress the audio file other than changing its bitrate. Although changing the bitrate might help you lessen the size of the audio file, you must consider that the quality might reduce once you reduce the bitrate.
What is the ideal bitrate of an audio file on iTunes should be?
Even though iTunes supports as low as 16 kbps or as high as 320 kbps, the ideal bitrate for the audio you want to compress is 80 kbps on iTunes. But remember, do not overdo it because once you lower the bitrate of audio lower than 80 kbps, you will hear a vast difference between the uncompressed and compressed audio. The 80 kbps is ideal but not the standard, so you may choose whatever bitrate you want.
Why can't I compress my audio file on iTunes?
After you change the bitrate, you must duplicate the file to make it compressed. To do it, you can follow step 4 on part 2 of this article as we indicated them for you step-by-step.
Conclusion
Now that you understand how to compress audio files in iTunes, it has become more accessible and precise. So, if you want to compress the file size of the audio you have, doing it on iTunes can help you by following the steps above. However, the squeezing function it provides isn't much, so if you want to shorten the file size, the ideal
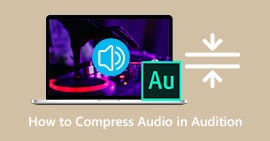 Compress Audio Files in Adobe Audition to Downsize Large Audio
Check out this blog post and learn how to compress audio in Audition. Additionally, you discover excellent alternatives that offer the same great compression results.
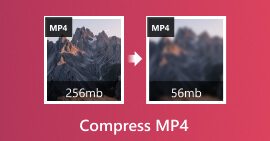 How to Compress MP4 for iPhone in an Efficient Way
The article explains how to compress MP4 in different aspects. You can always find something useful for you.
 2 Free Ways to Compress A Video/Videos Losslessly
How to compress a video to Email or upload to YouTube? This page will show 2 free ways to make video compression from MP4, QuickTime, etc. online and on computer.

Video Converter Ultimate is excellent video converter, editor and enhancer to convert, enhance and edit videos and music in 1000 formats and more.
![]() 100% Secure. No Ads.
100% Secure. No Ads.
![]() 100% Secure. No Ads.
100% Secure. No Ads.
*Required field
*Please enter a valid email
