In the modern audio world, many sound editors ignore the importance of compressing the audio. They think it doesn't add an advantage to the audio, but it has something to do with it. By adjusting the compressor and limiters, you reduce the range of the softest and the loudest sound range active to the sound. We need specific software that can do the job effortlessly to know how to compress audio, like the Adobe Premiere Pro. Without so much talking, the following details here will help teach you to use the Adobe Premiere compress audio feature to fix the dynamic range of the audio that is suitable to hear.
Adobe Premiere Pro comes up with easy-to-adjust parameters to be able to compress the sound of the file you've uploaded. In the next details, we will show you how to compress audio in Premiere by following the detailed step-by-step procedure below.
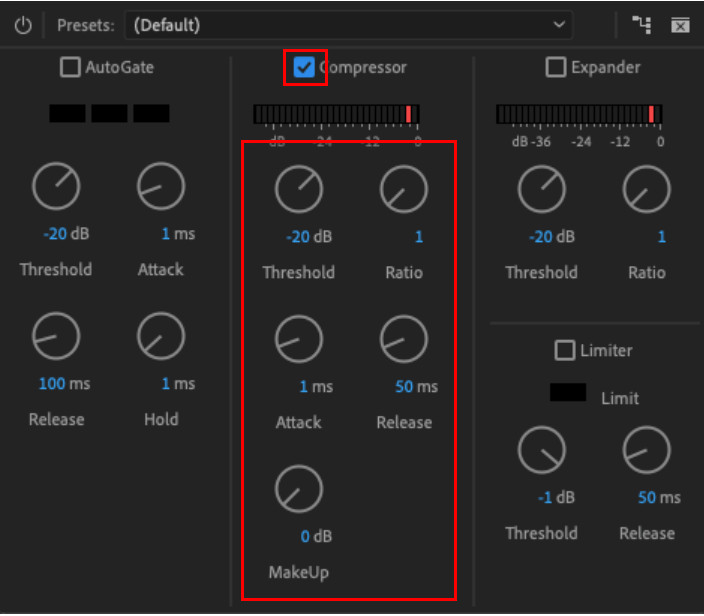
If you haven't encountered these presets that will show on compression, it is a must to know the purpose of each before doing the audio compression in Premiere Pro. To make everything work easy for both of us, we add the five settings available on the Adobe Premiere Pro compressor that you will see once you access the compressor.
Threshold – the starting point at which the compressor will begin to apply to the audio.
Ratio – helps you determine the level of compression you want to apply to the sound. The higher the ratio, the more compressed the audio, in simple words.
Attack – it is the compressor's fast response when it reaches the level you set on the threshold.
Release – when the threshold is not met, it will gradually lower compress the audio until it stops.
Makeup – is the main reason for the overall adjustment of the gain.
Now that we know what these limiters are, you can quickly determine which is to adjust or not on the Adobe Premiere Pro. But if you don't want to use the professional tool to compress, we add an easier and cheaper alternative than the Premiere. Please read the details below to know more about it.
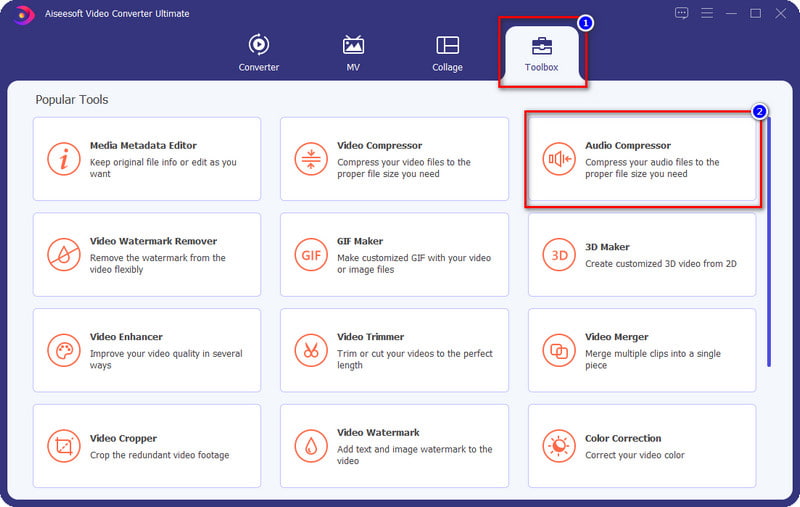
Yes, one of the best compressors you can have is the Aiseesoft Video Converter Ultimate. It supports both Windows and Mac operating systems, so even if you are a user of the said operating system, we can assure you that you can have this within your reach. Unlike the Premiere Pro parameters, this tool can do such things by adjusting the sample rate, bitrate, channel, etc.
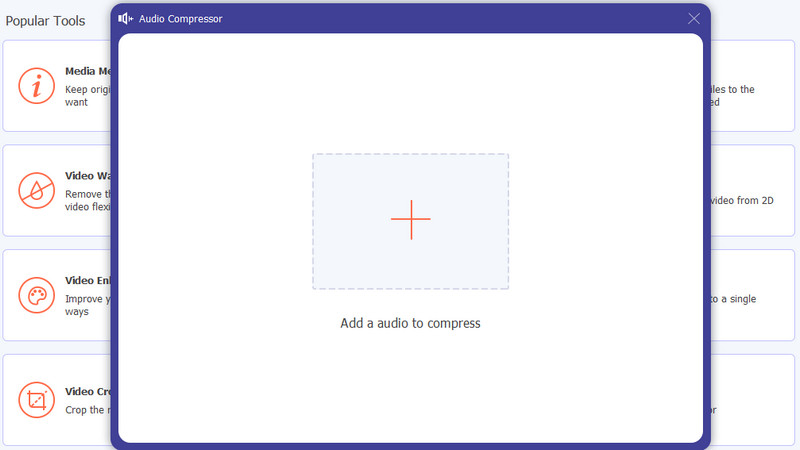
In addition to that, you wouldn't need to develop a deep understanding before you can use this, for it has a user-friendly and intuitive interface for you to handle in no time. Also, it has countless features and function support that you would love to use. The steps provided below will help you how to compress the audio Premiere Pro alternative successfully.
![]() 100% Secure. No Ads.
100% Secure. No Ads.
![]() 100% Secure. No Ads.
100% Secure. No Ads.

What should I use to compress audio if I don't have the Premiere?
Not all of us can avail of a subscription fee for the Adobe Premiere Pro, but no need to worry because Aiseesoft Video Converter Ultimate cans suffice the need for compression you are longing for. So, if you want a premium compressor that performs best like the Premiere, then your go-to must be the ultimate compressor.
Does compressing the audio lower the file on Premiere?
Technically, the Premiere's compression doesn't deal with the compression on file size, but it is more on the audio quality. But once you add compression to the audio you have here, there might be a slight change in the file size. It wouldn't be that compressed, but it is still less than the original file size.
Does exporting the compressed file on Premiere leave a watermark?
After compressing the audio file here, it wouldn't leave any crest of the watermark at the end; no watermark at all. However, its price isn't that great for people on a tight budget. But if you have the budget to avail a subscription with this software, it is a must because of its premium features and functions that other editors don't have.
Conclusion
After reading this article, you now have an idea about Adobe Premiere compress audio, and you can now do it by following the indicated steps we add here. Compressing the audio is never easy for some tools, but don't list the Adobe Premiere in that list to handle it in no time. But if you don't have the tool on your desktop to do compression and don't have enough budget to purchase it, we suggest you use the alternative: the Aiseesoft Video Converter Ultimate. Same as the professional tool, this tool can finish the same task, but you can think much easier and cheaper. Doubt with our review? The only way to prove that it is the ultimate solution to compress is by downloading and following the steps we list above.
 Step-by-step Tutorial to Export Videos from Adobe Premiere Pro
Here is an easy direction on exporting video from Adobe Premiere Pro. Read it carefully and follow the steps to export your video and share it to social media.
 Concrete Guide to Make a Split Screen Video in Premiere Pro
As a professional video editor, Adobe Premiere Pro provides a lot of advanced functionalities. This guide focuses on making a split screen video in Premiere.
 4 Easy Methods to Use Adobe Premiere to Add Slow-motion Effects
How to use the professional video editor - Adobe Premiere to create slow-motion videos? Here are 4 solutions to help you to slow down videos without losing quality.

Video Converter Ultimate is excellent video converter, editor and enhancer to convert, enhance and edit videos and music in 1000 formats and more.
![]() 100% Secure. No Ads.
100% Secure. No Ads.
![]() 100% Secure. No Ads.
100% Secure. No Ads.
*Required field
*Please enter a valid email
