Famous for presentation, business, and other fields, PowerPoint is a slideshow used for delivering presentations or providing visual aids. Meanwhile, a presenter usually inserts multimedia files like audio and video to get the spectator's attention, allowing them to convey their message well.
However, there are moments when the playback is not playing smoothly. Or, perhaps you want to send the PPT file with audio to someone. The solution is to compress the PPT or the audio file from the PPT. Therefore, this post will explain the default and great alternatives you may use. You will also know how to compress a PowerPoint with Audio on Mac and Windows.
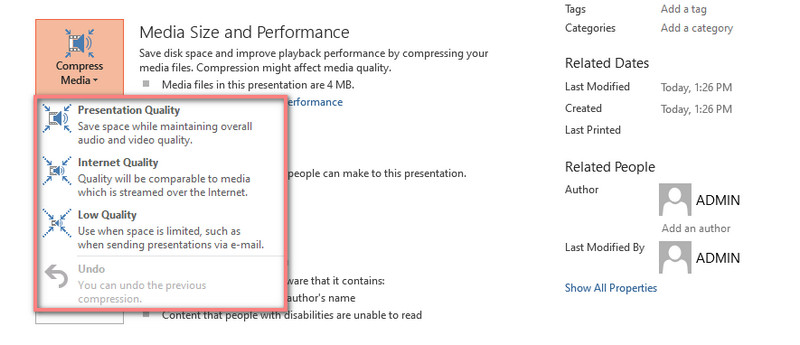
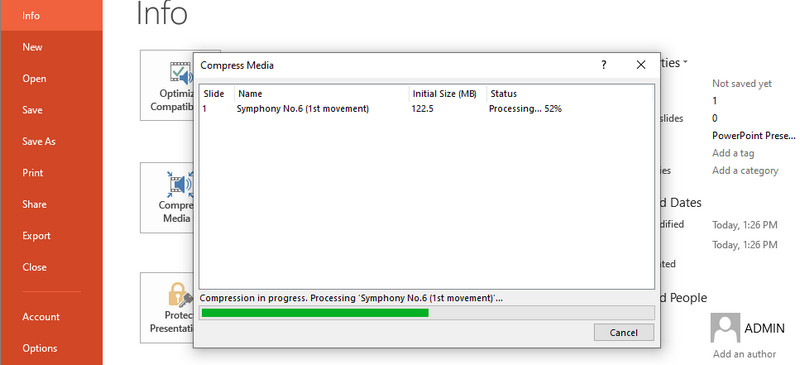
PowerPoint comes with a built-in tool for compressing audio and video media to help you constrict file size. In this way, you can improve the performance of the audio playback. Also, compressing your media file size can help reduce the file size of the PPT file. Most especially when the media file is embedded, the compression tool of PPT can significantly reduce the file size.
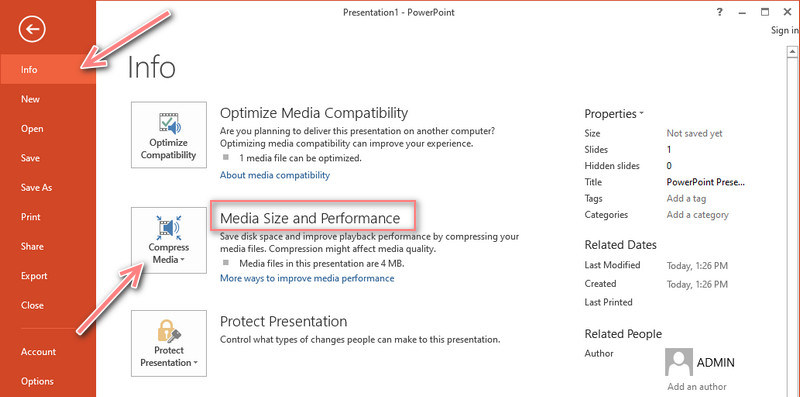
Tip: Note that online videos cannot be compressed using the default compression tool in PowerPoint.
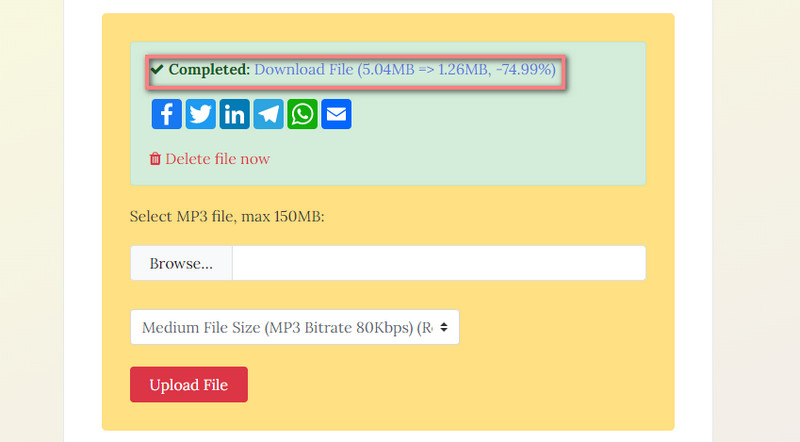
Video Converter Ultimate helps you to reduce the size of an audio file significantly. This program has been made specifically to convert audio and video files. More than that, it can also assist you in compressing media files of various audio formats. As a matter of fact, compressing up to 95% is possible with this program. You can save 117 MB from 122 MB media size.
On top of that, parameters including the bitrate, sample rate, and output format can be modified. In other words, you have full command over your audio files. If you wish to learn how to compress a PowerPoint file with audio, see the instructions below.

Downloads
![]() 100% Secure. No Ads.
100% Secure. No Ads.
![]() 100% Secure. No Ads.
100% Secure. No Ads.
Start by downloading the program. Simply click on either of the Free Download buttons above. You can choose between the Mac and Windows installers. Now, follow the setup wizard to install the app and launch it afterward. Acquaint with the interface and functionalities once the program is launched.
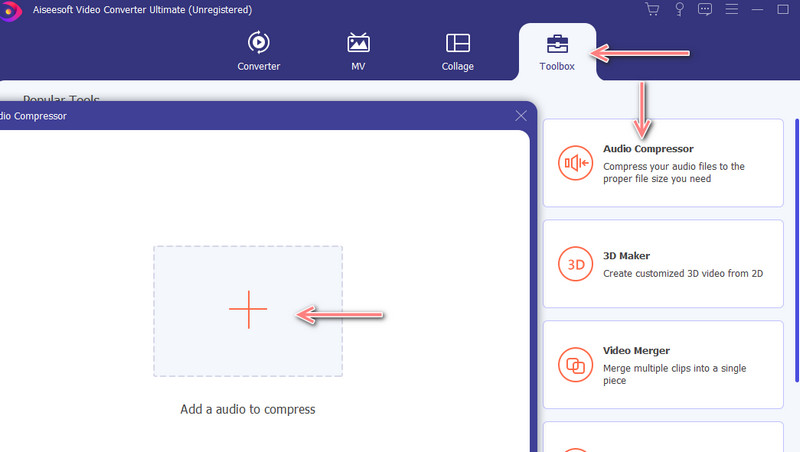
Next, import your target audio file to compress. Navigate the Toolbox tab and access the Audio Compressor option. Next, a new window will appear. From here, click on the Plus button to import the audio file. Locate the audio you prefer to compress and double-click on it to upload.
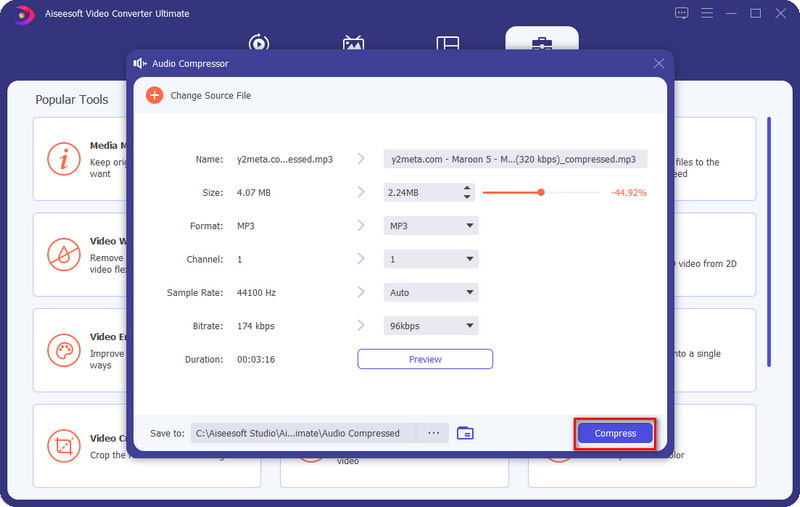
Once the audio file is uploaded, the compression panel will appear. You can set the compression rate to your desired file size from this window by moving the slider ball. Also, you may modify the output format and bitrate. After setting up, hit the Compress button at the bottom right corner of the interface.
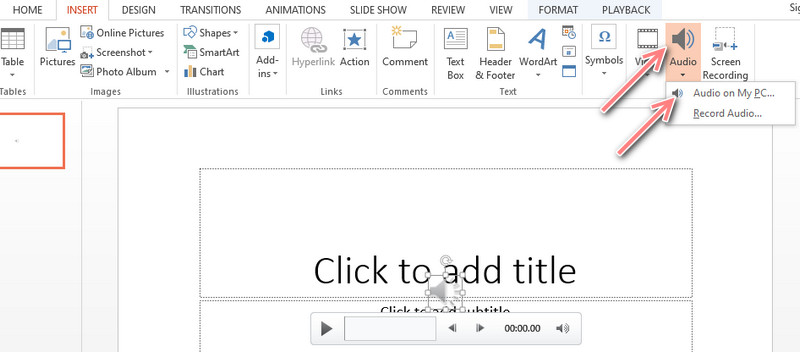
After compressing the audio file, you can now embed it into your PowerPoint presentation. Simply open the presentation, go to the Insert tab in the Ribbon, and go to the Audio option. Select Audio on My PC. Lastly, locate and upload the compressed file to the presentation.
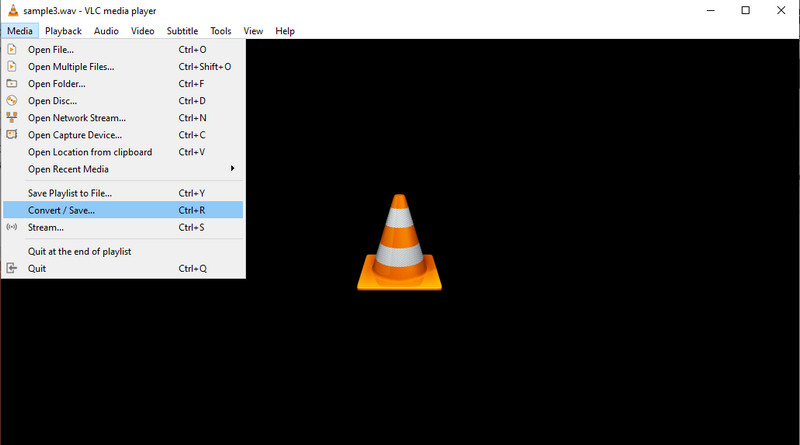
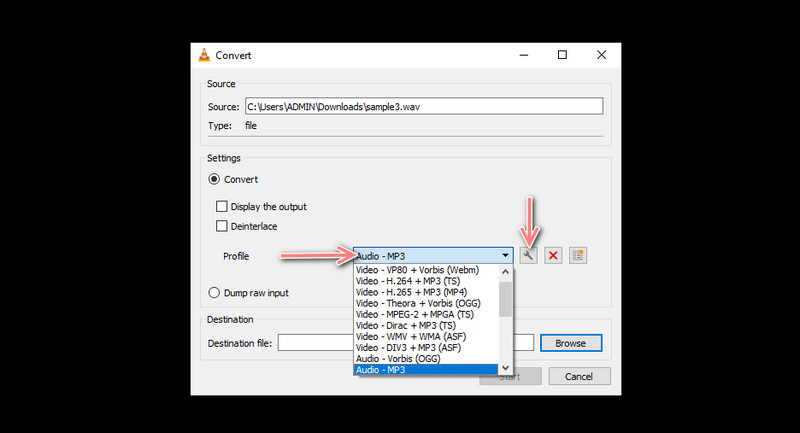
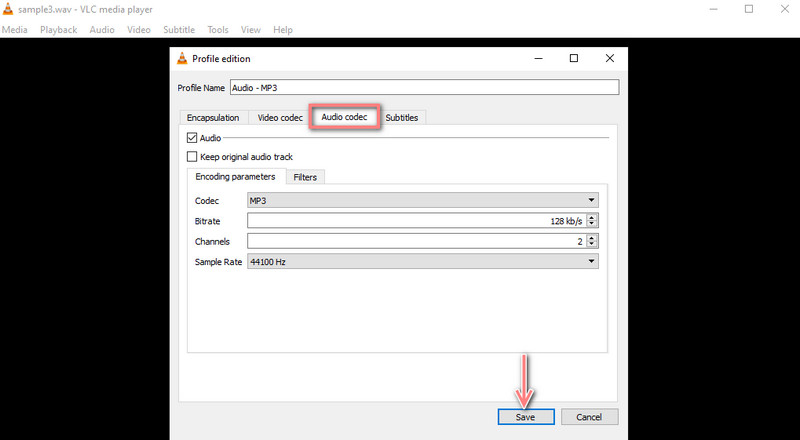
VLC Media Player is a free tool that allows you to compress audio and video files. It can effectively downscale the media size of an audio file, yet the process can be a bit difficult to set up. As a matter of fact, it supports many audio formats, like MP3 and M4A. Meanwhile, here is how to operate this app to compress PowerPoint with audio.
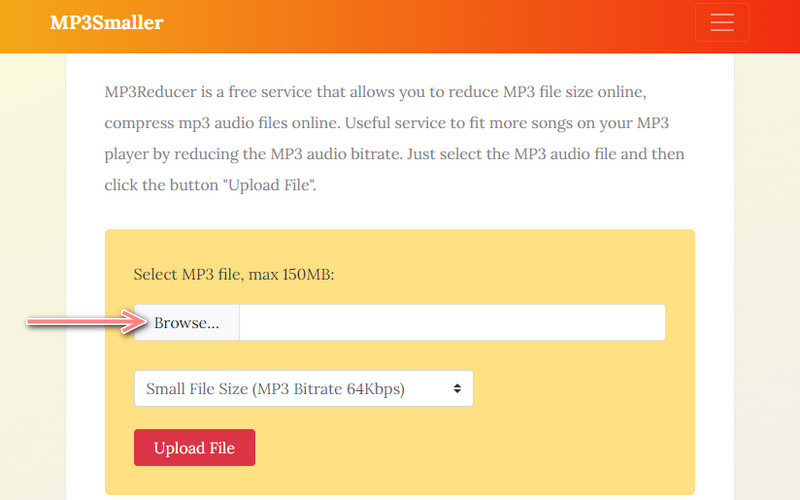
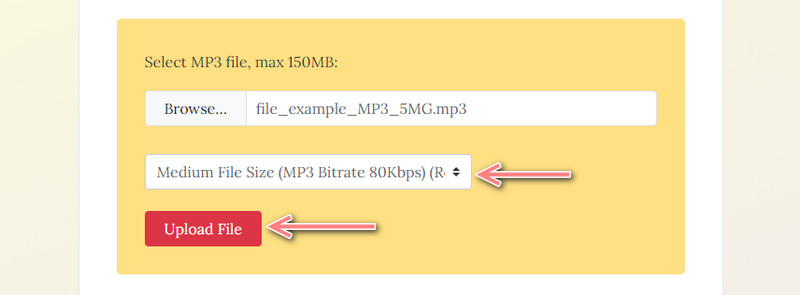
If you are up for an online tool, MP3Smaller can get this job done. It can resize audio files without installing anything on your device. You also do not need to cut or trim the audio file because it can effectively compress audio files with preserved quality. Here is a simple guide to compressing PowerPoint with audio online.
What makes the size of my PowerPoint huge?
The reasons lie in attaching multimedia files, such as large images, video, and audio files, and using different elements.
How do I compress a PowerPoint file without losing quality?
Since PowerPoint comes with a trimmer feature, you can cut the unwanted parts of the audio file to reduce the file size without losing the quality.
How do I send PowerPoint via email?
If you wish to send PPT using email, you should compress the file into a zip file or compress your presentation's attachments.
Conclusion
Those are the programs you can use to compress audio files or PowerPoint with audio files. You may also utilize them to learn how to compress PowerPoint audio files on Mac and Windows systems. Suppose you wish to send via email or reduce the PPT presentation to save space, the tools are provided to help you with this problem.
 How to Change PowerPoint Slide Size/Dimension (2007/2010/2011/2017/2018)
How to change a PowerPoint slide size or dimension? This page shows you the full guide to resize a PowerPoint slide in 2007, 2010, 2011, 2013, 2017, 2018, etc.
 Step-by-step Guide to Download PowerPoint Templates
You may think the best download PowerPoint templates are those that you need to spend money on. This guide shares you top 10 sites to get them for free.
 Ultimate Guide to Remove Picture Background in PowerPoint
Can I make a picture background transparent in PowerPoint? How do I remove background in PowerPoint? Learn how to remove picture background using PowerPoint.

Video Converter Ultimate is excellent video converter, editor and enhancer to convert, enhance and edit videos and music in 1000 formats and more.
![]() 100% Secure. No Ads.
100% Secure. No Ads.
![]() 100% Secure. No Ads.
100% Secure. No Ads.
*Required field
*Please enter a valid email
