
Best Video Enhancer: Upscale Video to 4K/8K
![]() 100% Secure. No Ads.
100% Secure. No Ads.
![]() 100% Secure. No Ads.
100% Secure. No Ads.
It goes without saying that old VHS tapes transport you to a memorable moment in time that is worth more than anything in the world, but when you allow VHS tapes to sit idly, they may break, tear, or lose their image clarity. However, you don't have to say goodbye to those precious memories just yet. In this article, we will teach you how to fix VHS tape issues, including physical damage, image clarity, and how to prevent long-lasting and damaging problems that could affect your VHS tapes' recordings. If you are struggling with a broken VHS tape or one that plays progressively grainier, this article provides simple workarounds to address the issue. It introduces tools that can restore your footage to the clarity you remember, or as close as possible.
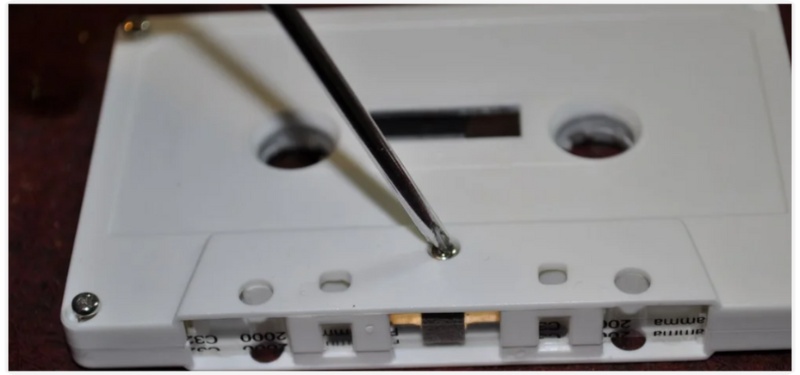
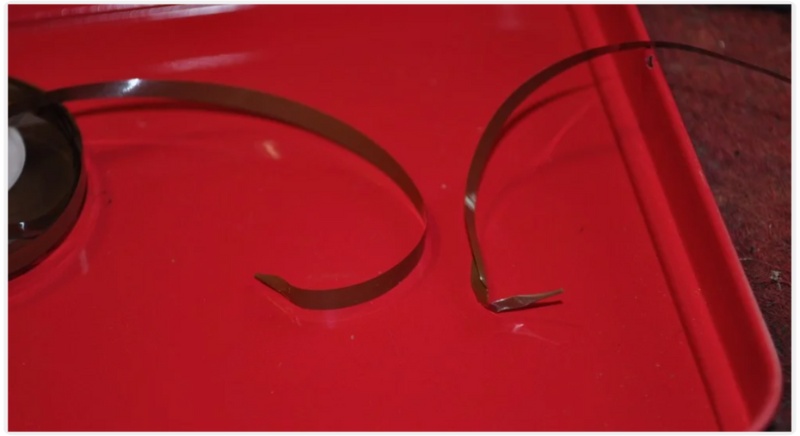
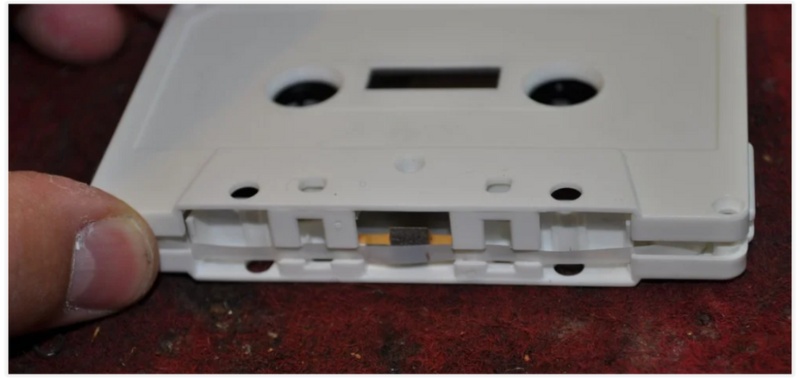
It can be difficult to face that your VHS tape is tangled, broken, or stuck, and feel like that beloved old memory is lost forever. But, there is no need to fear! You can repair VHS tapes at home with a few simple steps and a bit of time dedicated to the process. Correcting physical damage is sometimes not as hard as one might think, and if you have the right combination of tools on hand, your tape can be brought back to working condition without causing more damage in the process. Here's one method that works:
Rewind your VHS tapes before you spot them and keep them in a cool, dry location. Avoid heat or moisture, as this can cause damage to the casing or the tape.
You can successfully fix VHS tapes and prevent the loss of your priceless footage by following these easy steps.
If your older VHS films seem faded, blurry, or have static lines, please try uploading them to VHS restoration. Over time, magnetic tapes deteriorate, which can impact both image quality and playback stability. Fortunately, new AI tools, such as Aiseesoft VidHex, can help you revive those memories and effortlessly improve clarity, color, and pacing in just a few steps. Based on advanced algorithms, this state-of-the-art video enhancer combines resolution, reduces visual noise, and restores highly detailed elements, resulting in a more fluid and vibrant video. You can preserve every dynamic moment in newly layered memories by using VidHex for VHS restoration, whether you're repairing family footage on tape or re-establishing recordings for archival purposes.

117,882Downloads
![]() 100% Secure. No Ads.
100% Secure. No Ads.
![]() 100% Secure. No Ads.
100% Secure. No Ads.
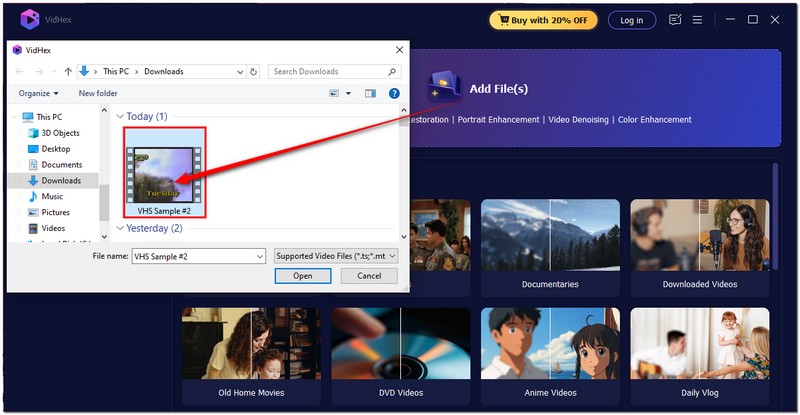
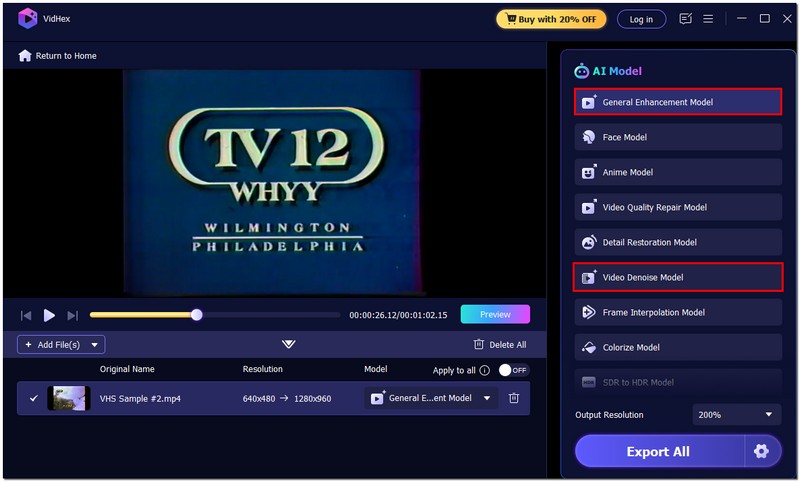
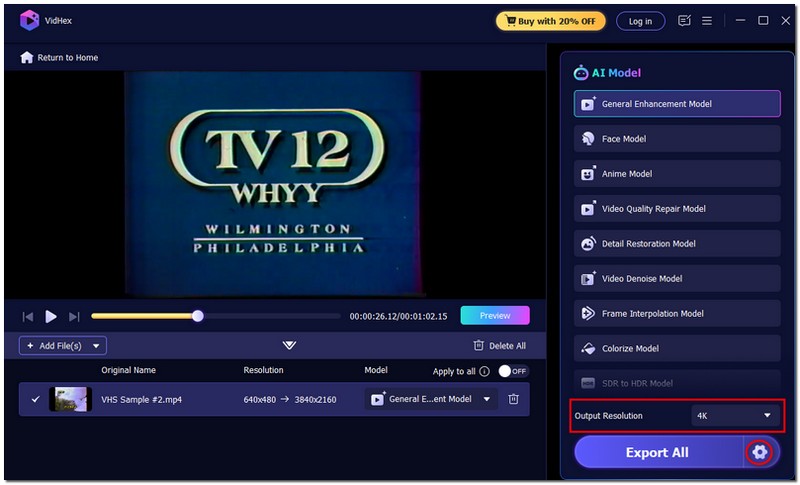
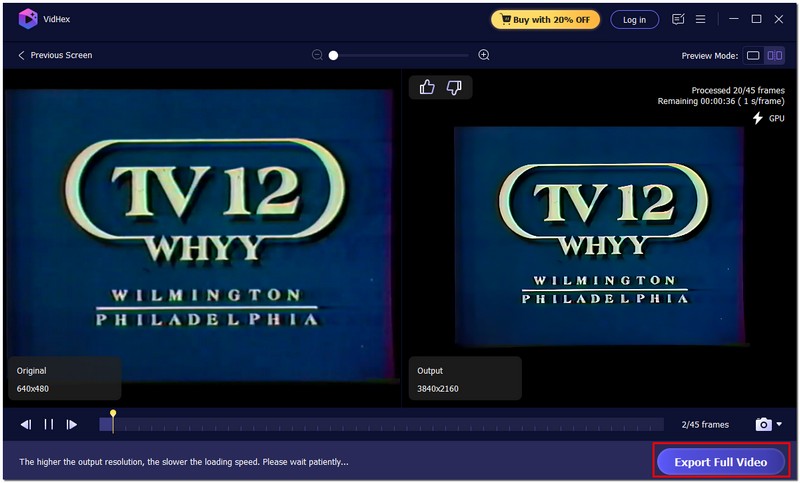
Steps to Enhance VHS Footage Using Aiseesoft VidHex
Why Choose Aiseesoft VidHex for VHS Restoration
VidHex works as an AI video upscaler and utilizes artificial intelligence to identify and correct imperfections automatically, as opposed to conventional editing software that requires tedious editing work. It saves you time and effort in the video editing process, allowing your VHS tape to remain a professional-looking video with a clean and bright color palette.
![]() 100% Secure. No Ads.
100% Secure. No Ads.
![]() 100% Secure. No Ads.
100% Secure. No Ads.
Although you repair VHS video tapes, it is equally important to handle and store them properly to ensure they remain in good condition. They are thin and can deteriorate easily over time, especially with exposure to dust, heat, or moisture. To preserve the lives of your tapes and their quality, below are some simple things that you can do:
1. Store in a cool, dry place.
Keep your VHS tapes away from direct sunlight, humidity, and extreme temperatures. These conditions can warp the tape or cause mold to build up.
2. Rewind before storing.
Always rewind your tape after watching. It prevents uneven tension that can damage the tape reels over time.
3. Use high-quality VHS players.
Avoid using old or damaged VCRs, as they can scratch or stretch your tape. Make sure the heads and rollers are clean before inserting your cassette.
4. Handle with care.
Hold the cassette by its edges, avoiding direct contact with the tape surface. Fingerprints, dirt, or dust can lead to playback issues and signal loss.
5. Transfer to digital format.
Think about converting your VHS tapes to digital files for long-term preservation. It prevents the tape from deteriorating further and allows you to watch the video without worrying about damaging the original.
How long can a VHS tape last?
Depending on use, storage conditions, and tape quality, VHS tapes can stay 10 to 30 years. To preserve the longevity of recordings, it’s best to digitize VHS tapes sooner rather than later, before they deteriorate to the point of being unrecoverable.
Do VHS rewinders damage tapes?
Generally, VHS rewinders don’t damage tapes if they are of good quality and well-maintained. However, cheap or fast rewinders can strain or snap the tape over time. It’s safer to rewind slowly using a VCR or a high-quality rewinder designed for gentle handling.
What ruins VHS tapes?
Heat, humidity, sunlight, dust, frequent use, and the use of subpar VCRs can all harm VHS tapes. Strong magnets can also erase recordings. Proper storage and careful handling help preserve them.
Conclusion
Revitalizing old VHS tapes doesn’t have to be difficult. You can not only restore tapes damaged physically, but you can also improve image quality and prevent other issues from occurring with some knowledge of how to repair VHS tapes. With proper care in use and storage, along with Aiseesoft VidHex to restore video, your treasured memories will remain clear, smooth, and enjoyable for years to come.
 VHS to DVD Converter/Player/Recorder – Transfer VHS to DVD
How to make VHS video into DVD? This page will show you three ways to use VHS to DVD converter, player and recorder to help transfer VHS tapes video into DVD.
 Three Efficient Methods to Convert Mini DV to Digital Format
Mini DV is obsolete now, but its content is important. To better preserve the recording, you can convert Mini DV to digital format with the guidance here.
 Video to DVD Transfer – Transfer/Make Video into DVD
How to transfer video from home made VHS to DVD? This page will show you the easiest way to make video to DVD on computer for any DVD player.

VidHex is an AI-powered video enhancer that upscales, denoises, colorizes stabilizes, and improves video quality in 1 click.
![]() 100% Secure. No Ads.
100% Secure. No Ads.
![]() 100% Secure. No Ads.
100% Secure. No Ads.
*Required field
*Please enter a valid email
