If there is an unwanted background in PowerPoint or photo, what will you do? Many people may choose to remove the background in PowerPoint/photo to a transparent background, so that you can add other favorite background again.
Here comes the question, how to remove a photo background in PowerPoint?
Actually you can do the job with Adobe Photoshop. But many user don't know how to use this professional software exactly, some of them even don't have this software on their computer.
Remove Background in Powerpoint
Fortunately, PowerPoint can instead of Photoshop to help you remove a photo background. And in this article, we will teach you the detailed steps of how to remove background in PowerPoint. Just read on the article to get the detailed process as below.
PowerPoint is not only a program that you can use to make slideshow. You can also use this software to remove background from image PowerPoint as well. But it is advised to remove some images with white or solid background, for those images that have high contrast with the foreground are the easiest images to be removed background in PowerPoint. In what follows is the detailed steps of how to remove background in PowerPoint. And you can use this way on your Microsoft PowerPoint 2010 or later.
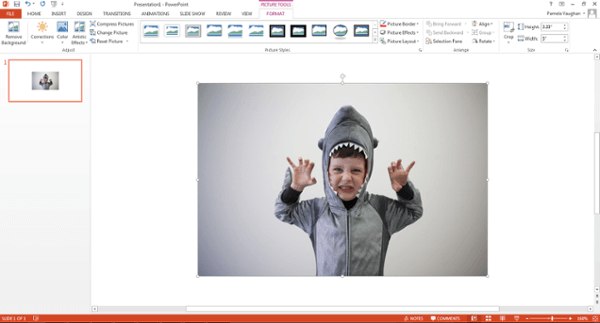
Step 1Insert image to PowerPoint
Launch PowerPoint on your computer firstly. And then you need to insert your image you want to remove the background with. Just click on Insert button, which is in the top tool bar and then add the photo.
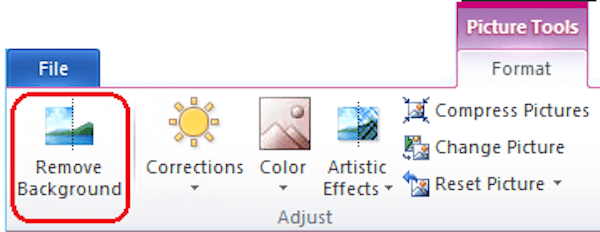
Step 2Choose Remove background
Now you need to click on your image. Then you need to click on File button (on a PC) or Adjust button (on a Mac) in the top tool bar. And in the menu, you can choose Remove background in PowerPoint.
Step 3Keep or delete cropped image
Next PowerPoint will try to remove the image background automatically. But it can't help you to remove the background from this image very accurately. And now you are finishing the process of how to remove background in PowerPoint. Just click to keep or delete the final cropped image in tool bar.
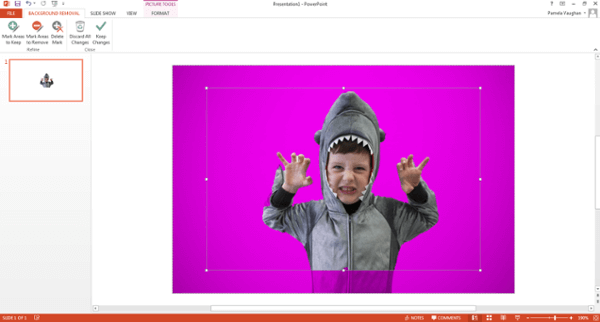
Step 4Adjust your wanted and unwanted areas
You need to drag the box around the image and adjust it to include the entire area of the image you want to keep. And you should know the purple area would ultimately be removed. You can use the Mark Areas to Remove option and click on any additional areas you want to remove, and then they will show a minus sign. And if you want to keep these areas, use Mark Areas to Keep option and click on the areas you want to keep, then they will show a plus sign.
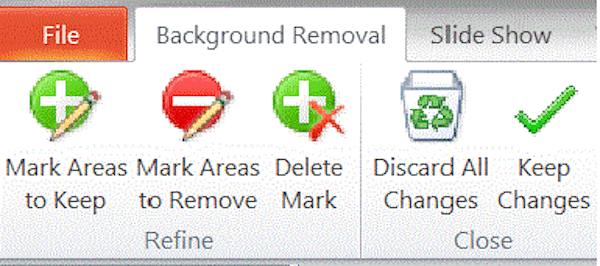
Note: You can zoom your image to click on the area, and if you want to cancel your click, just click on the plus or minus sign.

Step 5Remove background from image PowerPoint
When you finished, just click on somewhere outside of your image, and the background will be removed by PowerPoint. Last but not least, don't forget to save the image which you have removed the background as a PNG file in your computer. (It is more advised to save this edited picture in PNG format, for this format can preserve its transparent background.)
If you want to remove background from image PowerPoint, but the picture is so difficult that your PowerPoint can work for it, you may need to ask Photoshop for help. Photoshop is a professional photo editor, which has powerful functions to help you edit your images and photos. To learn how to remove a photo background in Photoshop, you can follow the next steps.
Step 1Add image to Photoshop
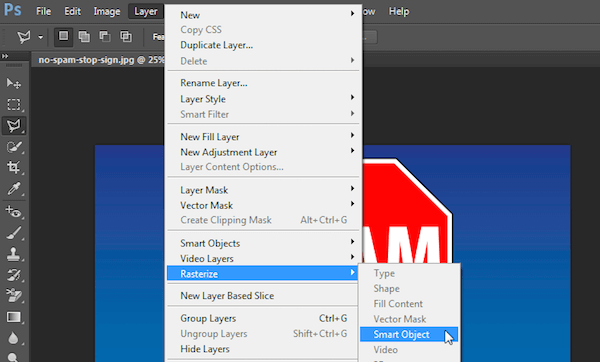
Launch Photoshop on your computer and then click File button, which is in the tool bar to open your image. You can also simply drag the photo into this program. Then click on "Layer", which is also in the top tool bar. And you can see Small Object in the menu, just highlight on it and then click Convert to Small Object.

Step 2Prepare for removing
Now you need to click on Layer option again, and choose Rasterize. Next you can click on Smart Object in Rasterize. You can also click on View dropdown and chose Zoom In or Zoom Out to zoom your picture.
Step 3Select the area
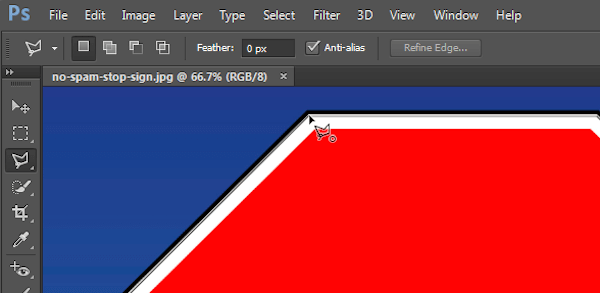
Then select Polygonal Lasso Tool from the left tool bar. Click on your image, and then trace the part you want to keep with a series of clicks from point to point. Once finished, you need to connect your line to the first point you started with. And then it will show a flashing dashed line to you.
Step 4Remove image background
Now you need to click on "Select" option, which is in top menu and then choose Inverse. And just press the Delete on your keyboard. The background that was highlighted before will turn into a checkered grid, which means your background is transparent. Now you are finishing theprocess of removing image background and just save your image as a PNG file.

If you are finding the guide of how to remove background in PowerPoint, this article is very useful to you. You can simply remove background from image PowerPoint by following the steps we list to you.
We also recommend you another way of removing image background with Photoshop. You can choose the suitable way according your needs. If you think this article is helpful, just share with your friends who are still having no idea about removing image background.

July 17, 2018 15:30 / Posted by Jenny Ryan to Edit Video
 6 Best Video Background Noise Removal Apps for Computer and Smartphone
One of the crucial steps to have an appealing video is to assure that the audio quality is great. Here are the multiple ways to do background noise removal.
 Top 10 Sites to Find Background Music for Video (Free/Paid)
Looking for best background music for video? This article introduces to you 10 best places to get background music for videos.
 How to Create Multi-Screen Video on Windows/Mac
It is quite popular for video makers, especially YouTubers, to make a split-screen effect video. But what is a split-screen video? And how to make one? You can learn the detailed process from the article.
