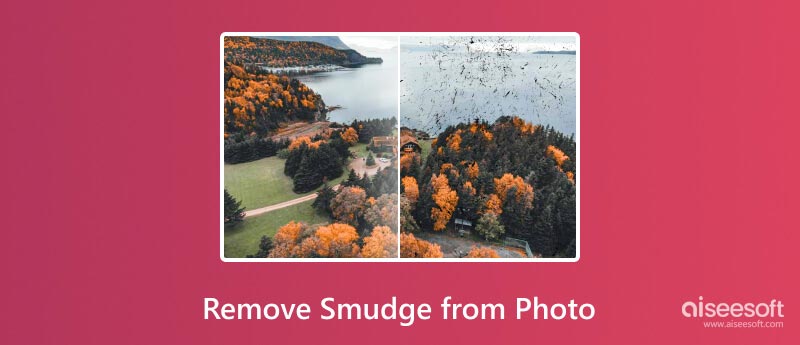
Are you facing a situation where your captured photo has a pesky smudge? How to remove smudge from a photo?
Digital photographs, while seemingly immune to the physical world's smudges, can still develop their own digital imperfections. These unwanted marks, often appearing as streaks, spots, or even patches of discoloration, can detract from the beauty and clarity of your image. This post will equip you with the necessary knowledge and tools to banish those unwanted blemishes and restore clarity.
Understanding the culprit behind the smudge is key to effective removal. Smudges on your photos can arise from various culprits, both during and after the capture.
Fingerprint smudges: The most common offender, these occur when our oily fingers come into contact with the lens or the photo itself.
Dust and dirt: Airborne particles can settle on the lens or sensor, leaving blurry traces when captured.
Lens scratches: Deeper scratches on the lens can cause permanent smudging across the image.
Camera shake: A shaky camera can blur the image, mimicking the appearance of a streak.
Digital noise: In low-light situations, cameras can capture digital noise, manifested as grainy patches that can resemble smudges.
Post-processing errors: Improper editing techniques, like over-sharpening, can sometimes create smudge-like artifacts.
Improper storage: For physical photos, if they are exposed to extreme temperatures, humidity, or direct sunlight can deteriorate, leading to smudging and fading.
Chemical reactions: Certain adhesives or acidic materials used in albums or frames can react with the photo's surface, causing discoloration and smudging.
Scanning issues: Imperfectly cleaned scanners or low-quality scanning settings can introduce digital smudges or artifacts during the digitization process.
Not all smudges are created equal, and the approach to removing them will vary depending on their nature and severity.
For light smudges, gently buff the affected area with a clean, dry microfiber cloth. This can often be enough to lift the smudged residue without damaging the photo.
For slightly stubborn smudges, use a soft vinyl eraser, moving it gently in a circular motion. Be cautious not to apply too much pressure, as this can scratch the photo's surface.
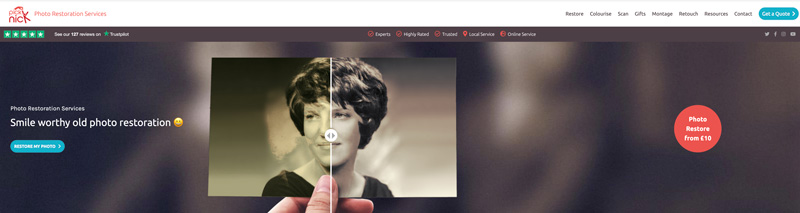
For deeper scratches or abrasions on physical photos, seek professional restoration services. They have specialized tools and techniques to minimize the appearance of damage.
Consult photo restoration experts or archival supply stores for professional cleaning solutions specifically formulated for photographic materials. These should be used with caution and only after testing on an inconspicuous area of the photo.
The digital age has revolutionized photography, but it hasn't eradicated the age-old enemy: the smudge. Try using the solutions below to restore your photos to their pristine state.
The Clone Stamp tool in most image editors allows you to paint over the streak with pixels from another area of the image. Great for small, isolated smudges.
Similar to the Clone Stamp, the Healing Brush intelligently analyzes the surrounding pixels and blends them seamlessly to cover the smudge. Effective for larger, more complex smudges. Also, you can use a Spot Removal tool to remove small imperfections like dust spots or blemishes.
You can easily access many online tools and services to help you optimize your photos and clean smudge.
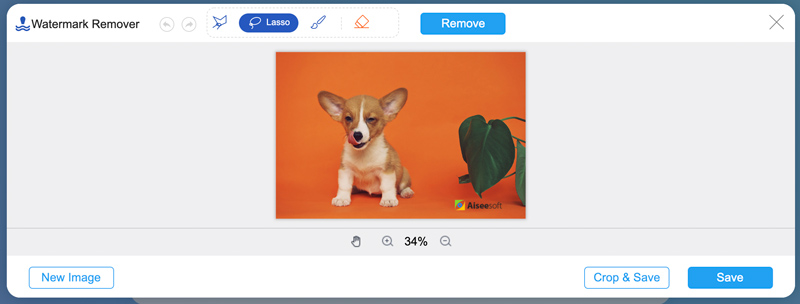
For digital photos with minor smudges, consider using free online photo editing tools like Aiseesoft Free Watermark Remover Online. It has a user-friendly interface and basic features to effectively remove small blemishes.
For stubborn smudges or complex restoration needs, professional online services offer advanced techniques and expertise to meticulously remove imperfections while preserving the photo's integrity.
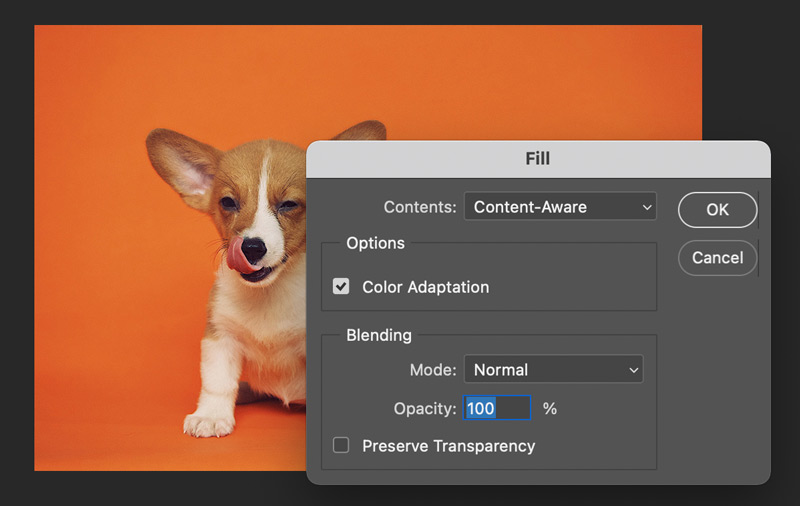
Software like Photoshop offers clone stamps, healing brush, noise reduction, and other features that can camouflage smudges by seamlessly blending surrounding textures. Moreover, it offers a sharpening feature to enhance edge definition and potentially make smudges less noticeable.
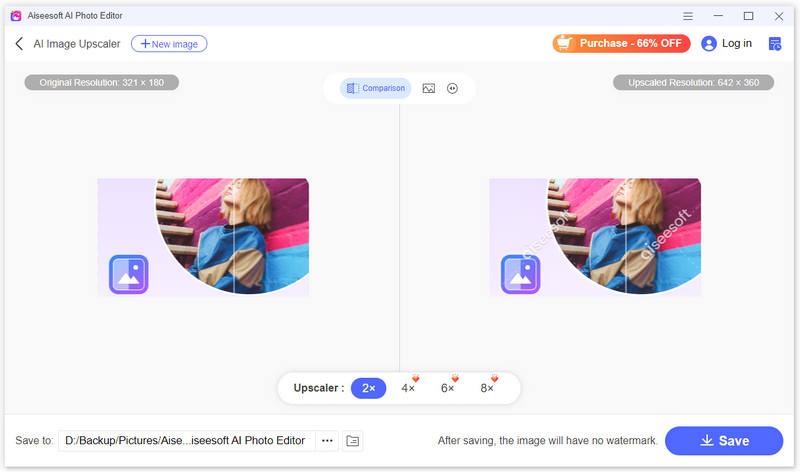
Aiseesoft AI Photo Editor boasts a powerful arsenal of AI-powered features specifically designed to tackle common photo issues like smudges and blurs. It gives you a convenient way to upscale images and enhance quality. It can analyze your photo and intelligently reconstruct blurry areas, sharpening edges and bringing back crisp details.
![]() 100% Secure. No Ads.
100% Secure. No Ads.
![]() 100% Secure. No Ads.
100% Secure. No Ads.

Can you remove haze from a photo?
Yes, you can remove haze from photos with three quick methods. Most photo editing software, like GIMP or Fotor, have sliders or buttons specifically for dehazing. Simply adjust the level to bring back clarity and vibrancy. Target specific areas like midtones and shadows, which are often most affected by haze, using tools like contrast and clarity sliders. If the haze is stubborn, consider professional services like FixThePhoto.
How do I get rid of the smudge on my iPhone camera?
For minor smudges, you can gently buff the lens with a dry, clean microfiber cloth. For tougher smudges, try a lens pen. Gently brush with one end, then use the cleaning pad for a finishing touch. If the smudge won't budge, don't hesitate to consult an Apple expert.
Can you fix photo blemishes by upscaling?
Upscaling a photo can potentially improve the appearance of blemishes. Try using the popular Aiseesoft Free Image Upscaler Online to fix photo blemishes.
Conclusion
Smudges on your photos might seem daunting, but with the right knowledge and tools, you can banish them from your images and restore clarity. Experiment with different removal techniques and find what works best for you to remove smudge from your photos.
 2 Free Apps to Remove Object from Photos
Look for a free app to remove unwanted objects from photo? How to take the background out of a picture? This post will show you how to remove something from a picture with PhotoShop. Also, you can learn a free online way to easily erase unwanted objects.
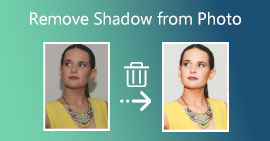 Top 4 Methods to Remove Shadow from Photo without Quality Loss
If you want to get rid of shadows from a photo, start by reading this tutorial, pick your favorite method, and follow our steps to remove shadow quickly.
 5 Blemish Remover Photo You Can Use to Get Rid of Blemishes on Photo
Blemish remover photo can be useful to re-create a perfect clear skin selfie photo. But which app to use? Find out the best apps here.

Enlarge and upscale images up to 4K in batches quickly with wide support for various image formats.
![]() 100% Secure. No Ads.
100% Secure. No Ads.
![]() 100% Secure. No Ads.
100% Secure. No Ads.
*Required field
*Please enter a valid email
