Aiseesoft Screen Recorder
![]() 100% Secure. No Ads.
100% Secure. No Ads.
![]() 100% Secure. No Ads.
100% Secure. No Ads.
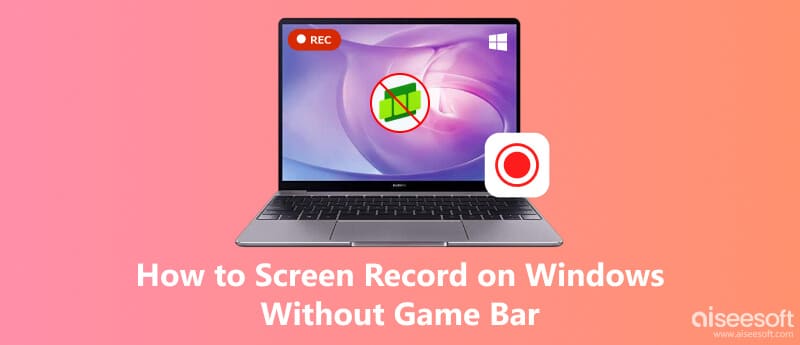
How to screen record on Windows without Game Bar?
The built-in Xbox Game Bar in Windows 10 and 11 is excellent for quick captures. It is primarily designed to record short clips of games or apps. However, this recorder comes with some significant drawbacks. For instance, it cannot record the empty desktop or File Explorer and lacks basic video editing tools. It can cause lag or stuttering during recording, especially in high-performance games. What’s more, many users have reported the “Xbox Game Bar recording failed” notification.
Whatever the reason, if you are unsatisfied with Xbox Game Bar and prefer another recording solution, check out the three methods below.
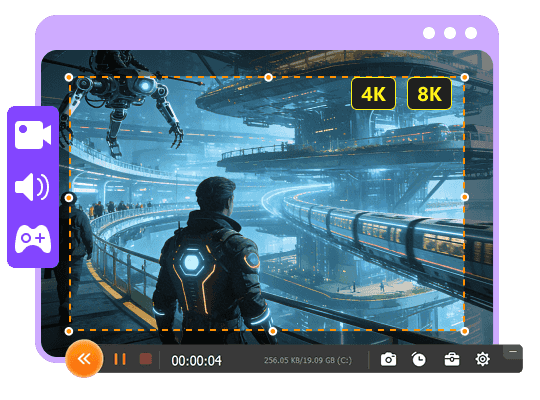
If you need to record your Windows desktop in high quality, such as 4K or higher, especially when creating lengthy tutorials, dedicated screen recording software is often the best choice.
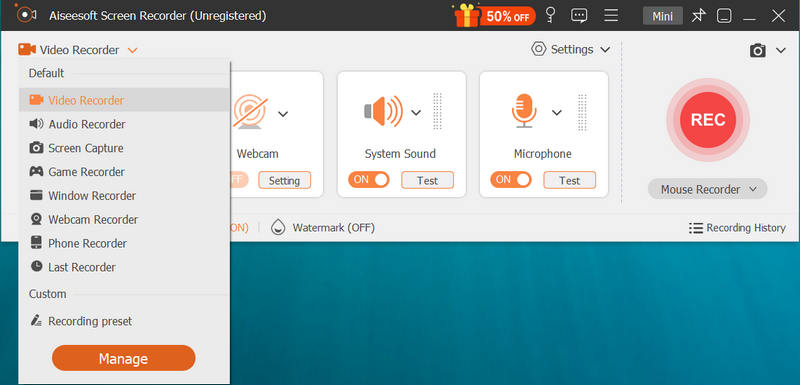
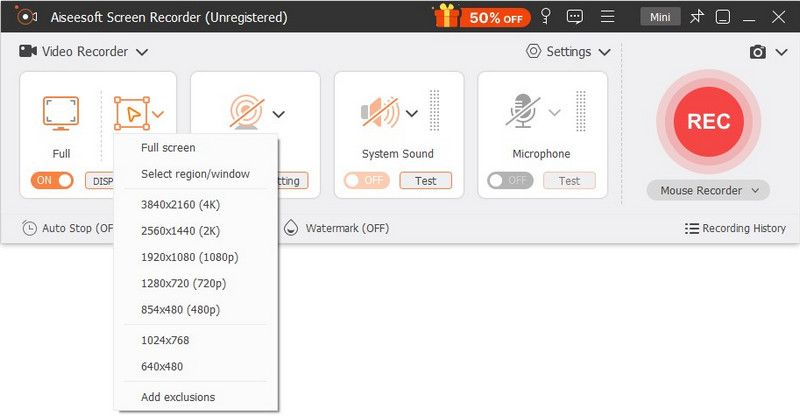
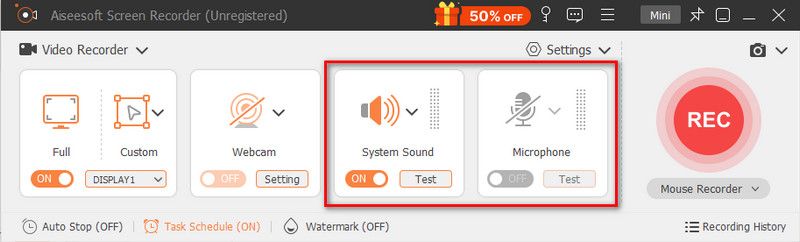
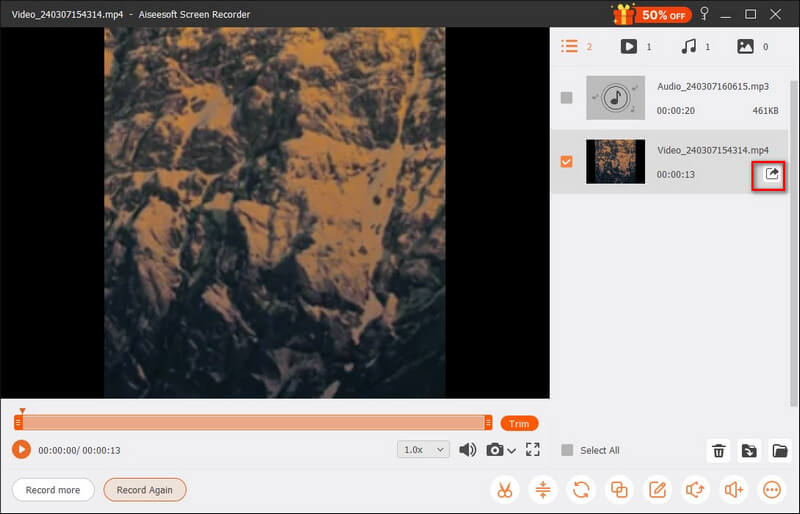
Aiseesoft Screen Recorder is a reputable video and audio recording tool for both Windows 11/10 and macOS users. This multifunctional software offers several solutions for different recording needs. It can capture screens, games, webcam videos, photo activities, and more.
Downloads
![]() 100% Secure. No Ads.
100% Secure. No Ads.
![]() 100% Secure. No Ads.
100% Secure. No Ads.
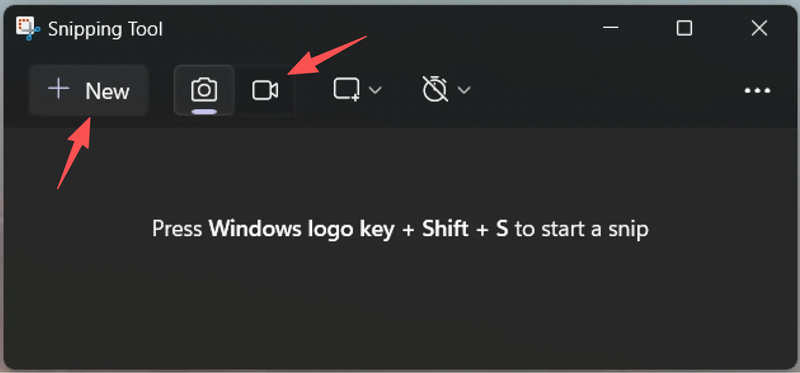
Besides the Xbox Game Bar, there is another native Windows tool that can capture the computer screen. If you only need general records, the updated Snipping Tool in Windows 11 might be sufficient. It lets you quickly record any part of your screen.
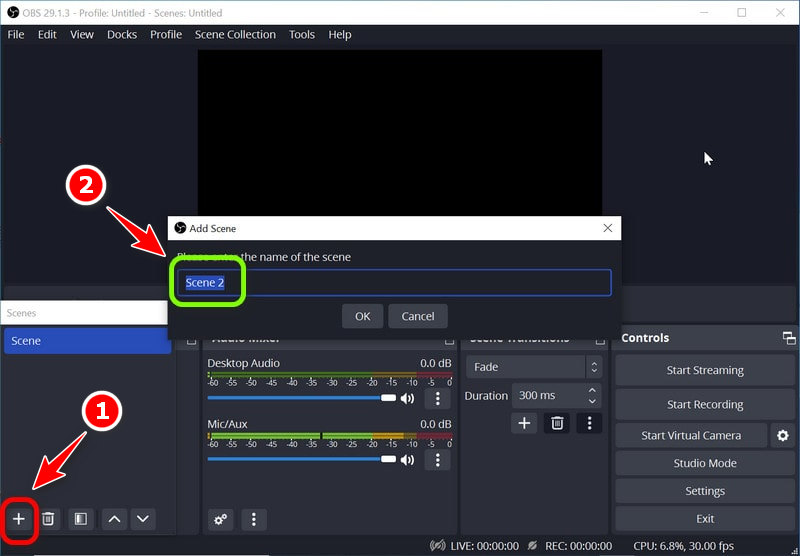
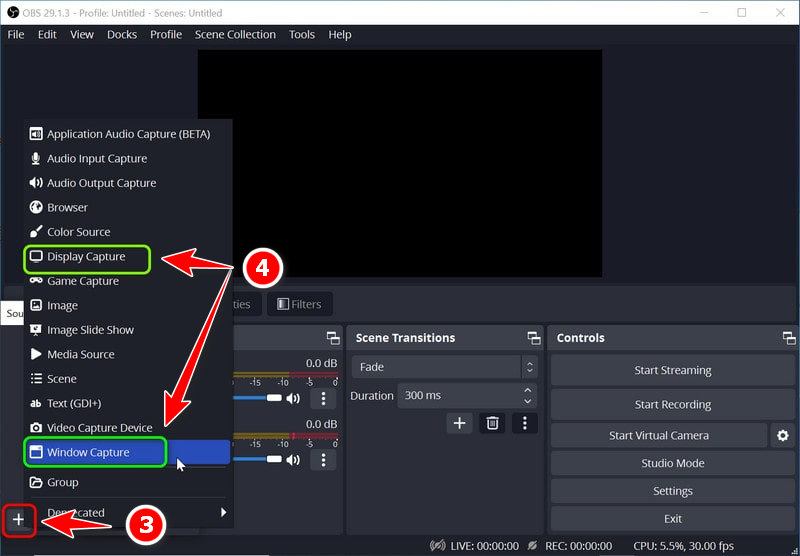
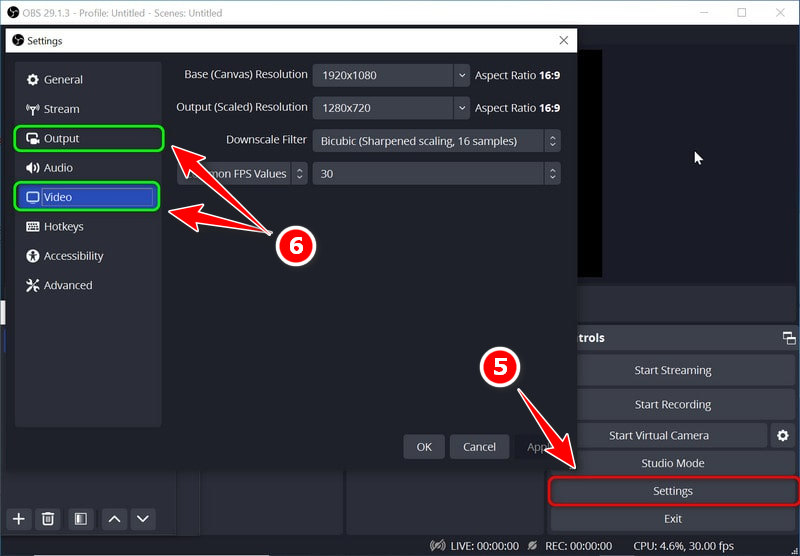
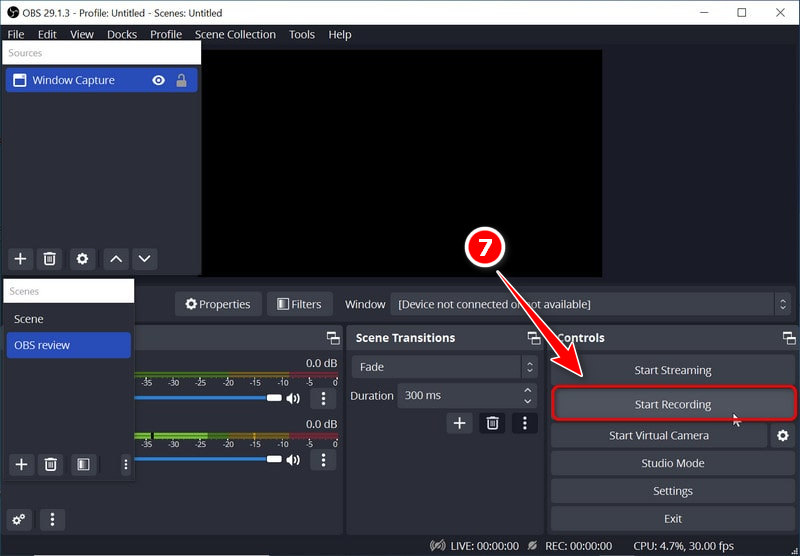
If you are looking for a free screen recorder with more customization options and professional results, turn to the open-source OBS Studio. The software enables users to capture complex scenes from multiple sources. However, compared to Aiseesoft Screen Recorder and many other similar recorders, it has a steeper learning curve.
Question 1. How do you screen record on Windows with Game Bar?
You can capture your screen with the built-in Windows game recorder, Xbox Game Bar. When you need to record a game or application, press Windows + G keys to directly open Game Bar. For the first recording, you need to confirm “Yes, this is a game” to proceed. Locate the Capture widget in the Game Bar overlay and click the Record button to begin.
Question 2. Does Windows 11 come with a screen recorder?
Yes, Windows 11 comes with two built-in screen recording tools. As you can see from above, you can use the Xbox Game Bar and the updated Snipping Tool to capture your computer screen with ease.
Question 3. How do I hide Game Bar while recording?
You can press Win + Alt + R keys at the same time to easily start or stop recording. This will prevent the Xbox Game Bar from showing the main overlay. You can also customize related settings to stop the Game Bar overlay from appearing in your screen recordings. When the overlay appears, you can press the Win + Alt + B keys to hide it.
Conclusion
You can learn three methods to screen record on Windows 11/10 without Game Bar. As a casual user, you should start with Aiseesoft Screen Recorder, which is easy to use. If you occasionally need basic screen recordings, the built-in Snipping Tool in Windows is sufficient. OBS is ideal only for professional content creators who are willing to invest time in learning.
 Loom Screen Recorder Review: Is it Good for Anyone
This article is an honest review of Loom Screen Recorder. Here, you will learn about its features, pros, cons, and performance in screen recording.
 How to Fix Windows 11 Snipping Tool Not Working Quickly
Windows 11 Snipping Tool sometimes doesn’t work well. Don’t worry. This article will tell you the reasons and offer 8 easy solutions with detailed steps.
 Latest ScreenRec Review: Convenient Desktop Recording Tool
Our in-depth review of ScreenRec shares everything about this convenient screen recording tool with its pros, cons, features, and a great ScreenRec alternative.

Aiseesoft Screen Recorder is the best screen recording software to capture any activity like online videos, webcam calls, game on Windows/Mac.
![]() 100% Secure. No Ads.
100% Secure. No Ads.
![]() 100% Secure. No Ads.
100% Secure. No Ads.
*Required field
*Please enter a valid email
