Taking notes on our smartphones has become an integral part of our daily lives to stay organized, capture ideas, and keep important information at our fingertips. However, as our note-taking needs evolve, we may find it necessary to transfer iPhone notes to a new structure.
Whether it's consolidating scattered notes, reorganizing them for better categorization, or adopting a new note-taking app, you can learn from the step-by-step process of transferring iPhone notes with a new structure, ensuring a seamless transition without losing valuable data.
If you're using Apple's built-in Notes app and wish to transfer notes within the Apple ecosystem, follow these steps:
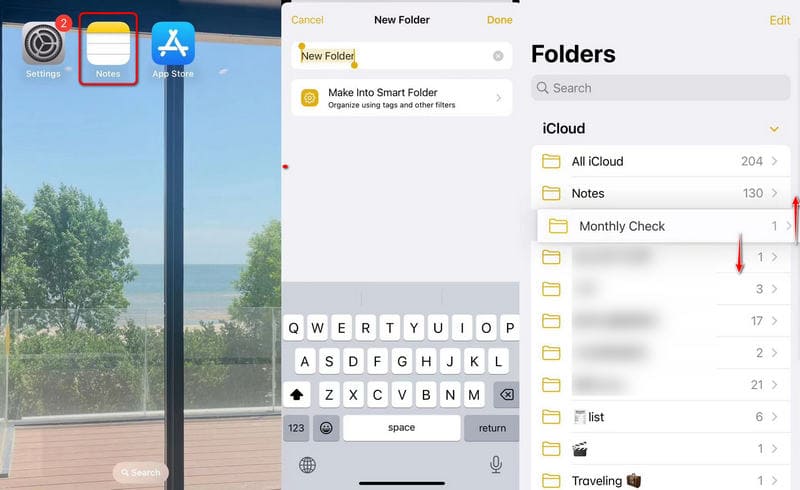
Open the Notes app on your iPhone and organize your existing notes into folders or categories based on your new structure. You can create folders by tapping the New Folder option on the app's main screen.
Drag and drop notes into the respective folders for better organization.
Ensure that your Notes app is synced with iCloud. To do this, go to Settings > [Your Name] > iCloud > Notes and toggle the switch to enable synchronization.
Your notes backed up to iCloud can be checked on other Apple devices.
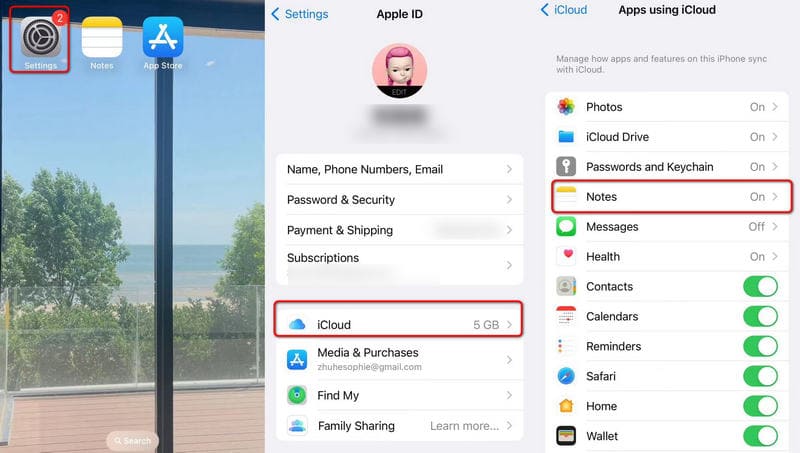
If you get a basket of Apple products like an iPad or Mac, ensure they are also signed in with the same iCloud account.
Open the Notes app on these devices, and your organized notes should be automatically synced and available in the new structure.
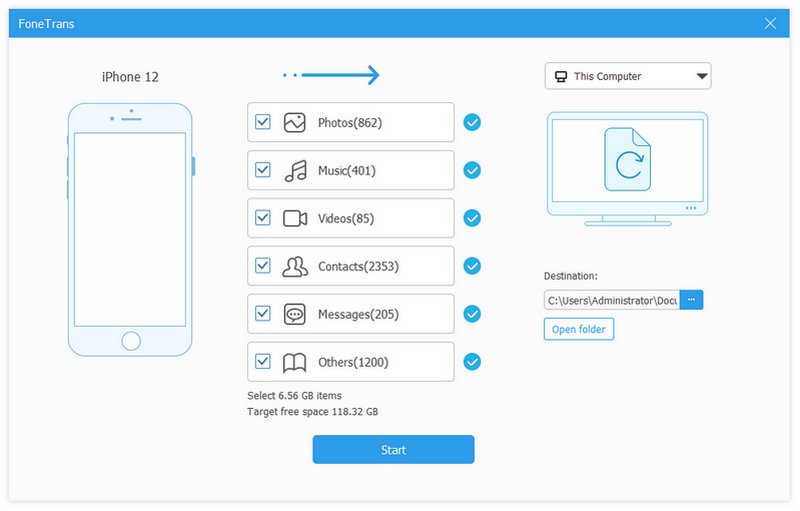
It’s OK even if you don’t get a Mac and iPhone at the same time. To help you transfer notes from iPhone to personal computers, you can free download FoneTrans and quickly move iPhone notes to release storage space.

Downloads
![]() 100% Secure. No Ads.
100% Secure. No Ads.
![]() 100% Secure. No Ads.
100% Secure. No Ads.
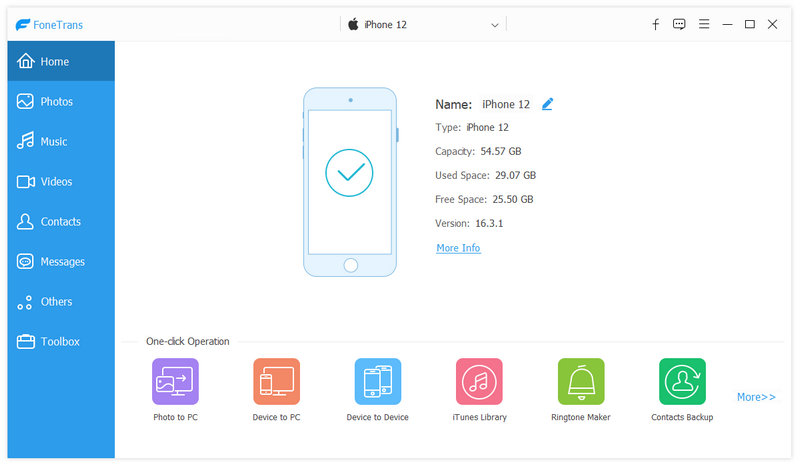
Or you can get a one-click transfer via Toolbox and choose Phone to PC. Tick all wanted options and click Start.
If you're switching to a new note-taking app outside the Apple ecosystem, follow these steps:
Research and select a note-taking app that aligns with your needs and preferences. Popular options include iPhone notes apps like Evernote, OneNote, Google Keep, Bear, Notion, and Simplenote.
Make sure the app is available on both your iPhone and any other devices you use, such as your computer or tablet.
To export your notes from Apple's Notes app, go to Settings > Notes > Import Notes.
Choose the new note-taking app you've selected from the list of available options. This will initiate the export process.
Open the new note-taking app and follow its import instructions to bring in your notes.
Depending on the app, you may be able to import notes directly or import them from a file (e.g., CSV or HTML) that was generated during the export process.
Once your notes are imported, organize them according to your new structure using the features provided by the new app.
Create folders, tags, or categories to group related notes together.
Ensure that the new note-taking app is set up for synchronization across your devices.
Check that you have backed up iPhone notes in the app's cloud storage or any other backup solution provided by the app.
If you wish to create a hierarchical structure for your notes, consider using a note-taking app that supports nested folders or tags. Follow these steps to implement a hierarchical organization:
Choose a note-taking app that allows you to create nested folders or tags. This will allow you to create sub-categories within main folders, making it easier to navigate and manage your notes.
Create main folders for your top-level categories, such as Work, Personal, Ideas, or Projects.
Within each main folder, create sub-folders or tags for more specific topics or sub-categories.
Review your existing notes and move them to the appropriate folders or assign relevant tags based on the new hierarchical structure.
This may take some time, but the effort will result in a more organized and intuitive system.
To ensure a smooth transition while transferring your iPhone notes to a new structure, consider the following tips:
1. Take It Step by Step: Don't rush the process. Take the time to organize your notes systematically and avoid making hasty decisions.
2. Keep a Backup: Before making any changes, create a backup of your notes to avoid accidental data loss.
3. Review and Edit: As you transfer notes to the new structure, take the opportunity to review and edit your content. Delete outdated or irrelevant notes to keep your new system clutter-free.
4. Synchronize Across Devices: Ensure that your new note-taking app synchronizes across all your devices for seamless access and updates.
5. Utilize Tags: Tags can be an efficient way to organize notes based on multiple categories, enabling you to find specific information more quickly.
Conclusion
iPhone note transfer is not as difficult as you think as long as you grasp the appropriate methods. You can begin with the local Notes app or download third-party note-taking apps. Meanwhile, we have offered you an ultimate solution to transfer any important data to your desktop without data loss. FoneTrans is also a trustworthy choice for you.
 How to Fix iPhone Notes not Syncing between iPhone and Computer
There are a number of things that you can try to fix iPhone notes not syncing properly across all your iPhone and Mac with iCloud. Read and follow the troubleshooting guide to fix this problem.
 A Complete Guide on How to Recover Notes from iCloud
How to retrieve notes from iCloud? This article shows how to restore deleted iPhone notes from iCloud after updating a new iOS version or mistakenly deleting them.
 How to Back up iPhone Notes [Free & Paid]
How to sync my notes on iPhone or computer? This article shows 5 ways, including using the computer, iCloud, Gmail, Google Drive, iTunes, or Finder.
The best iOS Transfer software to manage and transfer iOS files from iPhone/iPad/iPod to your computer or reversely without running iTunes.
![]() 100% Secure. No Ads.
100% Secure. No Ads.
![]() 100% Secure. No Ads.
100% Secure. No Ads.
*Required field
*Please enter a valid email
