If you use the Notes app to capture quick thoughts, create checklists, sketch ideas, or sign documents, it’s important to back up your notes to avoid data loss. This article shows 5 effective ways to back up iPhone notes for the latest devices, including iPhone 16/15/14/13/12/11 series, iPhone XS/XR/X, iPhone 8/7/SE (2nd & 3rd generation), and earlier models running iOS 18, 17, or 16.
iPhone Notes is a very simple yet popular app that iOS users can rely on. Using this app, you can create new notes, change the folder, scan texts, and add photo or video attachments. Regardless of whether it is just journaling, making a study list, or taking notes for work, this app gives you the flexibility of recording and viewing them at any time. However, some users have reported iPhone malfunctions or accidental deletion of notes, which can prevent them from accessing their important information. In this case, knowing how to back up notes on an iPhone becomes essential. To prevent data loss, this article shows 5 easy ways to backup iPhone notes and texts. Keep reading and choose the best method to save your important notes now!
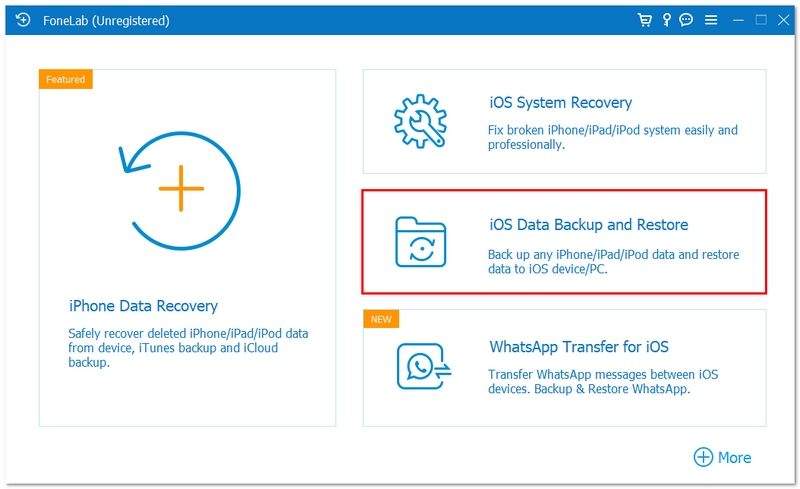
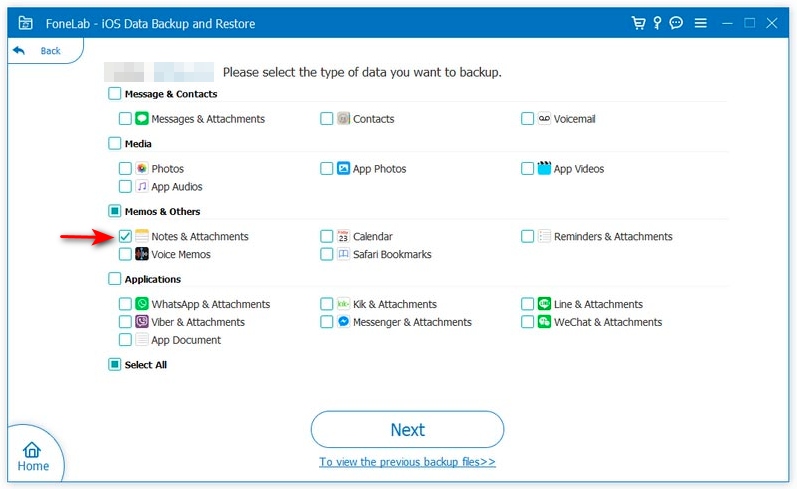
Notes for iPhone can help us take notes anywhere and anytime, which is very convenient. However, checking iPhone notes is not always reliable, especially if you have many attachments like photos or videos. Fortunately, you can use professional software for an iPhone notes backup to your computer. Aiseesoft iOS Data Backup and Restore is an all-in-one tool that can back up almost all data on your iOS device. It can transfer your iPhone notes, texts, messages, call history, photos, videos, and more to your computer. Besides, it also allows you to selectively restore data to your iPhone or computer, without causing any data loss during the backup or restore process. Free download it on your Windows or Mac computer now!
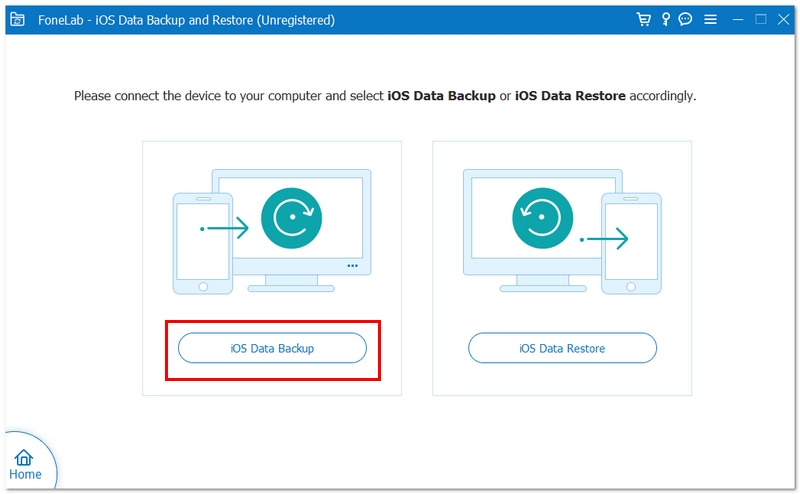
Follow these steps to backup iPhone notes to the computer.
![]() 100% Secure. No Ads.
100% Secure. No Ads.
![]() 100% Secure. No Ads.
100% Secure. No Ads.
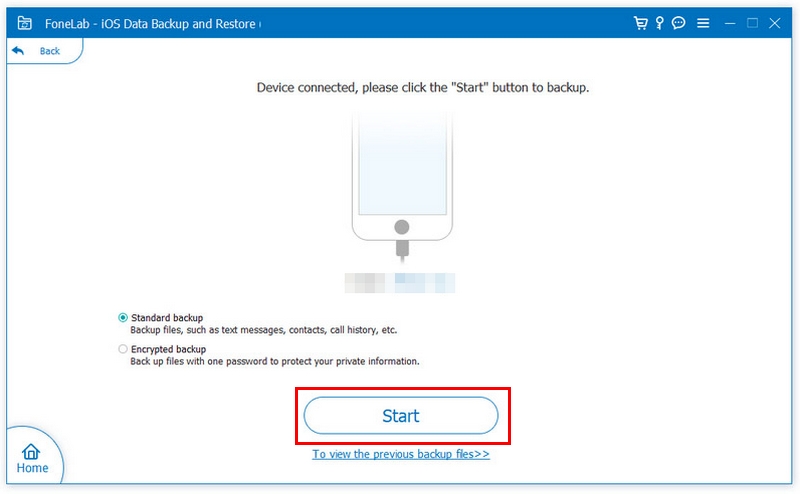
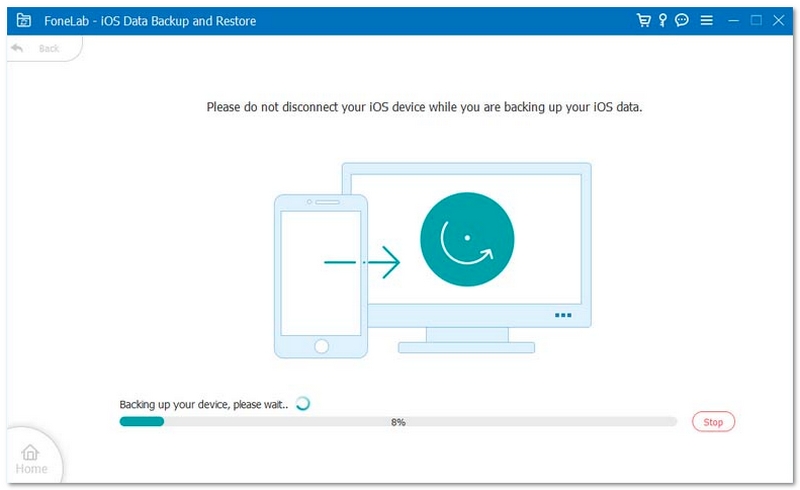
As you can see, you can back up notes and texts to the computer in a few clicks. Meanwhile, you can also use the program to back up photos, contacts, etc. And the process is the same as the Notes transferring.
If you purchased a series of Apple products, you could easily view and rewrite notes and texts on those devices by enabling iCloud. Once you use iCloud to sync Notes, you can simultaneously view, edit, share, and collaborate from your iPhone, iPad, and Mac.
Get the steps below to back up iPhone notes to iCloud:
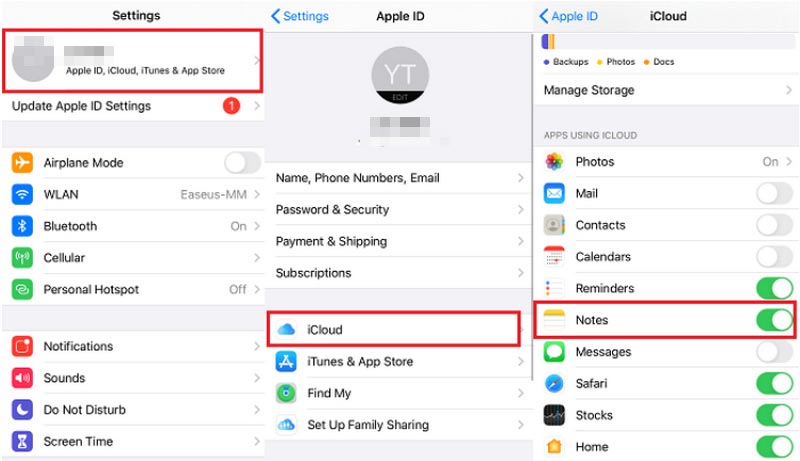
Now, your iPhone notes will sync to iCloud automatically.
iCloud backup provides 5GB of free storage for iPhones only. Upgrade the iCloud storage to save more notes if your data is more than 5GB.
Besides iCloud, it is also a great way to sync notes and texts using Gmail on iPhone. You can add a Gmail account to sync your notes automatically, which helps create an iPhone backup notes solution without needing extra software. Gmail offers up to 15GB of free storage, allowing you to store emails, attachments, photos, documents, and synced notes safely in one place.
Read the following steps to back up iPhone notes to Gmail:
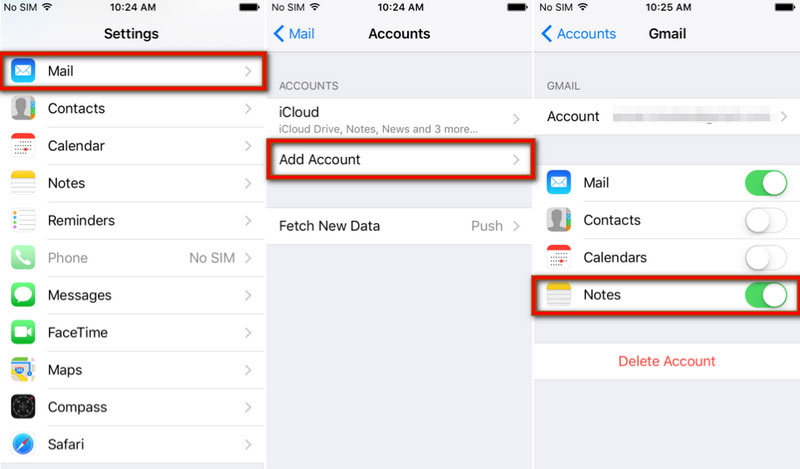
After that, all the iPhone notes can be found on your Gmail account.
The Google account provides 15GB of storage space, but this storage space is shared with your Gmail account and Google Drive.
For some users, Google Drive is another easy way to back up and manage notes and files on an iPhone. If you download the Google Drive app, you can try it to sync your various notes. Moreover, Google Drive also provides a Cloud service, allowing you to check iPhone notes with a web browser.
Here are quick steps to back up iPhone notes to Google Drive:

After syncing, you can also check these notes on Android using the same Google account.
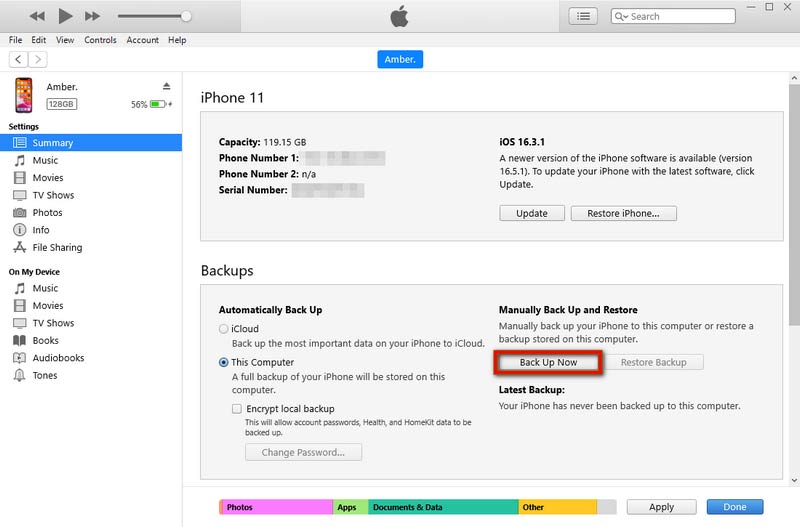
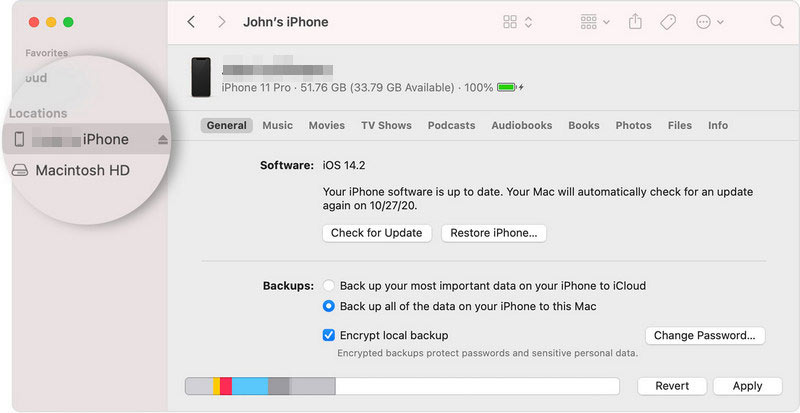
The last way to move iPhone notes and texts is by using iTunes. Nowadays, iTunes is still available on Windows, but it cannot run on macOS Catalina or later. Instead, you can use Finder to back up your contacts, messages, videos, music, and other data. However, this method is not always recommended, especially for users who can not backup iPhone data efficiently using iTunes because it only creates a full backup of the device. This means the process stores all iPhone data, including Notes, on the computer, which can take more time and make the backup process relatively slow.
For Windows users, follow these steps to back up iPhone notes to a PC.
For macOS users, follow these steps to back up iPhone notes to a Mac.
Are iPhone Notes Deleted Forever?
No. The moment you delete a note on your iPhone, it doesn't wipe it out straightaway. On the contrary, it puts it in the Recently Deleted folder of the Notes app, from where it'll be kept for up to 30 days. In this span of time, you're able to get back deleted notes and put them back in your regular notes folder. But after 30 days or if the folder is cleared by hand, the notes get deleted permanently.
Why did my notes disappear on my iPhone?
It may be that you deleted the notes accidentally. Besides, it may be that your Notes app is experiencing some issues or glitches.
How to save notes on your iPhone?
Usually, the notes you create on your iPhone can be saved automatically. You can open Notes and write your notes directly. Then, it can be saved on your iPhone.
Can you share iPhone notes to Messages?
Yes. You can share your notes with Messages directly. Find the note you want to share first. Then, tap the Share icon. Finally, tap the Messages app to select a contact you want to send notes to.
Conclusion
This article shares 5 different ways to make a backup for iPhone notes. You can transfer notes to the computer with iTunes, Finder, or a professional tool. And you can also sync iPhone notes using iCloud, Gmail, and Google Drive. Each way has detailed steps to back up your notes. Just pick out one way according to your needs. If you have other questions about backing up iPhone notes and texts, comment here.
 iPhone Notes App – 5 Best Note-Taking Apps for iPhone
How to use iPhone notes app? We list 5 great notes apps for iPhone and show you how to recover data from iPhone notes app.
 How to Transfer Notes from One iPhone to Another (With Pictures)
How do you transfer notes from one iPhone to another? This article teaches you to transfer notes from iPhone to iPhone.
 How to Recover Deleted Notes on iPhone (Step-by-Step Guide)
Accidentally deleted notes on iPhone? No worry! This blog has proven ways to recover deleted notes on the iPhone, covering official ways and third-party tools.
Backup iPhone Data
1.1 Backup iPhone Data 1.2 Backup iPhone Contacts 1.3 Backup iPhone Messages 1.4 Backup iPhone Notes 1.5 Backup iPhone iMessages 1.6 Backup iPhone Photos 1.7 Backup iPhone Apps 1.8 Backup iPhone Music
Your best choice to back up data from iPhone/iPad/iPod to Windows/Mac and restore from iOS data backup to iOS device/computer safely and efficiently.
![]() 100% Secure. No Ads.
100% Secure. No Ads.
![]() 100% Secure. No Ads.
100% Secure. No Ads.
*Required field
*Please enter a valid email
